Customers can now browse through products on your Shopify store using this gallery page. These product image galleries can be embedded with images and videos.
Step 1: First click on Online store and select Themes.
After that click Action and select Edit code.

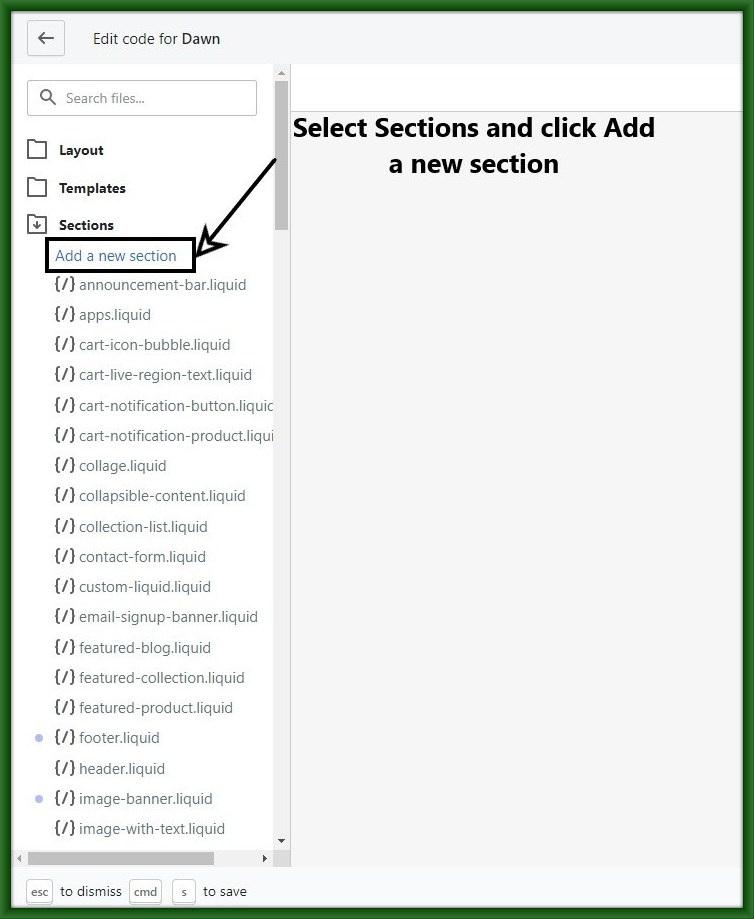
Step 2: Here click on Add new section to create an image gallery section.

Step 3: Now, give the name of the section and Click Create section.
And then paste the below code into this file.
image_gallery.liquid
|
<link href=”{{“image-gallery.css” | asset_url }}” type=”text/css” rel=”stylesheet”> <h1 class=”customCollageTitle”>{{section.settings.custom_collage_title}}</h1> <div class=”customCollage”> {% for blocks in section.blocks %}
<div class=”customBlock” style=”grid-area: {% case forloop.index %} {% when 1 %} a {% when 2 %} b {% when 3 %} c {% when 4 %} d {% when 5 %} e {% when 6 %} f {% when 7 %} g {% when 8 %} h {% when 9 %} i {% when 10 %} j {% when 11 %} k {% endcase %} “>
<img class=”collageImage” src=”{{blocks.settings.collage_image | img_url: ‘large’ }}”> </div> {% endfor %} </div>
{% schema %} { “name”: “Custom College”, “settings”: [ { “type”: “text”, “id”: “custom_collage_title”, “label”: “custom collage title” } ], “max_blocks”:11, “blocks”:[ { “name”:”college image”, “type”:”college_image”, “settings”:[ { “type”: “text”, “id”: “title”, “label”: “collage title” }, { “type”: “image_picker”, “id”: “collage_image”, “label”: “collage image” } ] } ], “presets”: [ { “name”: “Custom Collage” } ] } {% endschema %} {% stylesheet %} {% endstylesheet %} {% javascript %} {% endjavascript %} |

Step 4: And then add CSS.
Click on Add a new asset.

Step 5: Give the name of the CSS image-gallery.css
And then paste the below code into this file.
image-gallery.css
|
.customCollage{ width: 100%; height: 100%; display: grid; gap: 15px; padding: 10px 50px 50px; grid-template-columns: repeat(6, 1fr); grid-template-rows: repeat(3, 15vw); grid-template-areas: “a a b b c d” “e f b b g g” “h f i j j k”; position: relative; } .collageImage{ width: 100%; height: 100%; object-fit: cover; border-radius: 5px; } .customBlock:hover .collageImage { position: absolute; width: 40%; height: auto; inset: 0; margin: auto; border: 15px solid white; box-shadow: 0 0 50px crimson; } .customCollageTitle{ text-align: center; margin-bottom: 0; font-size: clamp(15px, 5vw, 45px); } @media only screen and (max-width: 600px){ .customCollage{ gap: 5px; } .customBlock:hover .collageImage { border: 5px solid white; } } |

Step 6: After that go to customize and click Add section.

Step 7: Search the section and click add.

Step 8: One by one image are uploaded in the college image section. and save it.

Step 9: Now refresh your page and see your image gallery.


