Welcome to CodeCrew Infotech


How To Create First Custom Sections In Shopify
Step 1:- Go to your Shopify admin, go to Online Store > Themes.
Step 2:- Find the theme you want to edit and click Actions > Edit code.
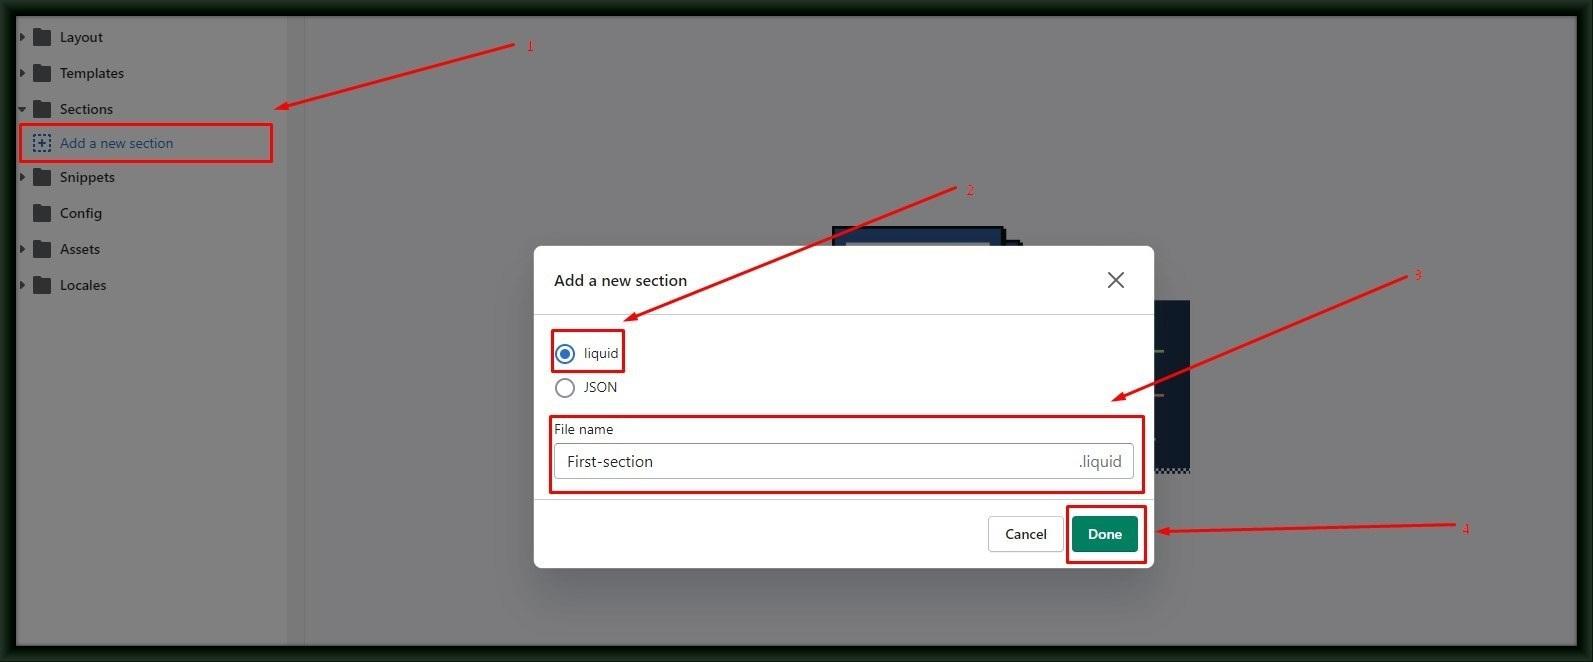
Step 3:- Go to Sections > Add a new section > Select liquid option and Enter section name ( example:- First-section )
Step 4:- After entering the name of section Click “Done”.
Step 5:- After the section is created copy the below static code to that section.
|
<section class="welcome"> <div class="container"> <div class="welcome-outter"> <h2 class="section-heading">Heading is Codecrew</h2> <h1 class="section-large-heading">Sub heading is Infotech</h1> <p class="discription">Lorem ipsum is placeholder text commonly used...</p> </div> <div class="col-xs-12 col-md-12 text-center"><button class="view-btn"><a href="">find more</a></button></div> </div> </section> <!-- Welcome section ends --> {% schema %} { "name": "First Section", "settings": [], "presets": [ { "name": "Welcome section Test", "category": "ADVANCED LAYOUT" } ] } {% endschema %} {% stylesheet %} {% endstylesheet %} {% javascript %} {% endjavascript %}
|
Step 6:- Finally add the presets details as shown above and SAVE it.
Code look like below image.

Details of Preset:-
Presets must have a name and a category. Section presets and will be grouped by their category in the theme editor.
A preset’s settings object contains the values that will be assigned to the section when a merchant adds it to their home page. The preset’s settings schema must be valid according to the section’s settings schema.
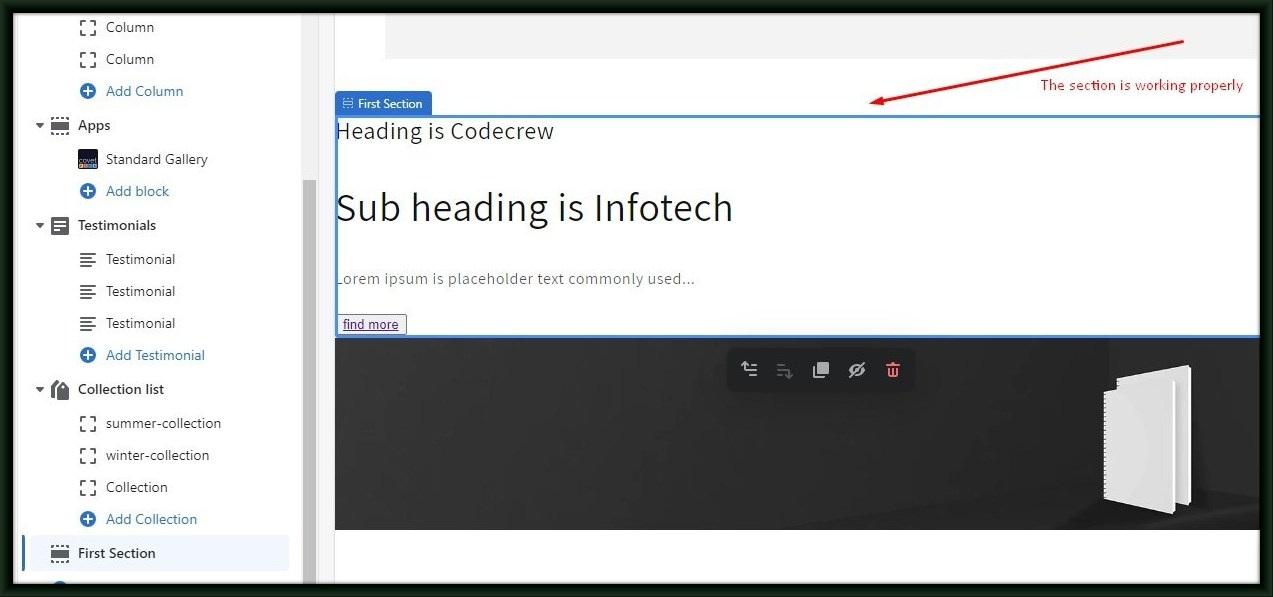
Now test the code is working or not for that you have to follow these steps:
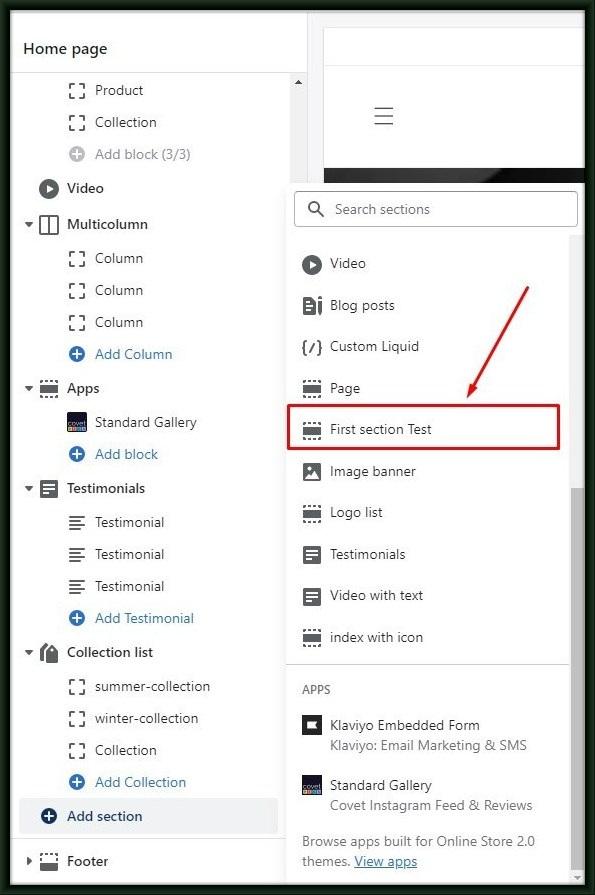
Step 1:- Click the Customize theme in shopify admin.
Step 2:- Under Sections select “Add section” and search your section First section Test and you can check the section is added at your right side screen.
Step 3:- After that SAVE it and Refresh your site. You can see the sections are added as shown below.
You may also like