How to integrate additional content to WordPress utilizing ACF
Flexible Content is a highlight feature of the Advanced Custom Fields (ACF) plugin, since it allows the developers to make more sophisticated and flexible designs. This tutorial will explain you how to add a Flexible Content field in ACF and use it for creating the sections of a blog specifically the title and description section.
What is a Flexible Content Field?
A Flexible Content field in ACF allows you to add repeatable blocks of content with varying layouts. Each block, called a “layout,” can have its own set of fields, giving you unparalleled flexibility in designing your content structure.
Follow This Step
- Set up and turn on ACF
If you haven’t already, install and activate the ACF plugin. ACF’s Flexible Content field is only accessible with the Pro license, so make sure you have it. - Establish a Field Group
To access Custom Fields: In your WordPress dashboard, select Add New.
Give your field group a name, such as “Flexible Content.” - Add a Flexible Content Field
Click Add Field and choose the Flexible Content field type.
Field Label:Content
Field Name: content
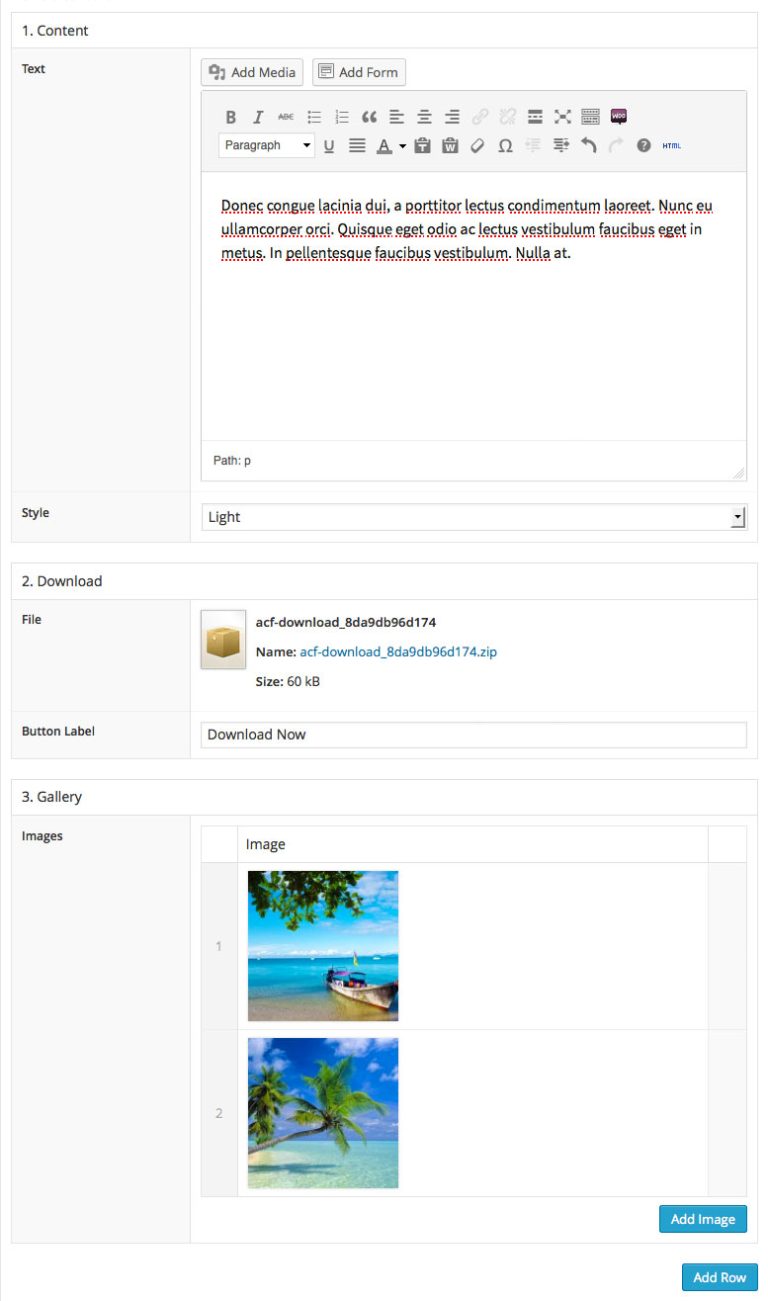
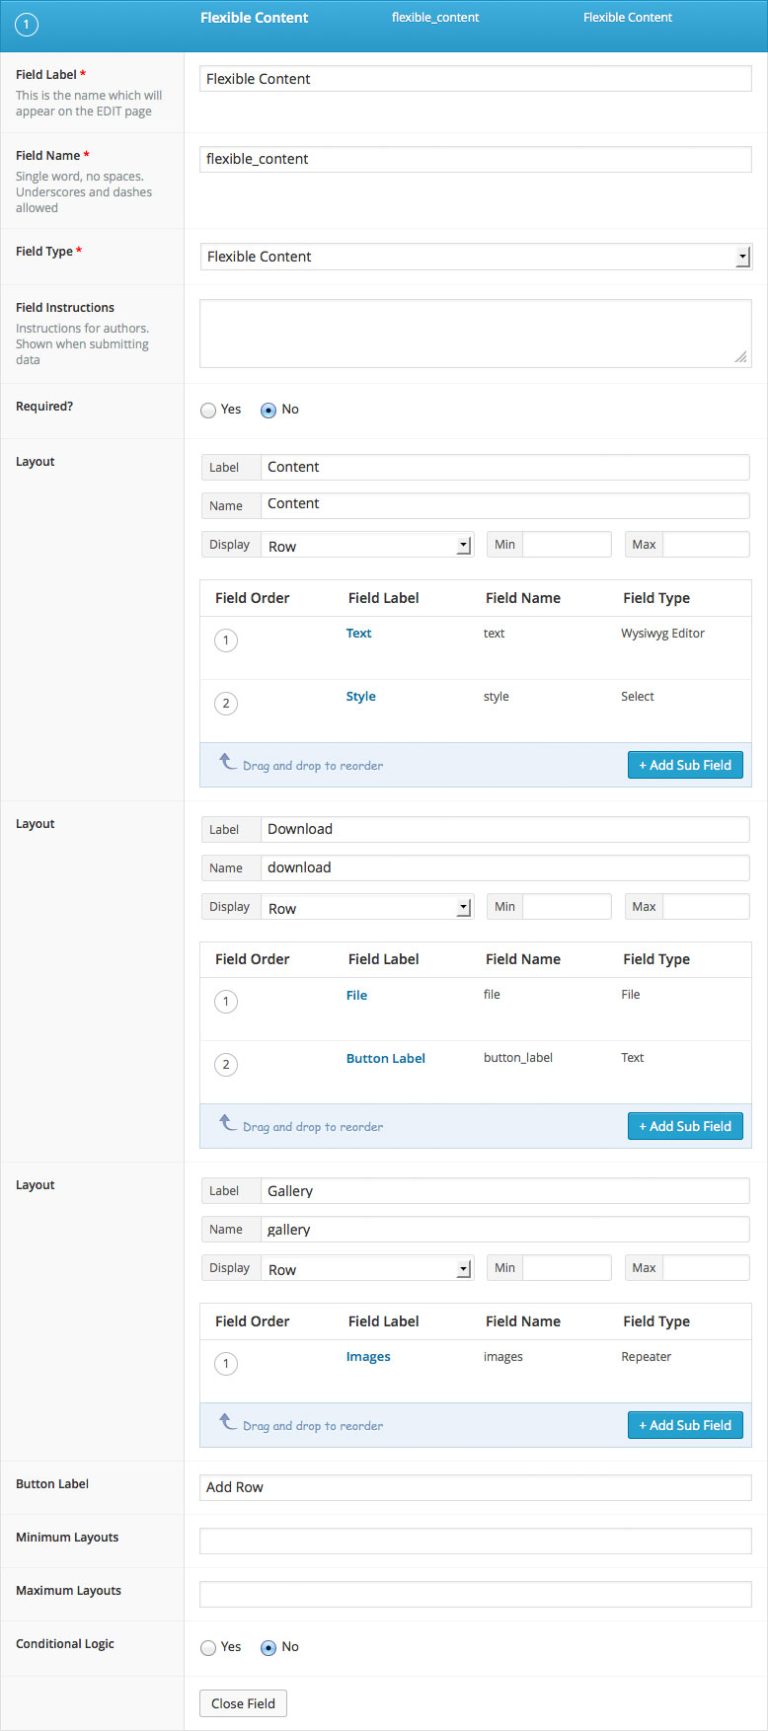
- Add Layouts
Within the Flexible Content field, you can add layouts. For our example:Layout Name: Content
Add a Text Field:Field Label: Text
Field Name: text
Add a select Field:
Field Label: Style
Field Name: styleYou can add additional layouts as needed.
- Assign the Field Group
Under Location, specify where this field group will appear. For example:
Show this field group if: Post Type is equal to Pages.
Save the field group. - Add Content in the Post Editor
Edit or create a new Pages.
Scroll down to the Flexible Content section.
Add a “Content” layout and input your desired title and description.
- Display Flexible Content in Your Theme
You need to modify your theme’s template to render the Flexible Content field. Add the following code to your theme file, e.g., index.php or Page.php:
<?php
get_header();
if (have_rows('flexible_contents')) :

	while (have_rows('flexible_contents')) : the_row();
		$layout = get_row_layout();

		switch ($layout) {

			case 'content':
				get_template_part('template-parts/layouts/content-section');
				break;

			case 'download':
				get_template_part('template-parts/layouts/download-section');
				break;
		}

	endwhile;
else :
	echo '<p>No layouts found.</p>';
endif;
get_footer();

?>wp-content/themes/gujju-travel/template-parts/layouts/content-section.php
<?php
$title = !empty(get_sub_field('text')) ? get_sub_field('text') : '';
$style = !empty(get_sub_field('style')) ? get_sub_field('style') : '';
?>
<div>
    <p><?php echo $title; ?></p>
    <span><?php echo $style; ?></span>
</div>wp-content/themes/gujju-travel/template-parts/layouts/download-section.php
<?php
$file = get_sub_field('file');
$button_label = get_sub_field('button_label');
?>
<div class="download-layout">
    <a href="<?php echo $file['url']; ?>" class=""> <?php echo $button_label; ?> </a>
</div>Conclusion
ACF’s flexible content fields enable you to easily design intricate and dynamic layouts. You can easily create a unique blog title and description section from the WordPress admin panel by following the above steps. To create even more adaptable pages, try trying different layouts.

