Adding new fields to the Shopify Newsletter Form: here is the step-by-step guide.
Step 1: Go to Shopify Dashboard and click on Online store> Themes > Actions > Edit code.

Step 2: In the edit code section of each newsletter.liquid file.
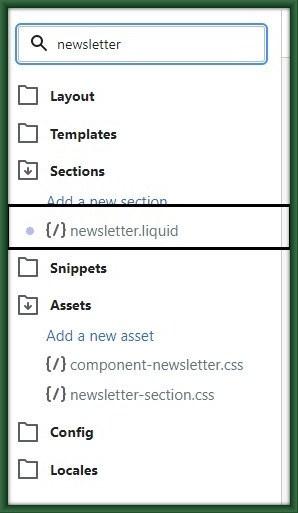
Step 3:

code: Paste this code in the newsletter-form class.
|
<div class=”field”> <input class=”field__input” autocomplete=”name” type=”text” id=”ContactForm-first_name” name=”contact[first_name]” value=”” aria-required=”true” placeholder=”First Name” required> <label class=”field__label” for=”ContactForm-first_name”>{{ ‘customer.register.first_name’ | t }}</label> </div> <div class=”field”> <input class=”field__input” autocomplete=”name” type=”text” id=”ContactForm-last_name” name=”contact[last_name]” value=”” aria-required=”true” placeholder=”Last Name” required> <label class=”field__label” for=”ContactForm-last_name”>{{ ‘customer.register.last_name’ | t }}</label> </div> |
Step 4: After updating, the code, go to “Themes” and then “Customize”

Step 4: After that click “Add section” and search for “Email signup” and drag the “Email signup” element


