As a store owner, you make your store updated daily. your daily work with theme editor where frequently change the images and pricing and many works. Well, Shopify makes it easy for you to upload and change your images and files.
You can have multiple ways of uploading files and images on Shopify. within this blog, I shall demonstrate some ways to upload files and images.
Method 1: Upload Image or File via Shopify Files:
Step 1: From the submenu, you navigate to “Content” on the left-sidebar of your Shopify admin panel.
Under the Content menu, select “Files”.
Upload files by clicking on the Right side button and select the file to upload.
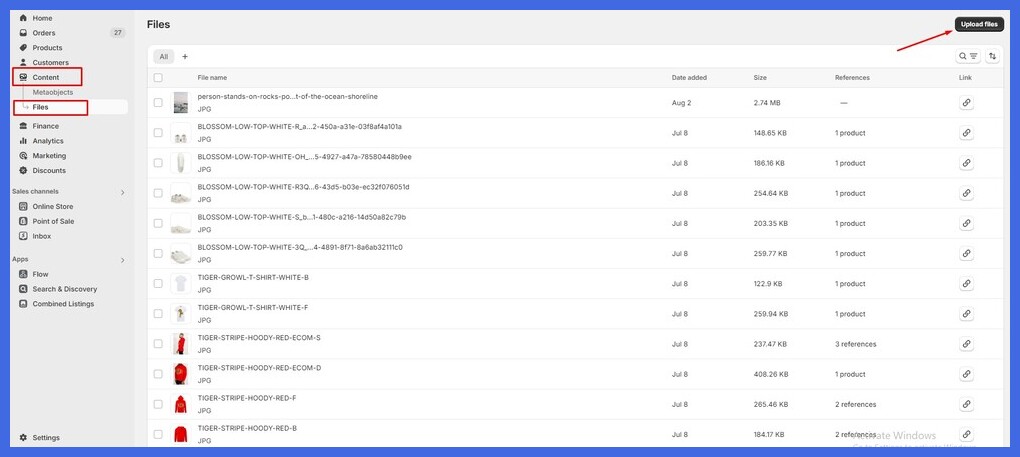
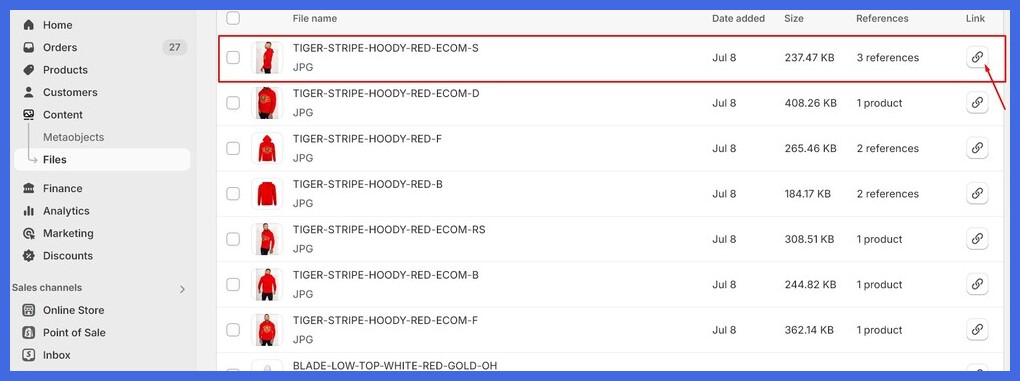
Step 2: Once uploaded and processed, it is visible in the list. To get the link, you simply need to click the “link” icon.
Method 2: Upload Image By Shopify Theme Editor:
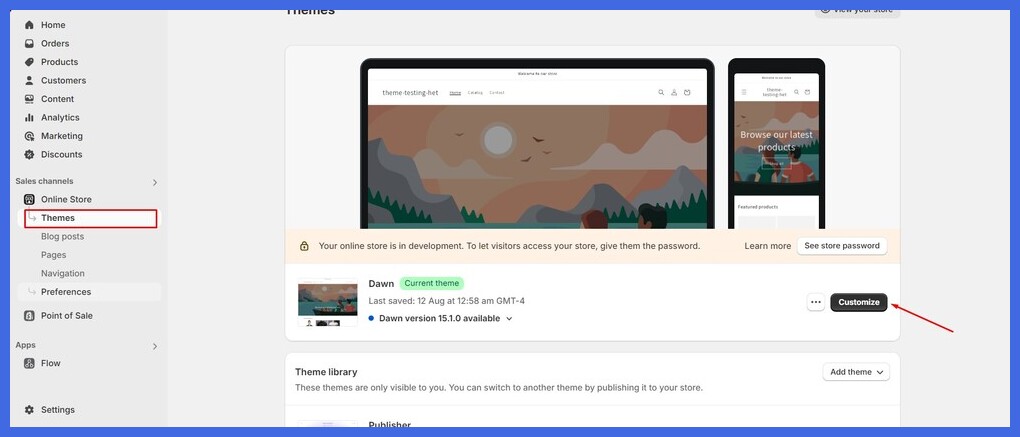
Step 1: Open Themes and click on the Customize button.
Step 2: Left sidebar shows a “+ ” (Add section) button to add new. Click this.
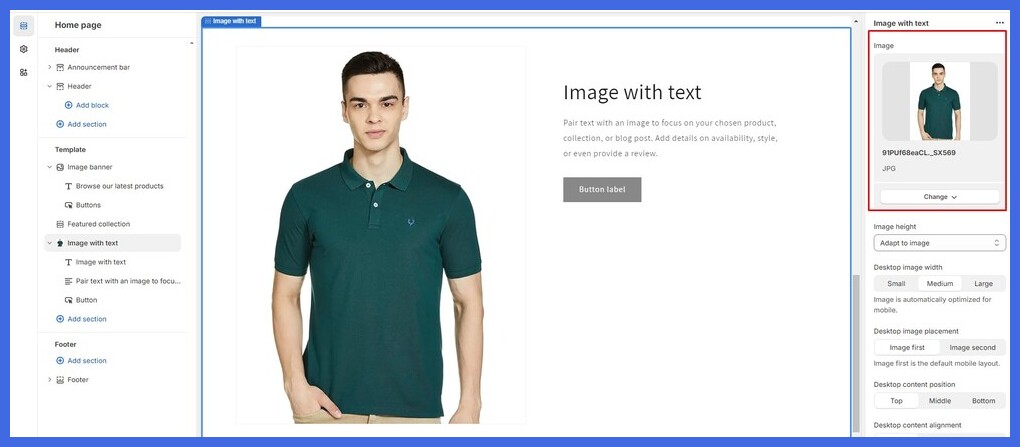
Choose the “Image with Text” section from the list of available options.
On the right side of the screen, you’ll see the settings for the Image with Text section. Click on the “Select image” button under the Image section.
A pop-up will allow you to either select an image from those that you’ve uploaded or upload one from your computer.

Step 3: When selected, your chosen image will populate into your desired section
Method 3: Upload Image By Rich Text Editor:
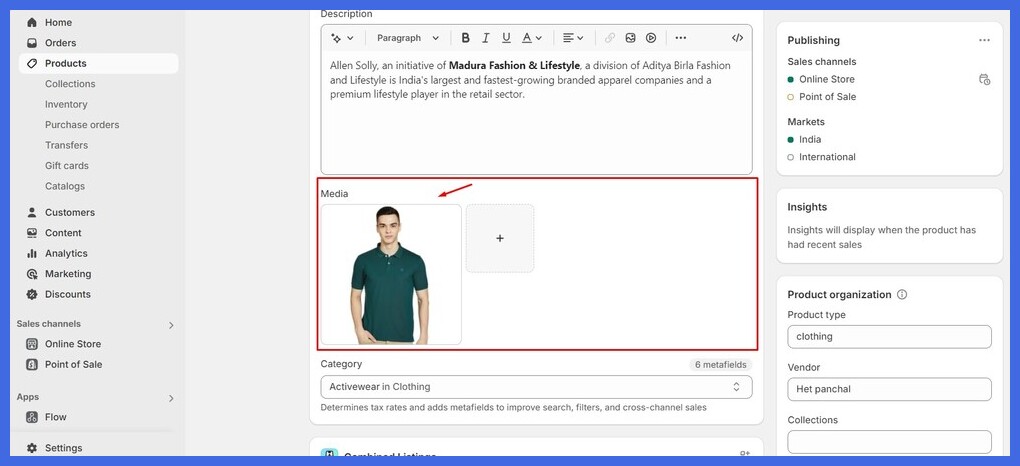
Step 1: Navigation left-hand sidebar in your Shopify Admin Panel, click on the section titled “Products”.
Next to it, click the top right corner of the page with the “Add product” button.

Step 2: This will redirect you to the page for creating a new product where you can add text containing the title of the product, description, images, pricing, etc.
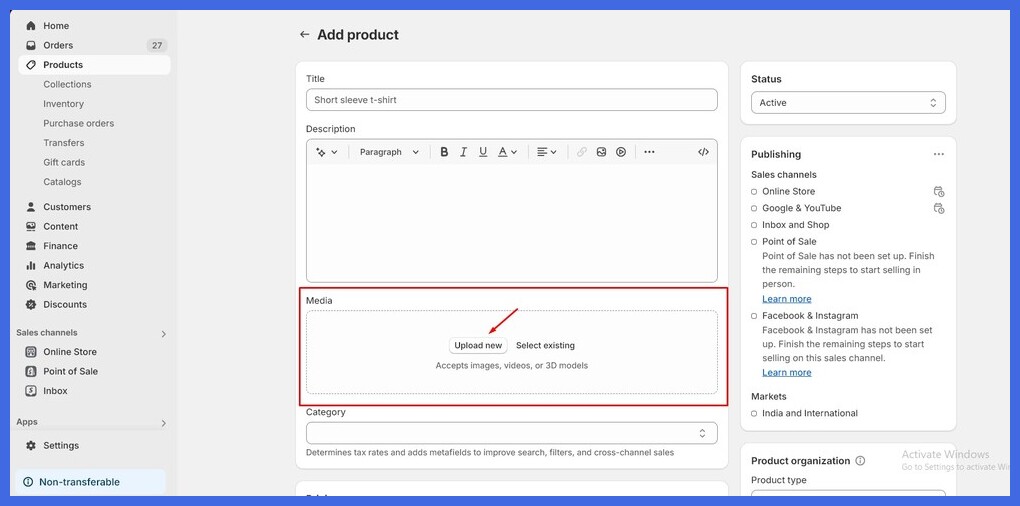
Step 3: Finally, your product image is successfully added.
