A metaobject is perhaps one of the most powerful features in Shopify, which enables you to extend your store functionality and make it even closer to customers’ personal needs. In this guide, we’ll tell you everything about metaobjects in Shopify-from their definition, through creation, to optimal application.
What Are Metaobjects?
Metaobjects are the bespoke data structures that can be used in Shopify to store and manage extra details about your products, collections, customers, orders, and other entities in your store. Metaobjects are quite similar to the custom fields that exist in other CMS platforms but are a lot more flexible and integrated capabilities within Shopify’s system.
Benefits of Using Metaobjects
Enhanced Product Information: Add more detailed and specific information to your products beyond the default fields provided by Shopify.
Improved Customer Experience: Personalize the shopping experience by displaying relevant information based on customer preferences or behavior.
Better Data Management: Organize and manage additional data in a structured way, making it easier to maintain and update your store.
Creating Metaobjects in Shopify
To create and use metaobjects in Shopify, follow these steps:
Step 1: Add Metaobject Definitions
Access Shopify Admin: Log in to your Shopify admin dashboard.
Navigate to Settings: Go to the “Settings” section at the bottom left of the dashboard.
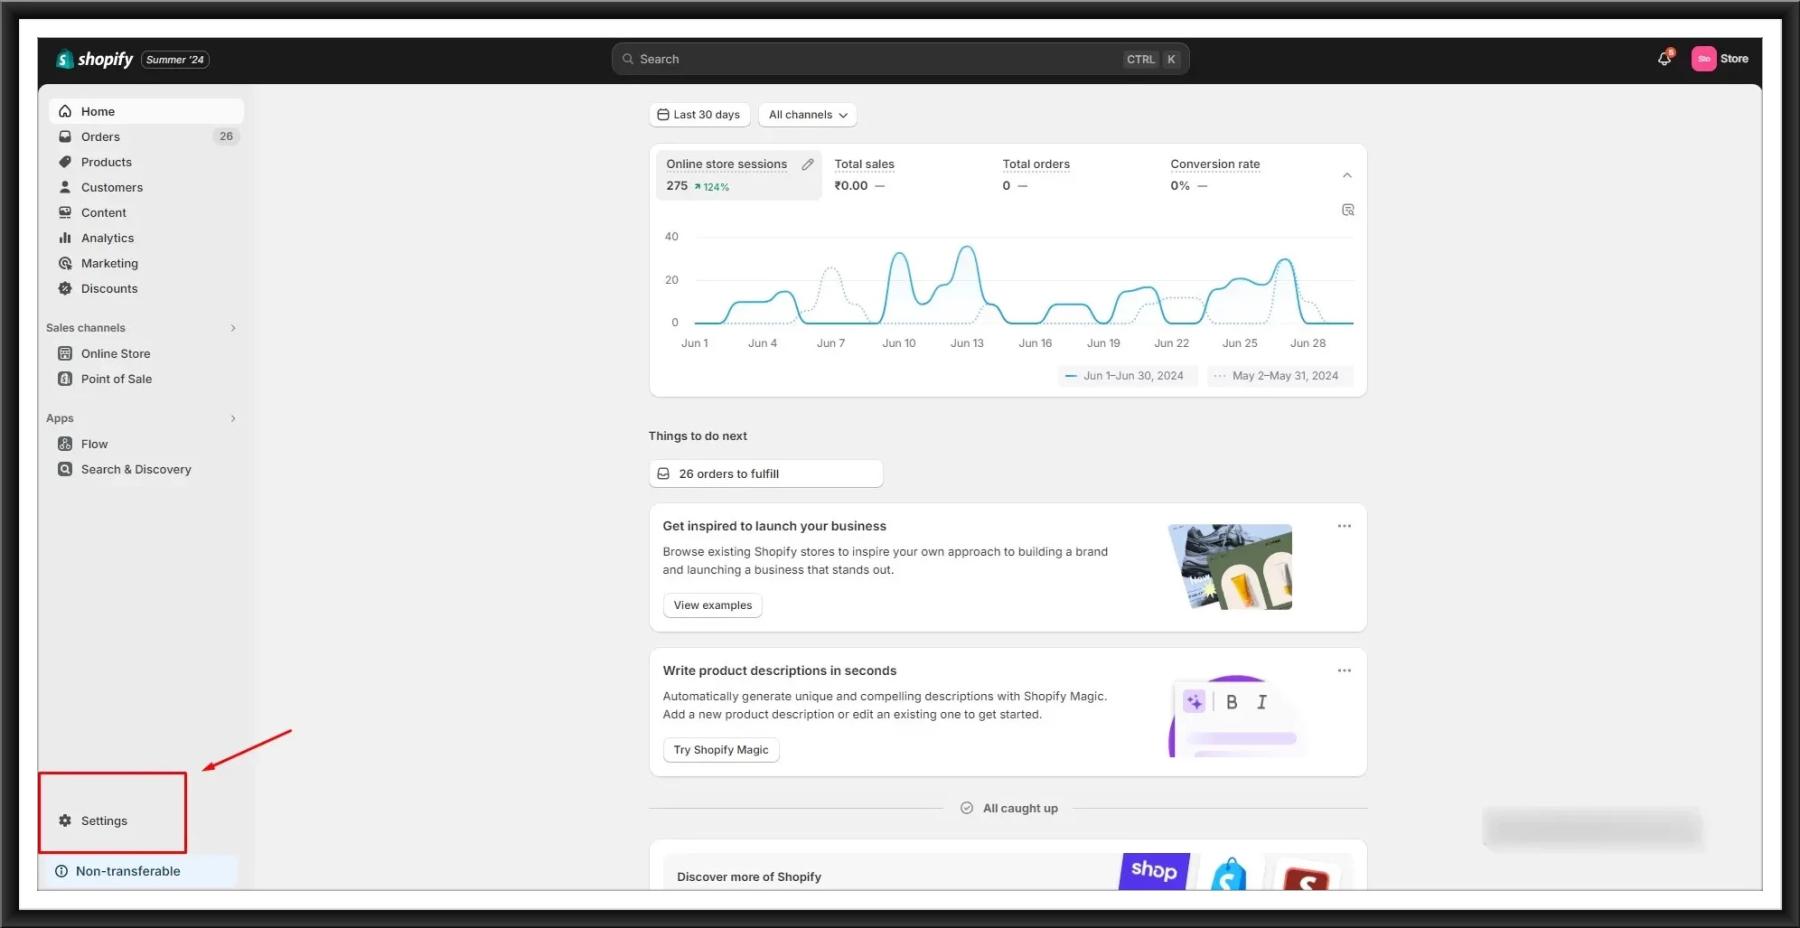
Click on “Custom data”

Add Definition: Click on “Add definition” and fill out the required information
Namespace: A unique identifier to group related metafields together.
Key: A unique name for the metafield.
Description: An optional description to explain the purpose of the metafield.
Type: Choose the type of data the meta field will store (e.g., single-line text, multi-line text, number, date, etc.).
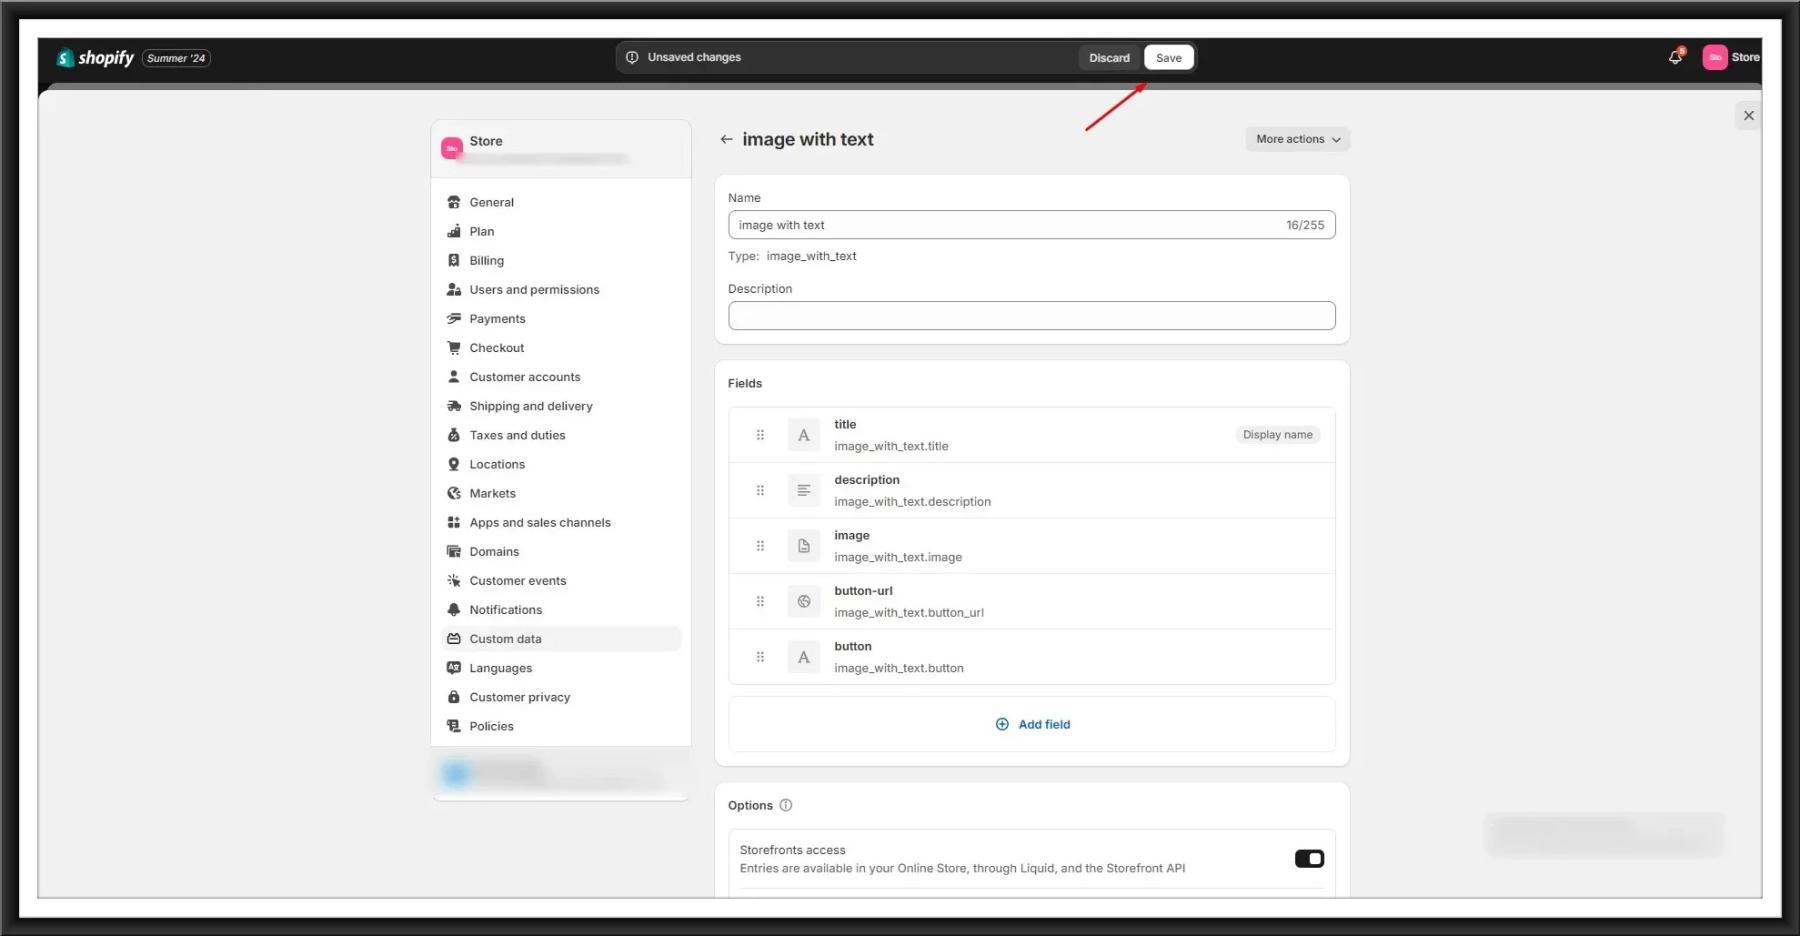
let’s add name, description, and image file fields. When you’re ready, click “Save”.
Step 2: Assign Metaobjects to Products

You’ll need to create a meta-field in the product
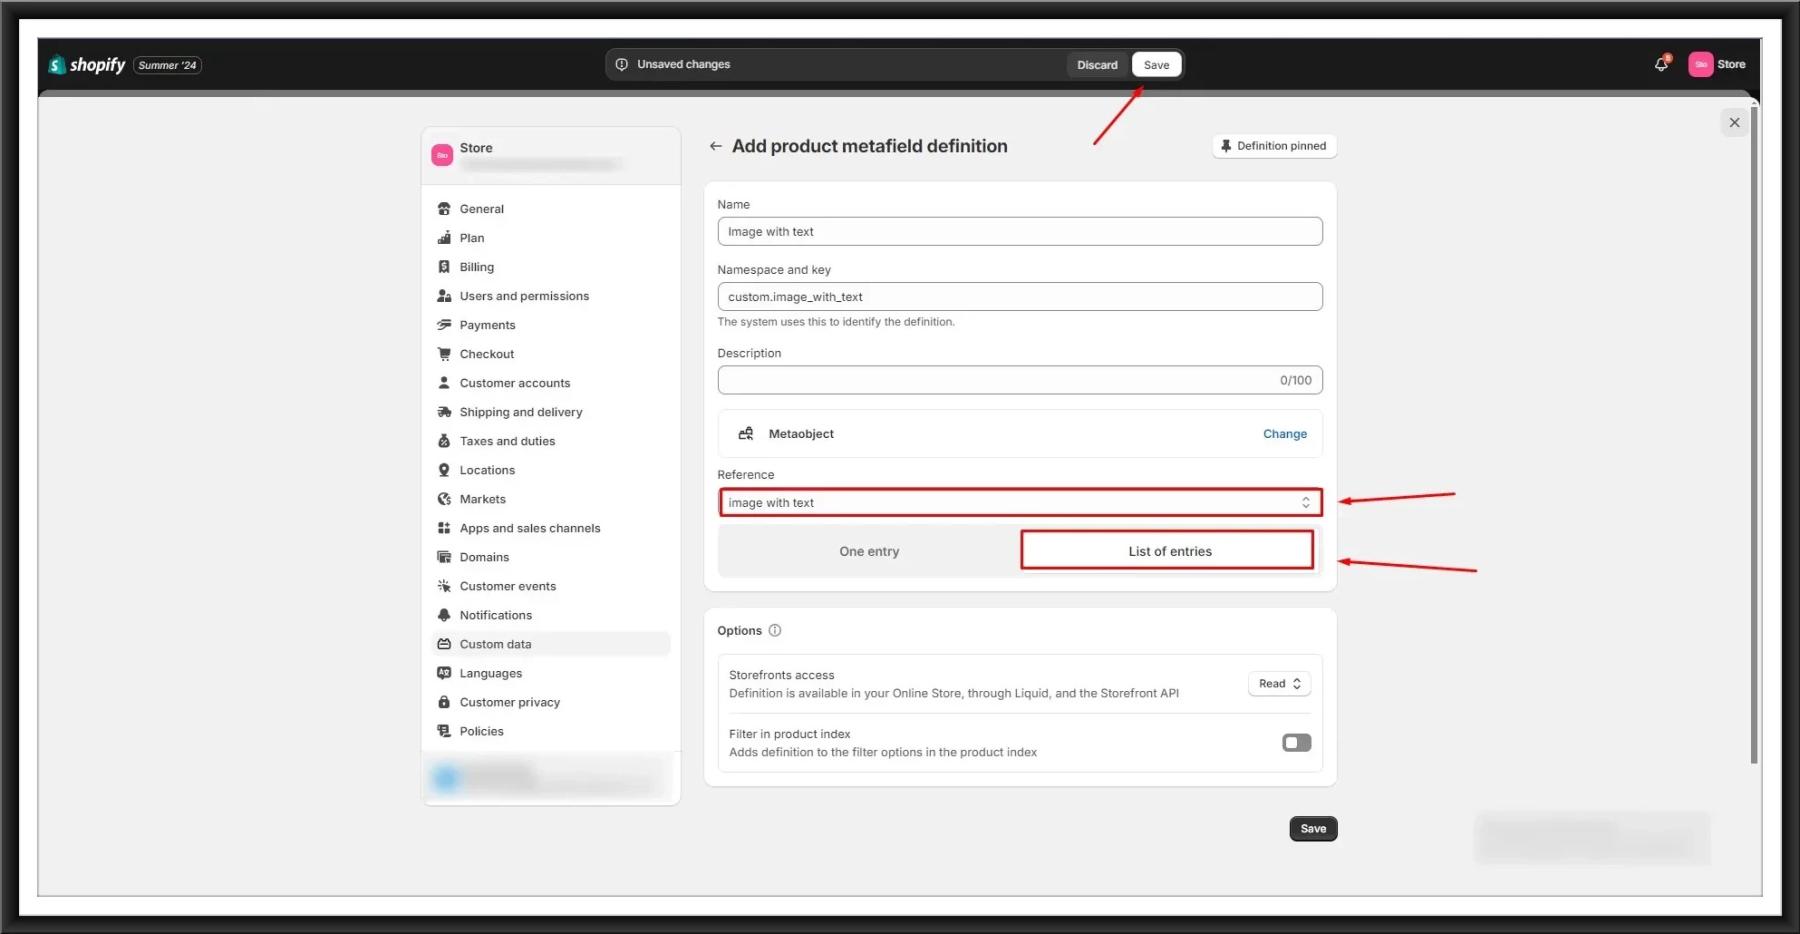
Open the “Select type” menu and select “Metaobject”.

Choose the metaobject you want to reference, add a unique name and description, select “List of entries”, and select “Save”.
To connect a meta field entry to one of your products, go back to the Shopify main dashboard and select “Products”.
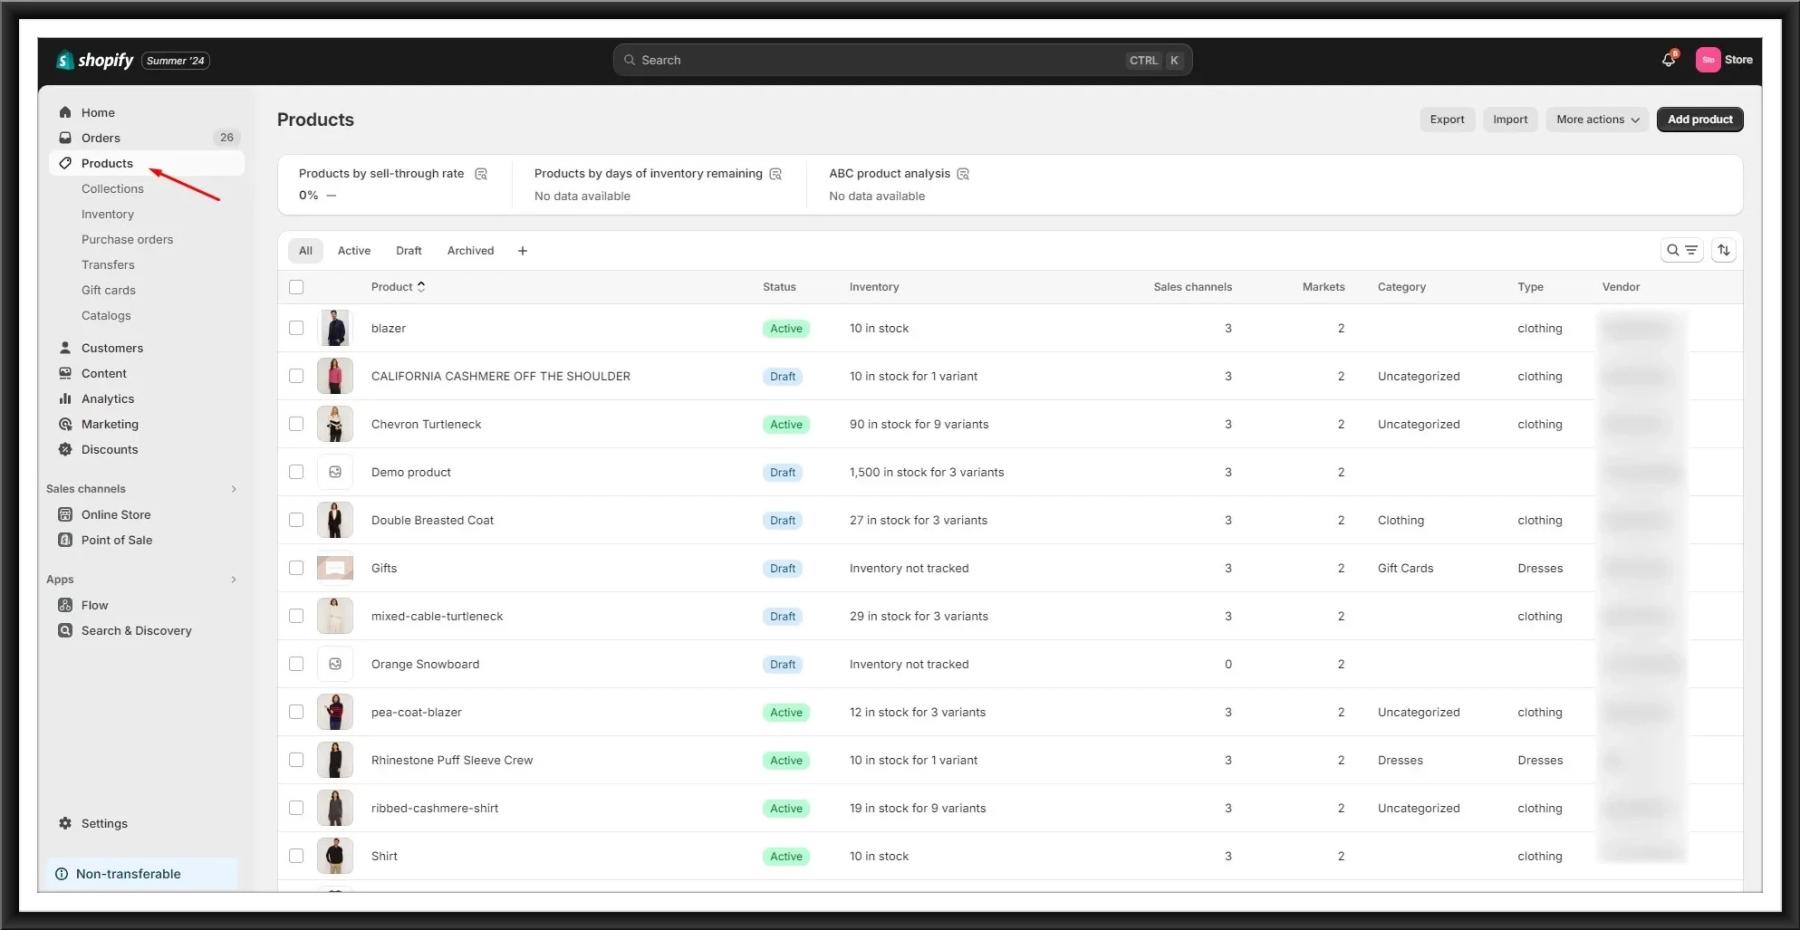
Select the product that you want to add your metaobject to.
Scroll down to the “Metafields” section. Here, you’ll see the meta field referencing the meta-object we just created. Let’s click on the “Add new entry” button.

Save your changes to the product page.

Using Metafields in Product Pages
To display meta fields on your product page, you’ll typically edit your Shopify theme’s Liquid templates. Here’s a simplified example:
Access Theme Files:
Go to Online Store > Themes.
Click on “Three Dots” > “Edit Code” for the theme you’re using.
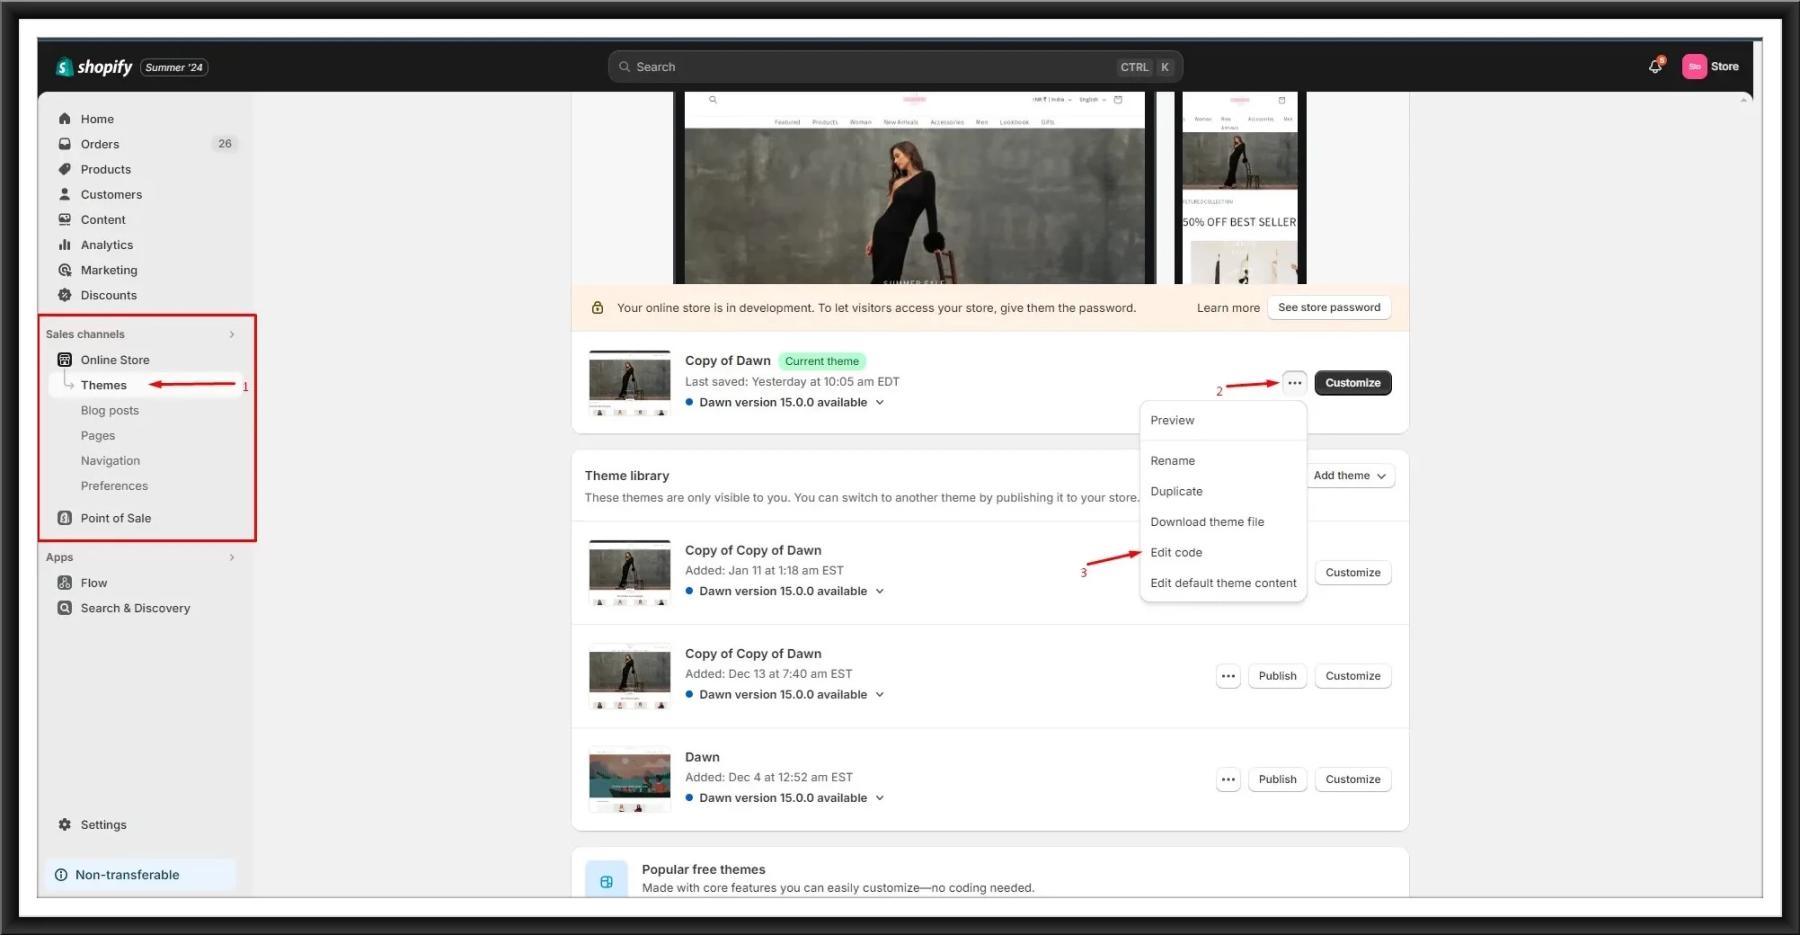
Locate the selection where you want to display the metafield data (e.g., main-product.liquid).
Retrieve Metafield Data:
Use Liquid code to fetch and display metafield values.
|
<div class=”metaobject”> {% for metaobject in product.metafields.custom.metaobjects.value %} <div class=”metaobject-item”> <div class=”leftside”> <img src=”{{ metaobject.image | img_url : “300x” }}” alt=”{{ metaobject.title }}”> </div> <div class=”rightside”> <h1>{{ metaobject.title }}</h1> <p>{{ metaobject.description }}</p> <div class=”button123″> <a href=”{{ metaobject.button_url }}”>{{ metaobject.button }}</a> </div> </div> </div> {% endfor %} </div> |

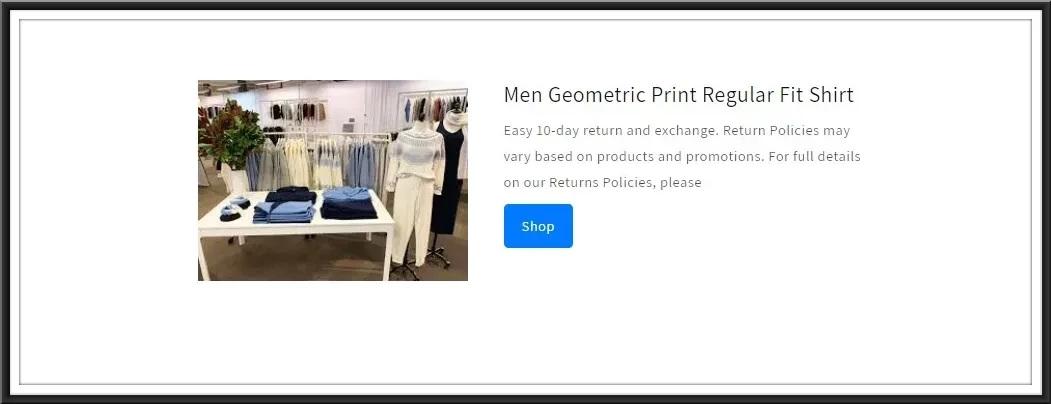
Output:
When you properly set up and connect the metaobjects to your product, the output on your product page might look like this:
Metaobjects are a feature available in Shopify with the capacity to improve functionalities and extend the customization possibilities of an online shop. Knowing how to create, manage, and use meta objects helps in creating a rich, personalized, and effective shopping experience for customers.


