What will you learn in this blog?
- What is A/B Testing?
- Why should we use it for an e-commerce store?
- How A/B Testing Works.
- How to integrate Figpii into Shopify.
What is A/B Testing?
A/B testing compares two iterations of a website, application, email, or other marketing or design piece to see which works better. It’s a controlled experiment meant to maximize user experiences and promote desired results, including increased engagement, purchases, or conversions.
Why should we use it for an e-commerce store?
Here are the benefits of the A/B testing.
How does A/B Testing Work?
Here are the steps of how A/B testing works
Define the Goal: Decide what you want to optimize, e.g., increase sign-ups, clicks, or purchases.
Create Two Variants: Develop two versions of the element you’re testing:
- Version A: The control or current version.
- Version B: The variation with a change, such as different text, colors, layout, or call-to-action (CTA).
Split the Audience: Divide your audience randomly into two groups.
- Group 1 sees Version A.
- Group 2 sees Version B.
Measure Performance: Track how each version performs against your chosen metrics, like click-through rate (CTR), conversion rate, or time on page.
Analyze Results: Determine which version achieves your goals more effectively and implement the winning version.
How to integrate Figpii into Shopify?
Step 1: Log in to your Shopify store, click on Settings, then click on Apps, and Sales channel’s Click on shopify app store.
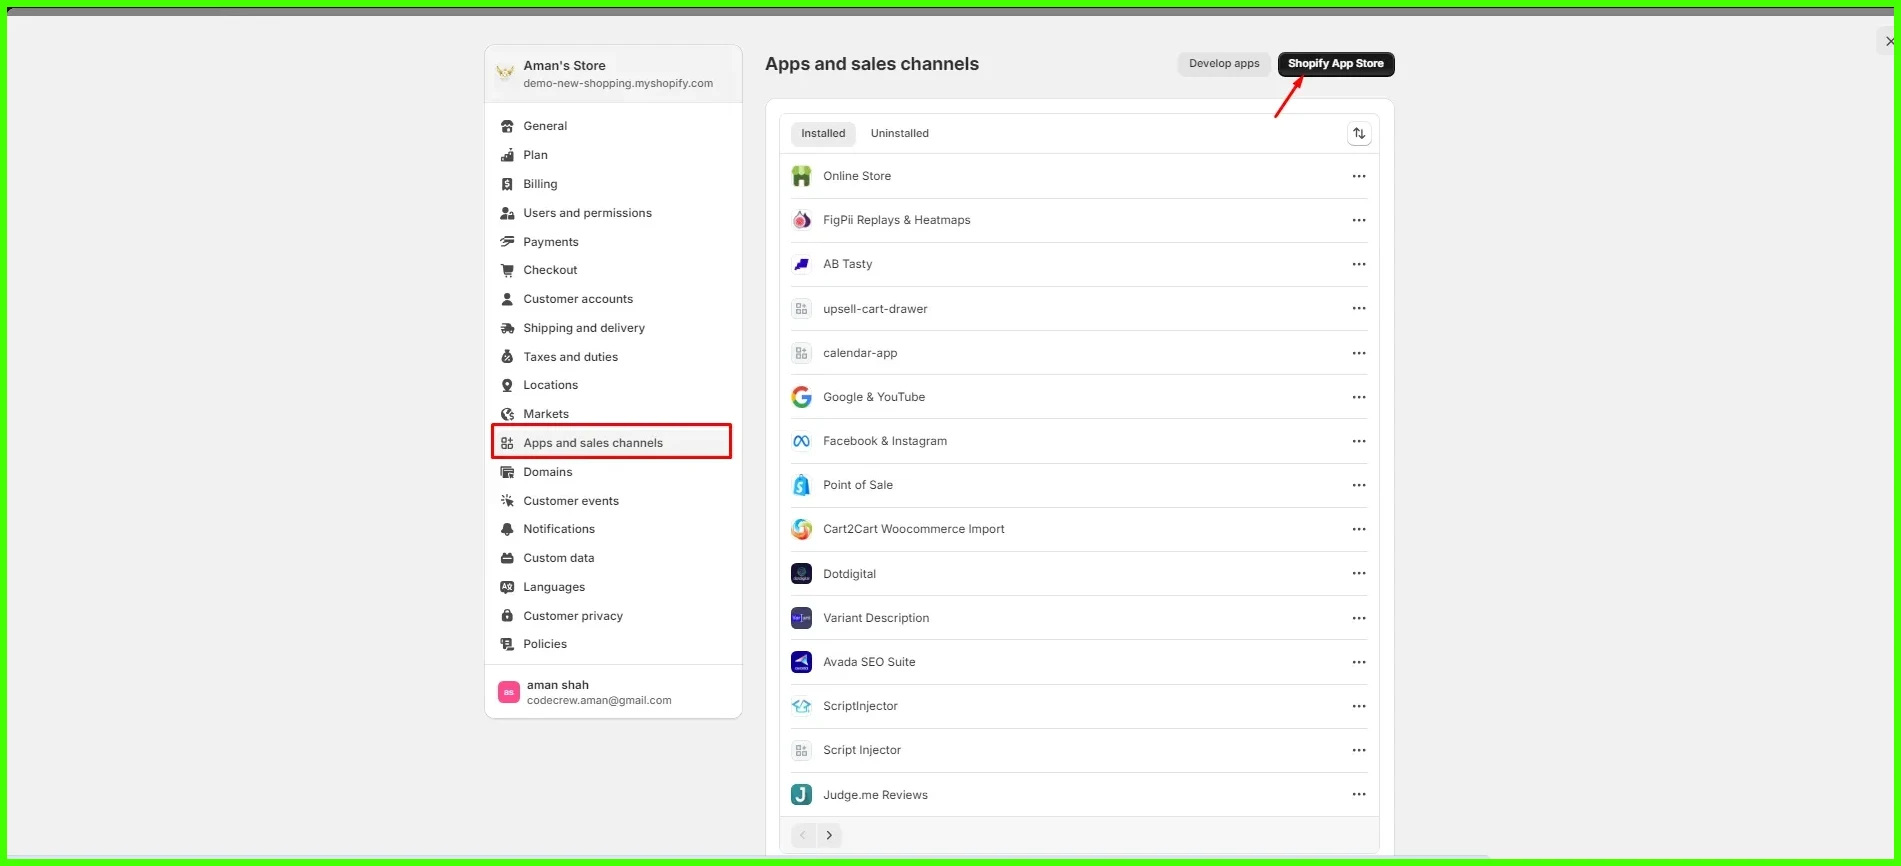
Step 2: Now search figpii and install it.

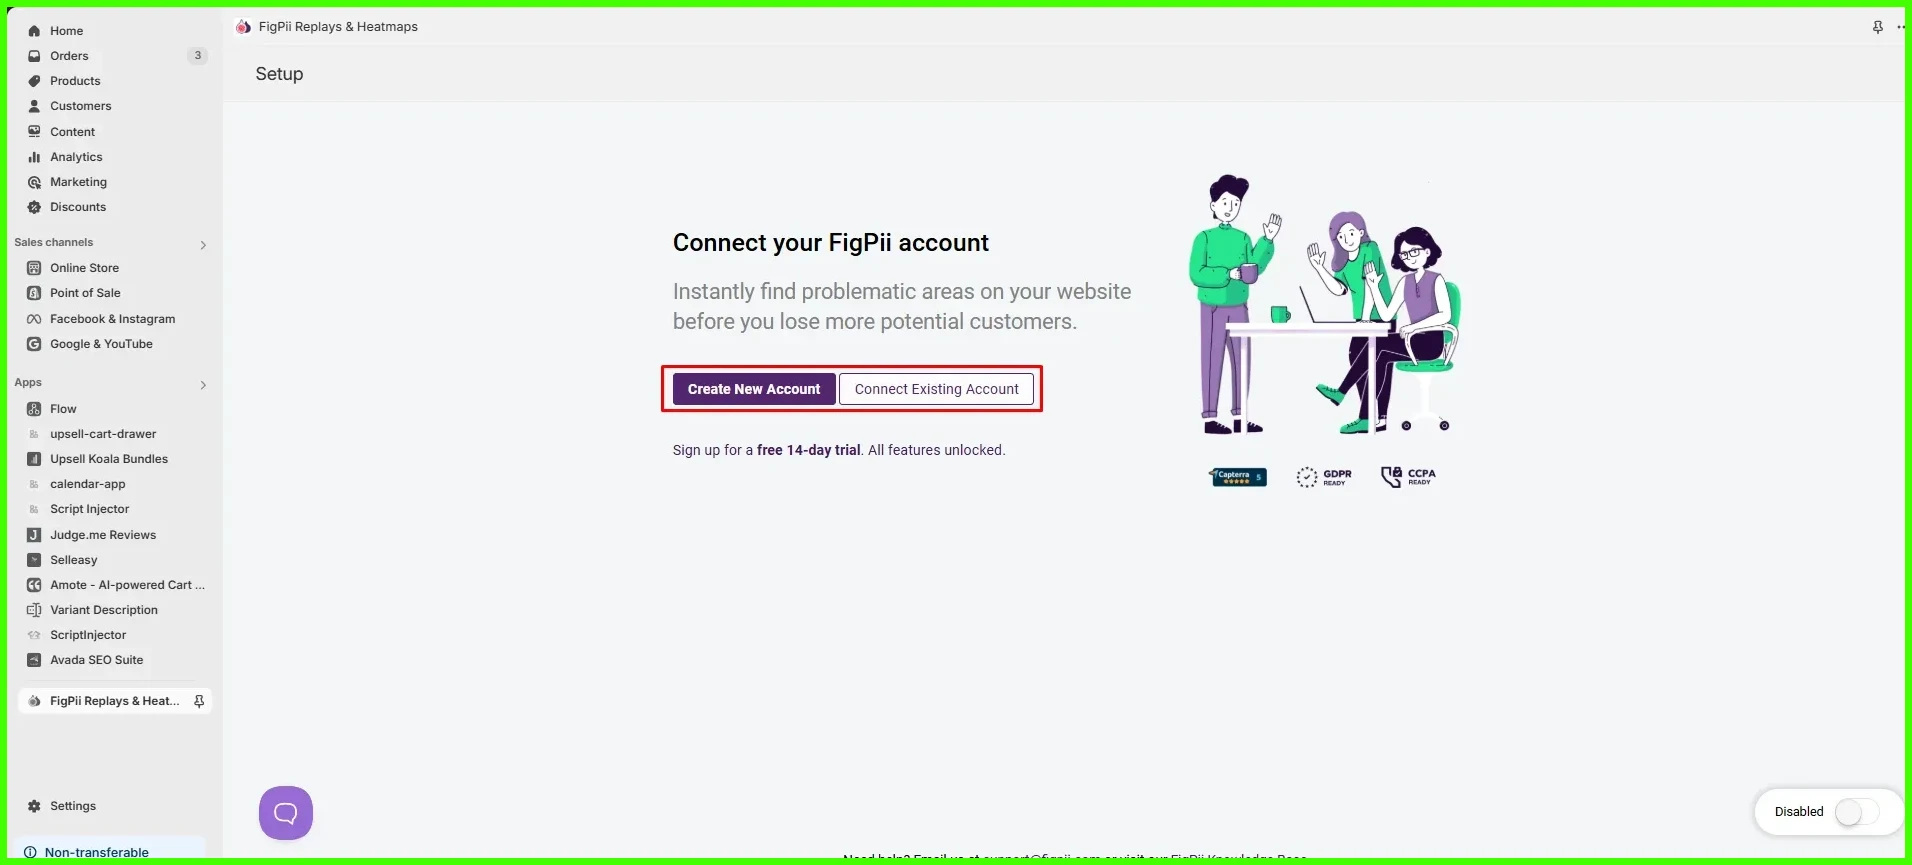
Step 3: Sign up or Sign in to the Figpii account.
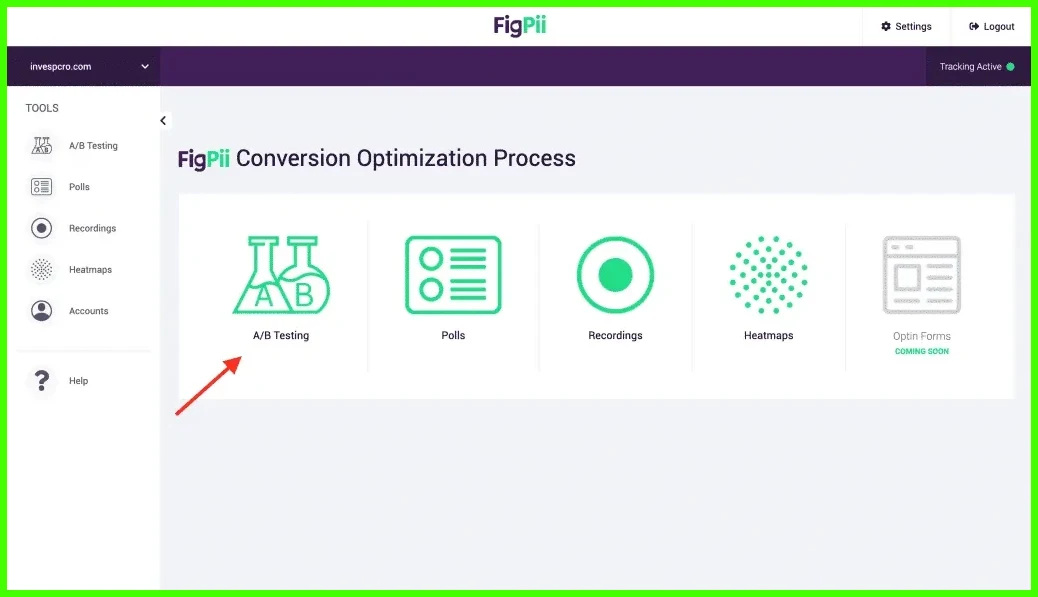
Step 4: Once you log in, you will see the figpii dashboard, now click on the A/B testing from the dashboard.
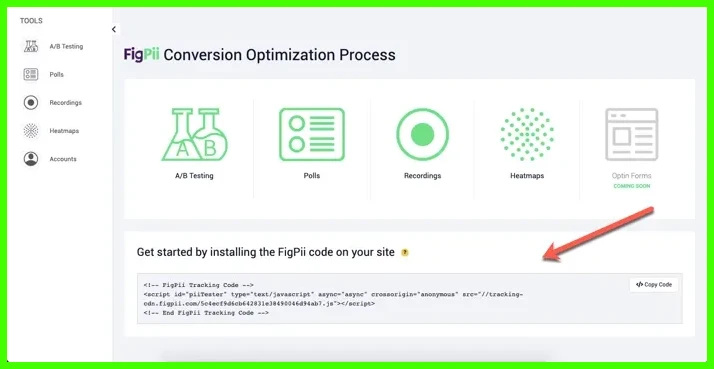
Step 5: Now you can see the code in the footer copy that code and paste it into the theme.liquid file.
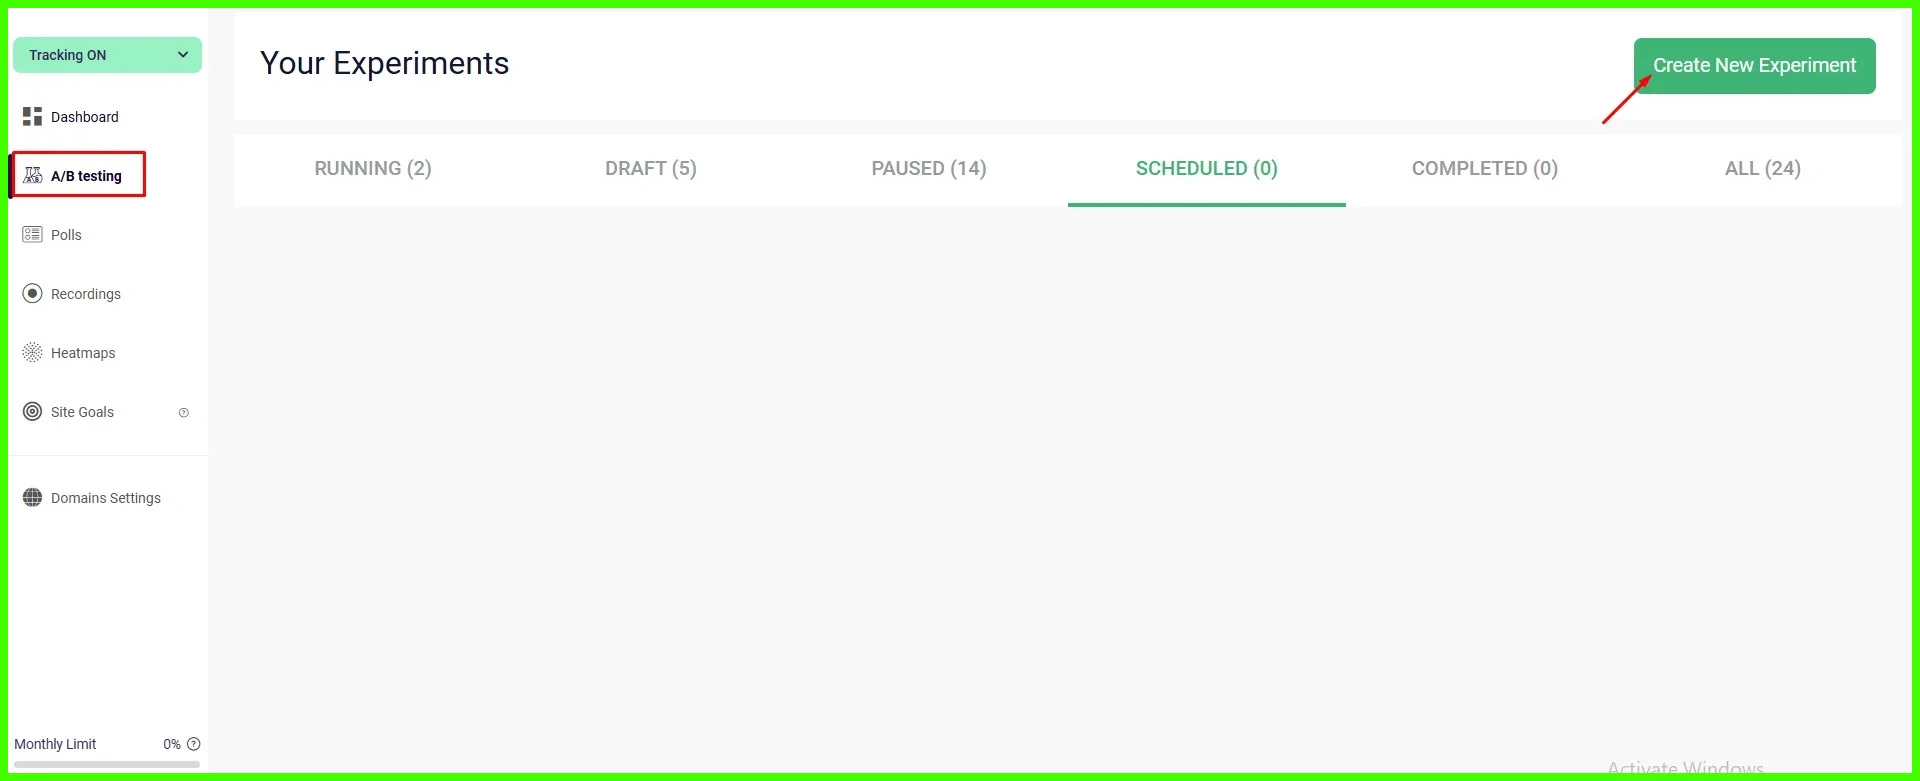
Step 6: Once it is connected with the Shopify store select A/B testing and Click on Create New Experiment.
Step 7: Add the AB testing experiment name in the name column.

Step 8: Select the AB test as an experiment type.

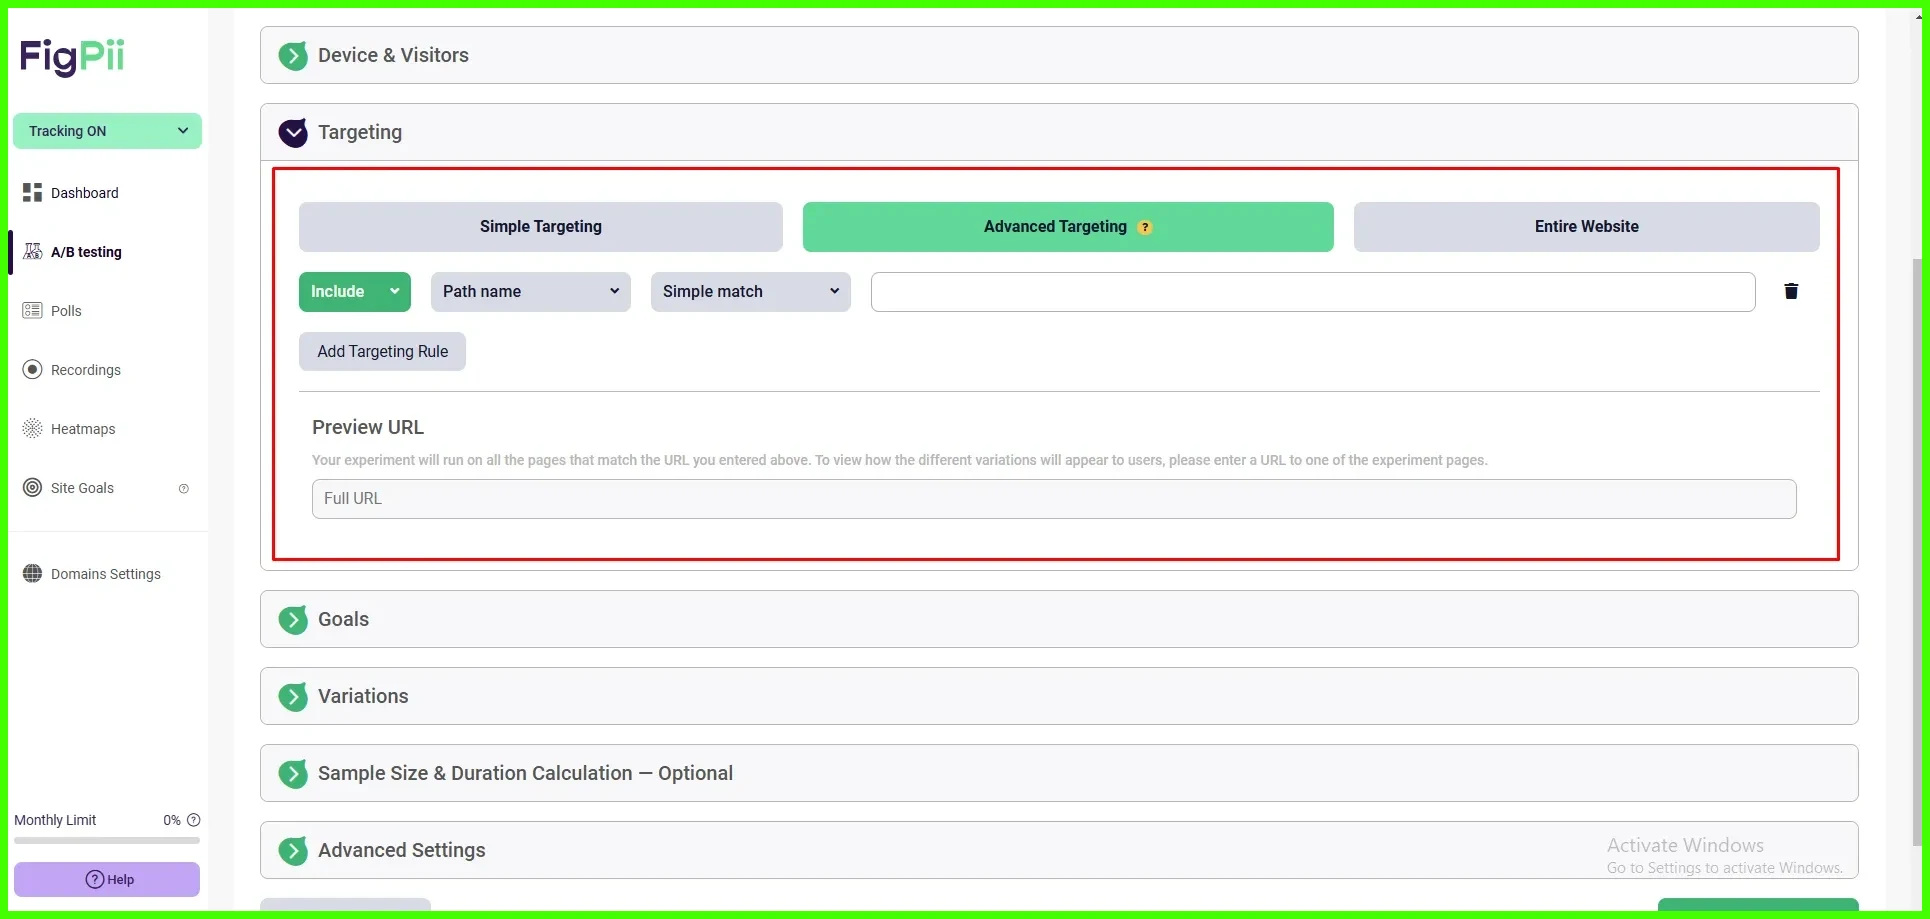
Step 9: Select a page target, and add the URL on which you want to target the AB testing also add a preview URL to show the AB testing on that URL.
Step 10: Select the Device and visitors on which you want to show AB testing. if you want to show AB testing on only mobile devices then select Mobile if you want to show it for all devices then select all. Also select the visitor like new returning or all from the visitor type.

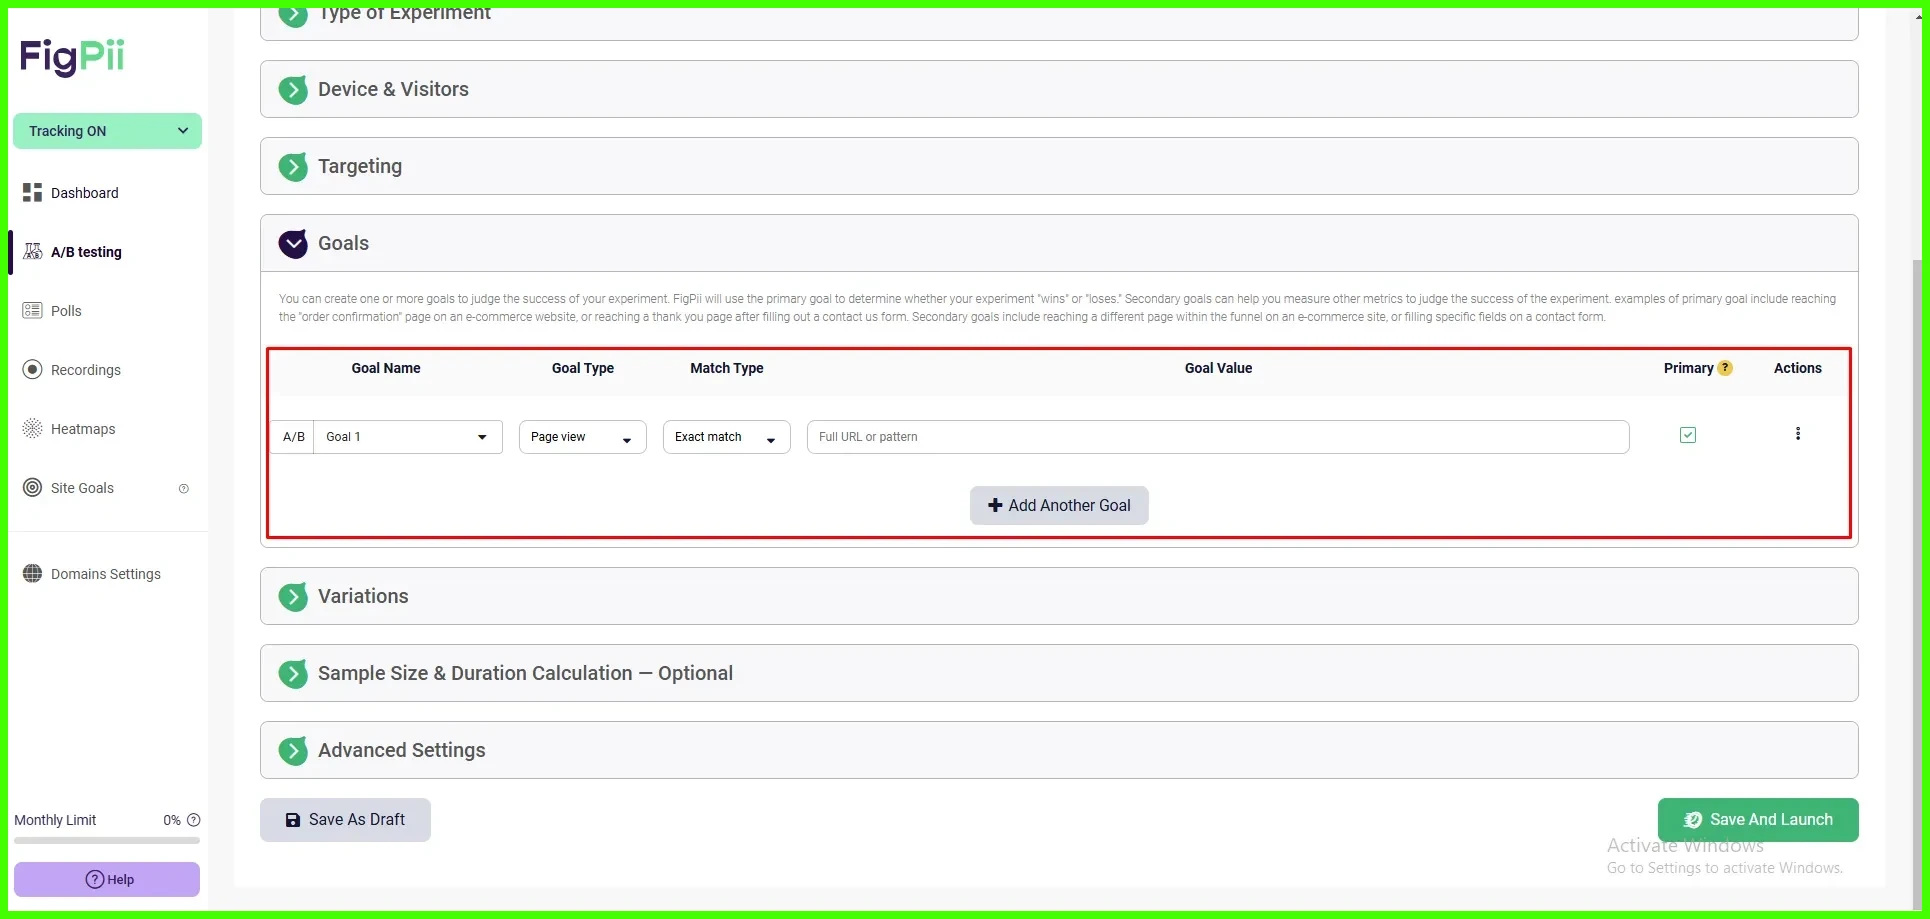
Step 11: Set goals like page view on a specific page or any event triggered.
Step 12: Add the variation using the add variant button. From there you can add CSS and JS and do whatever you want to do using the tool you can also preview the changes from there.

Step 13: Select advanced settings like IP targeting Google campaigns etc. Click on the Save and Launch