Introduction to Google Analytics 4
The advanced version of the web analytics application from Google is known as Google Analytics 4. It gives deep insights into the performance of a website and application. Being furnished to cater to every need of giving a holistic approach to the tracking of user interactions, understanding customer journeys from one platform to another, it has thereby replaced the old one, Universal Analytics.
Difference between GA4 and Universal Analytics (UA)
To measure these new resources effectively, Analytics 4 uses events, which are the center of the measurement in the new tool, unlike Universal Analytics, which uses more page views and sessions.
Google Analytics 4 benefits
It’s more adaptable: by integrating web and mobile apps, or any other digital resource, measurement, the new Analytics is better suited to the measurement needs of any digital business model.
GA4 provides more real-time data and reporting, enabling businesses to monitor user interactions and performance metrics as they happen.
How to set up Google Analytics 4 in Shopify?
We have discussed below the step-by-step process to set up GA4 for your website. You should include creating a new GA4 property as a mandatory step and installation of the tracking code on your website and configuration of your settings.
1. Create an Account in Google Analytics
Once you’re signed in, click on the “Admin” option in the bottom-left corner.

In the “Create” column, click on the dropdown and select “Create Account“.
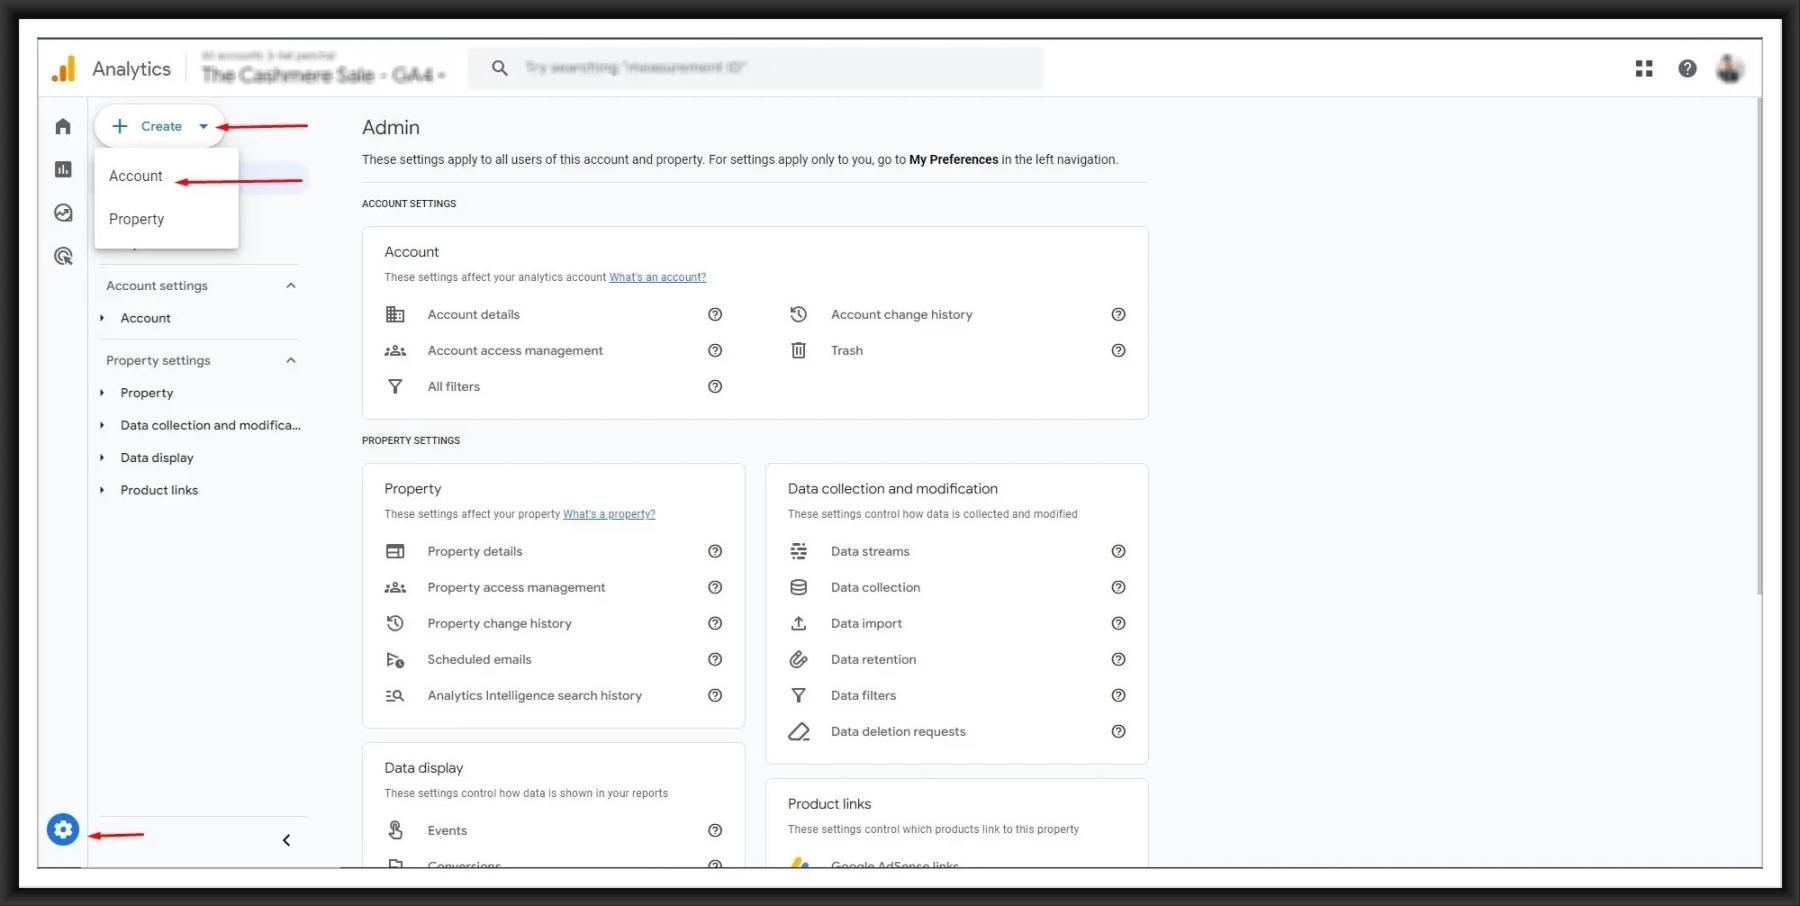
If you already have access to GA4 with a different account, find Admin in the menu (wheel on the bottom left side of the interface) and click + Create Account.
Step 1: Account Creation
Fill in the account name to get started.

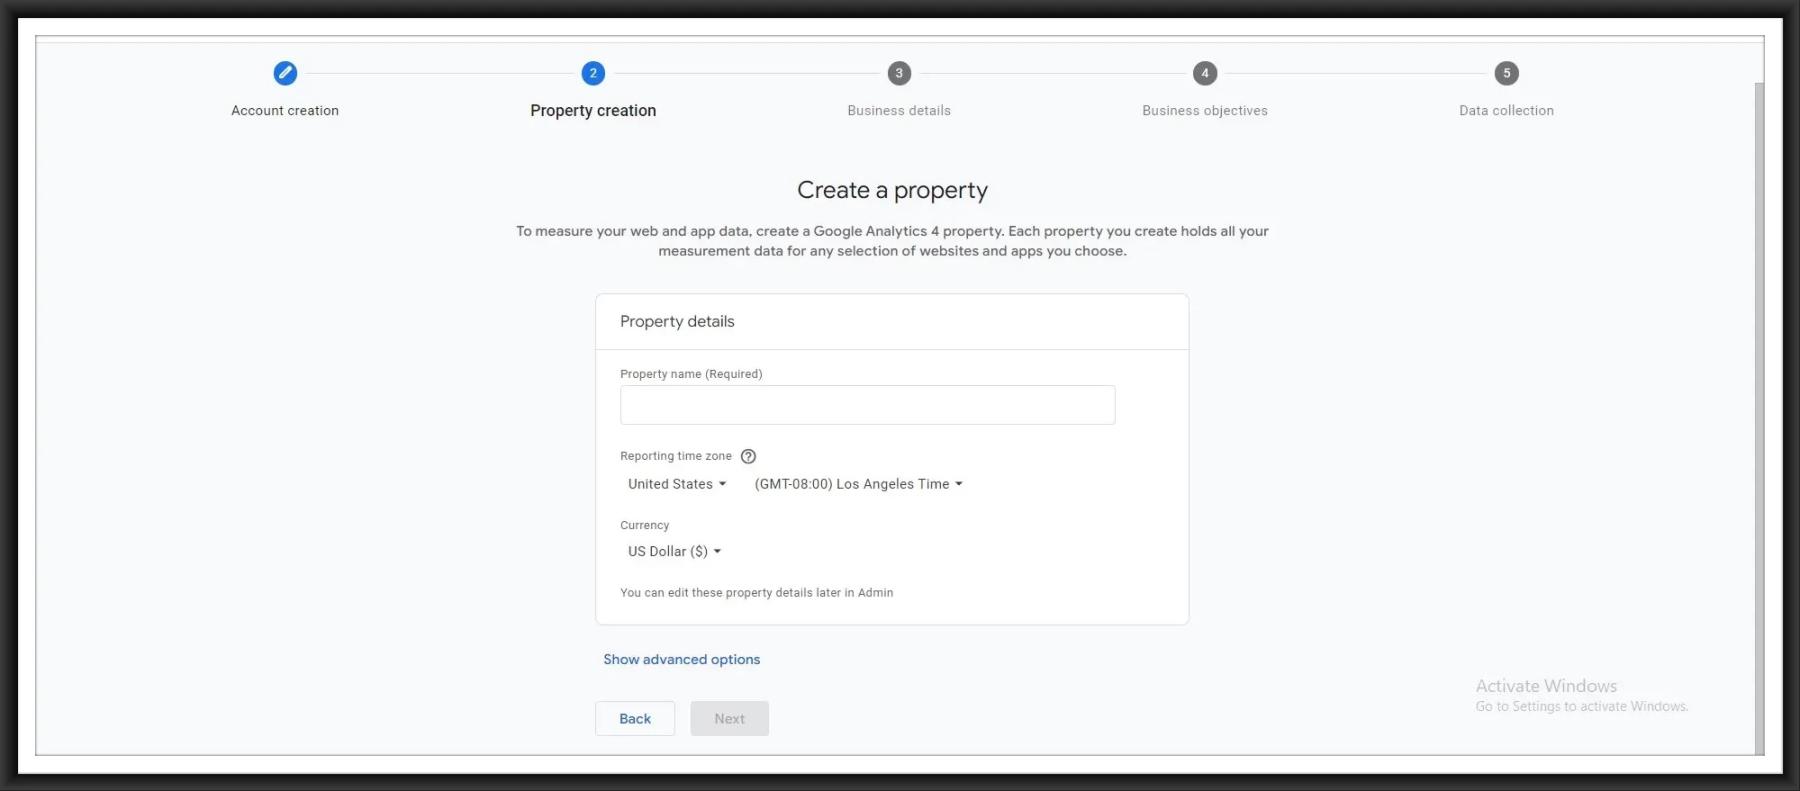
Step 2: Property Creation
Choose Your Property Name, Time Zone & Currency
Step 3: Business Details
Select your industry category and specify your business size.

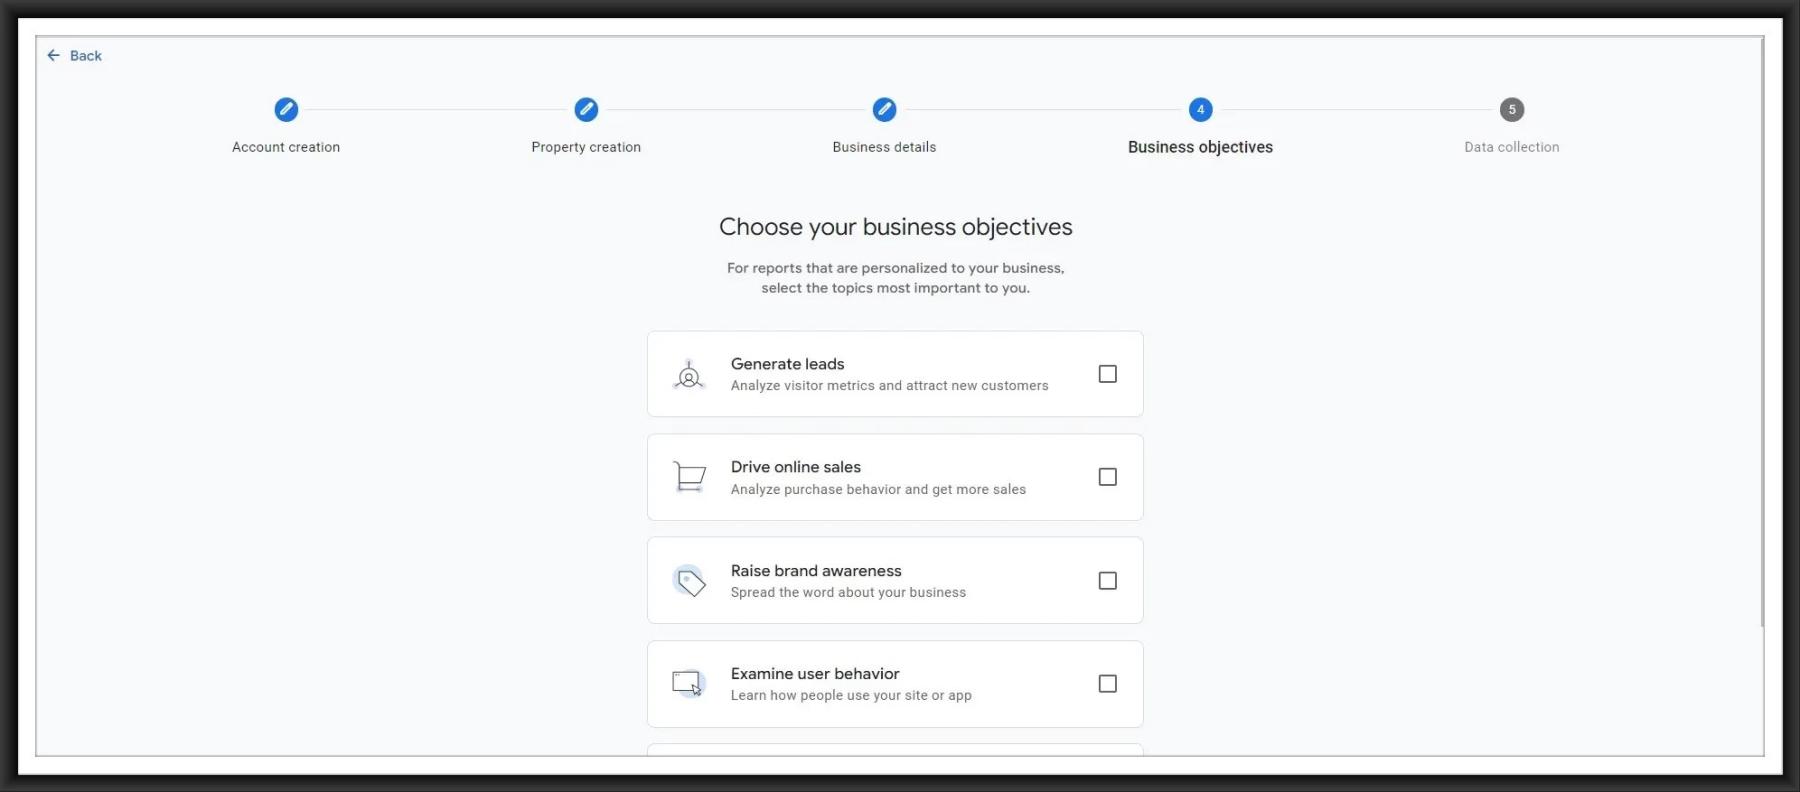
Step 4: Business objectives
Choose the objective that is most relevant to you for reports that have been customized specifically for your business’s needs.
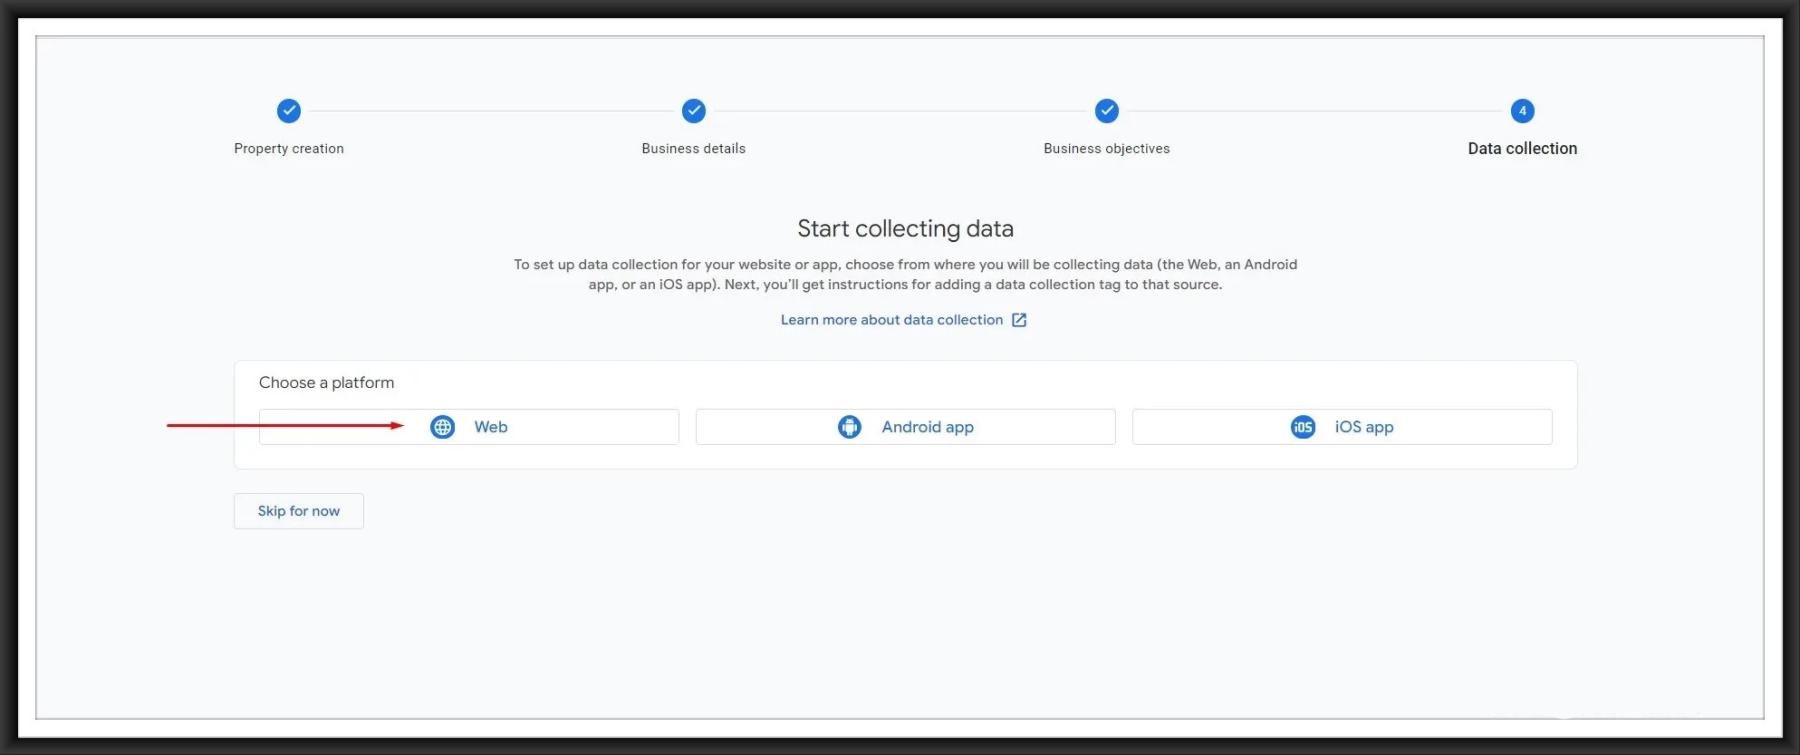
Step 5: Data Collection
To set up data collection for your website or app, choose from where you will be collecting data (the Web, an Android app, or an iOS app). Next, you’ll get instructions for adding a data collection tag to that source. In this scenario, we are choosing for the Web Stream.
Step 6: Data Stream
Set up your web stream by entering the Website URL and specifying the Stream Name. Then Create a Stream.
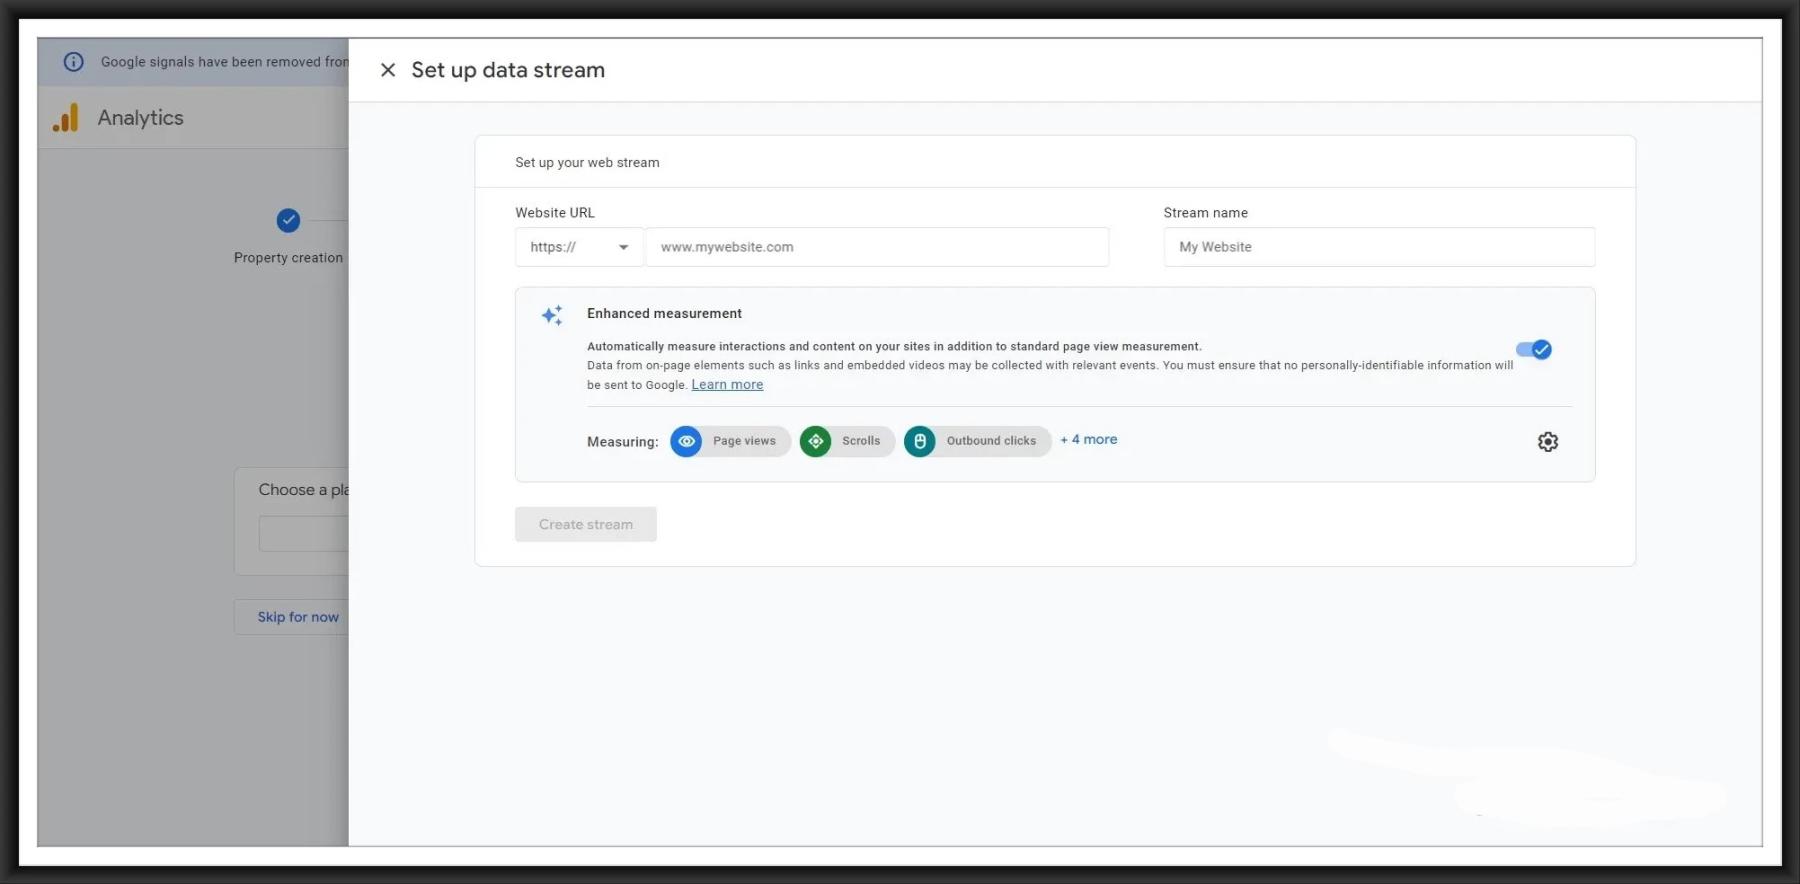
Data streams in GA4 give you the flexibility to adjust your reports within your property. GA4 automatically tracks metrics like page views, scrolls, outbound link clicks, video plays, site searches, and file downloads within each data stream. Thus, data streams allow you to easily track and analyze traffic across multiple sources of data.
Step 7: You’re done!
Once you’re done, you can easily access essential details of your web stream, including the stream ID, stream URL, stream name, and measurement ID. You can view and make changes as you wish. You will need these key notations in later stages when analyzing your valuable data.
Now let’s add a Google Analytics tracking tag to complete.
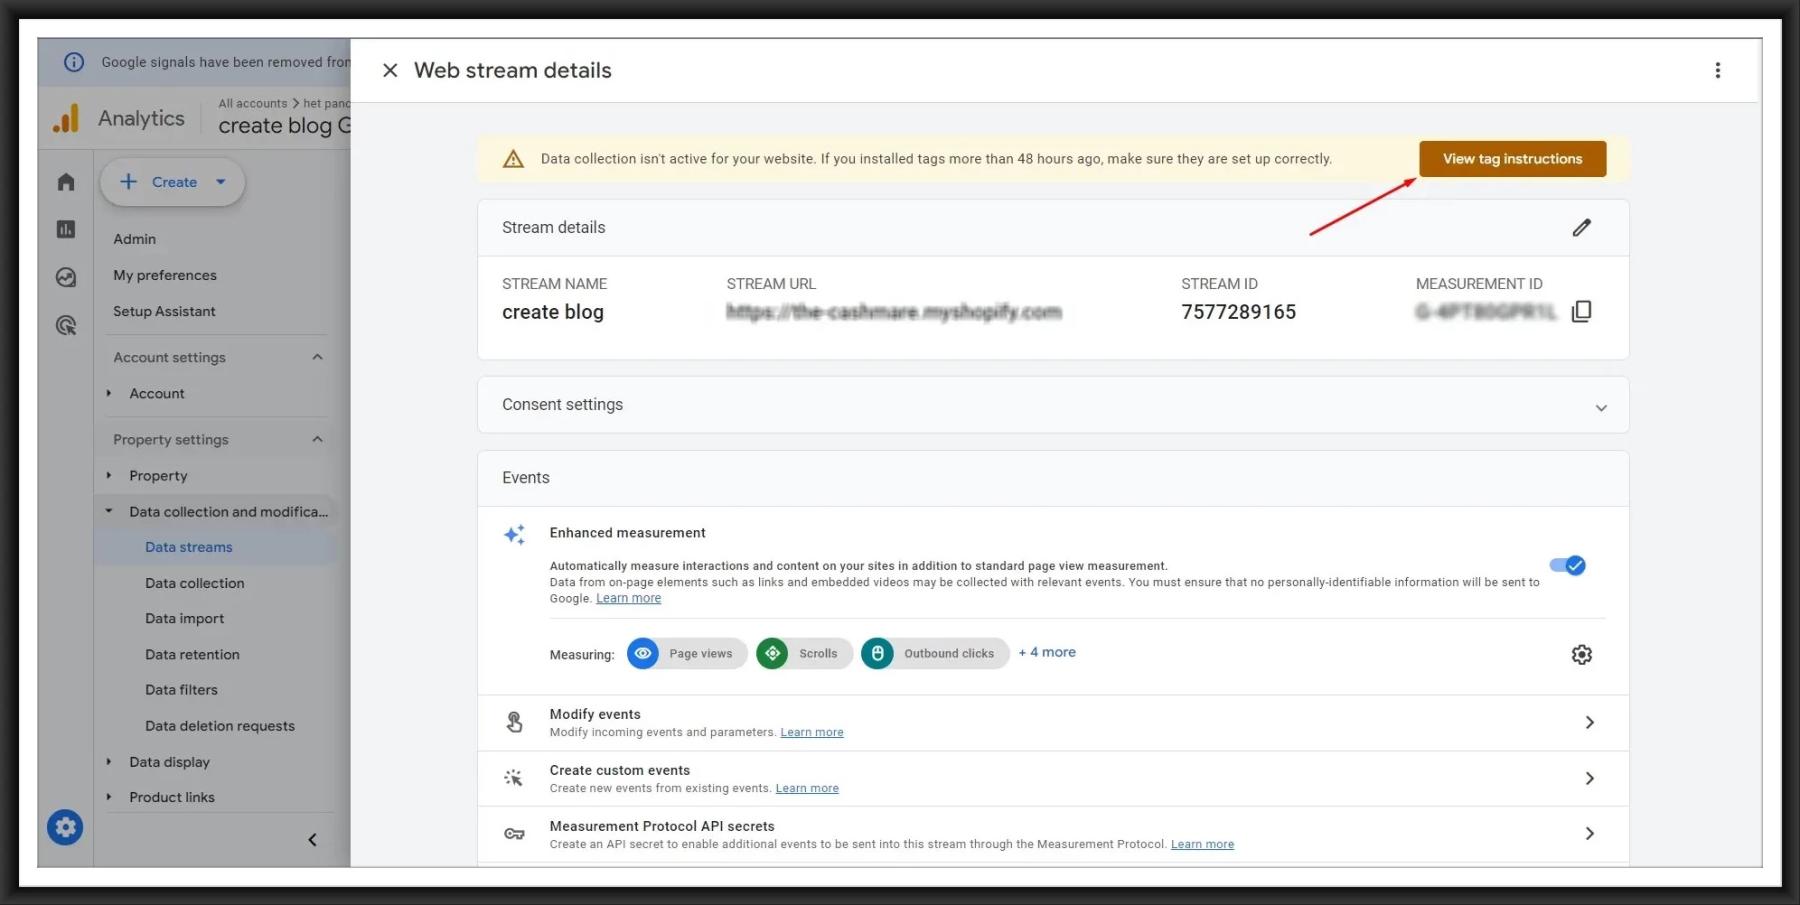
If this option is not available for you, you can scroll down and open it through the View tag instruction in the Google tag section.
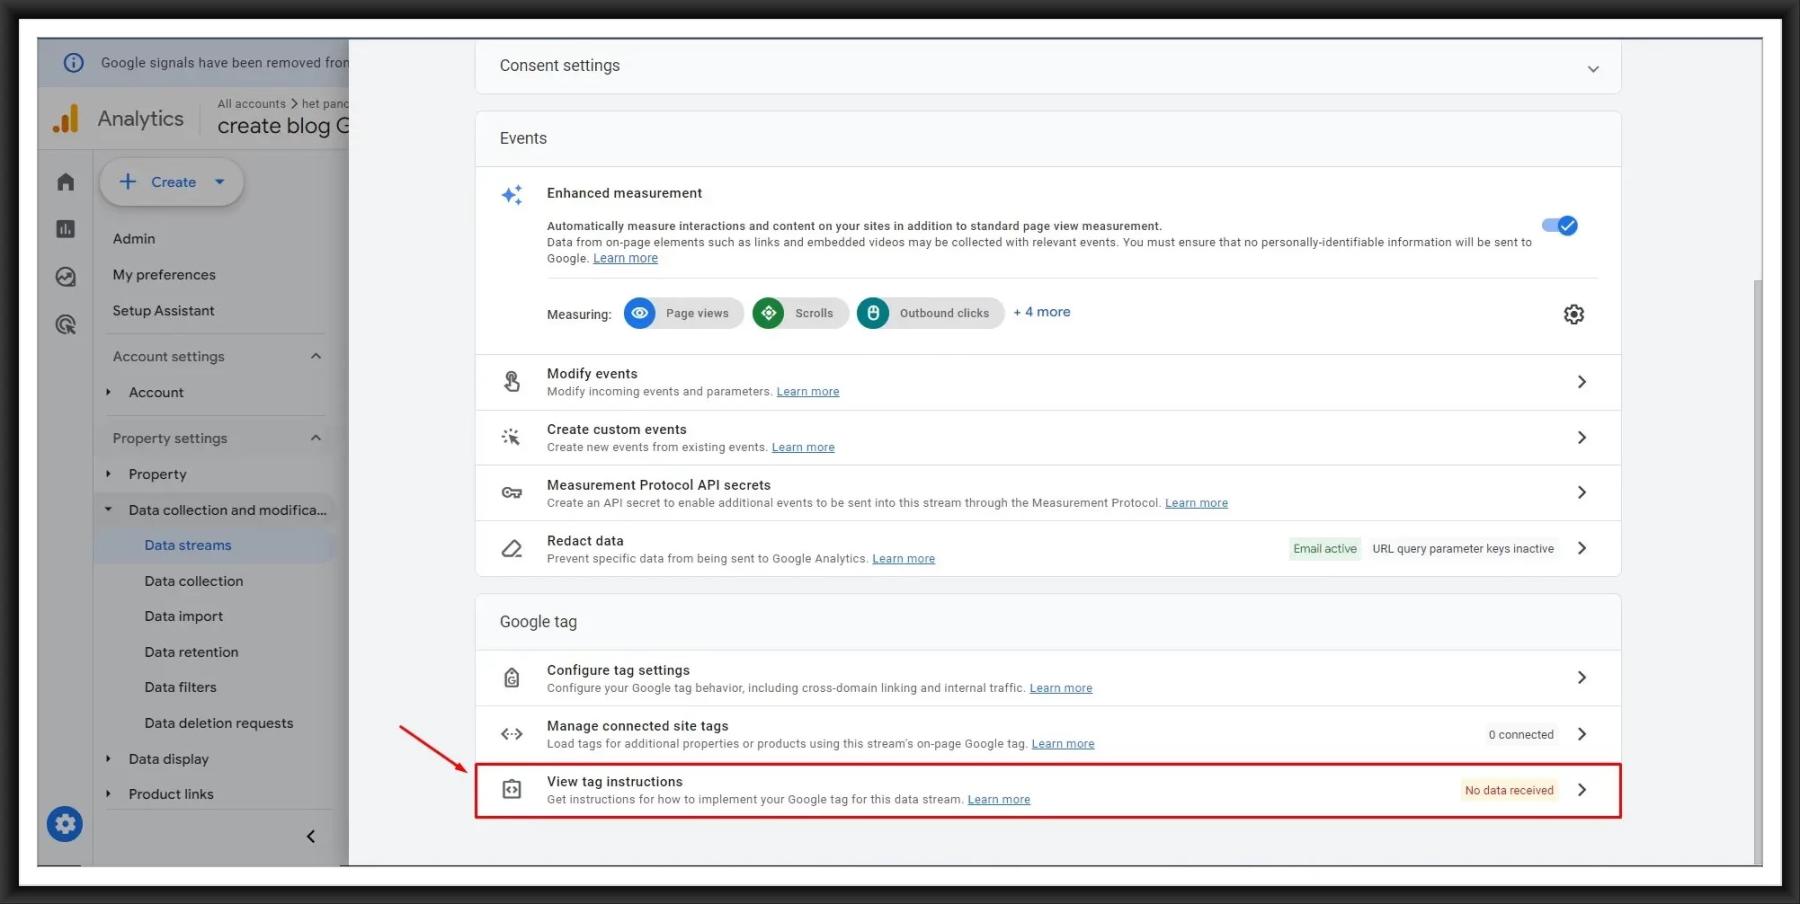
Shopify GA4: Integrate Google Analytics With Shopify
In the Installation instructions, you will get two options to install your Google tag. To connect Google Analytics to the Shopify store, you need to choose the “Install manually” option.
Now, copy this Google Analytics tracking code and go to your Shopify store.
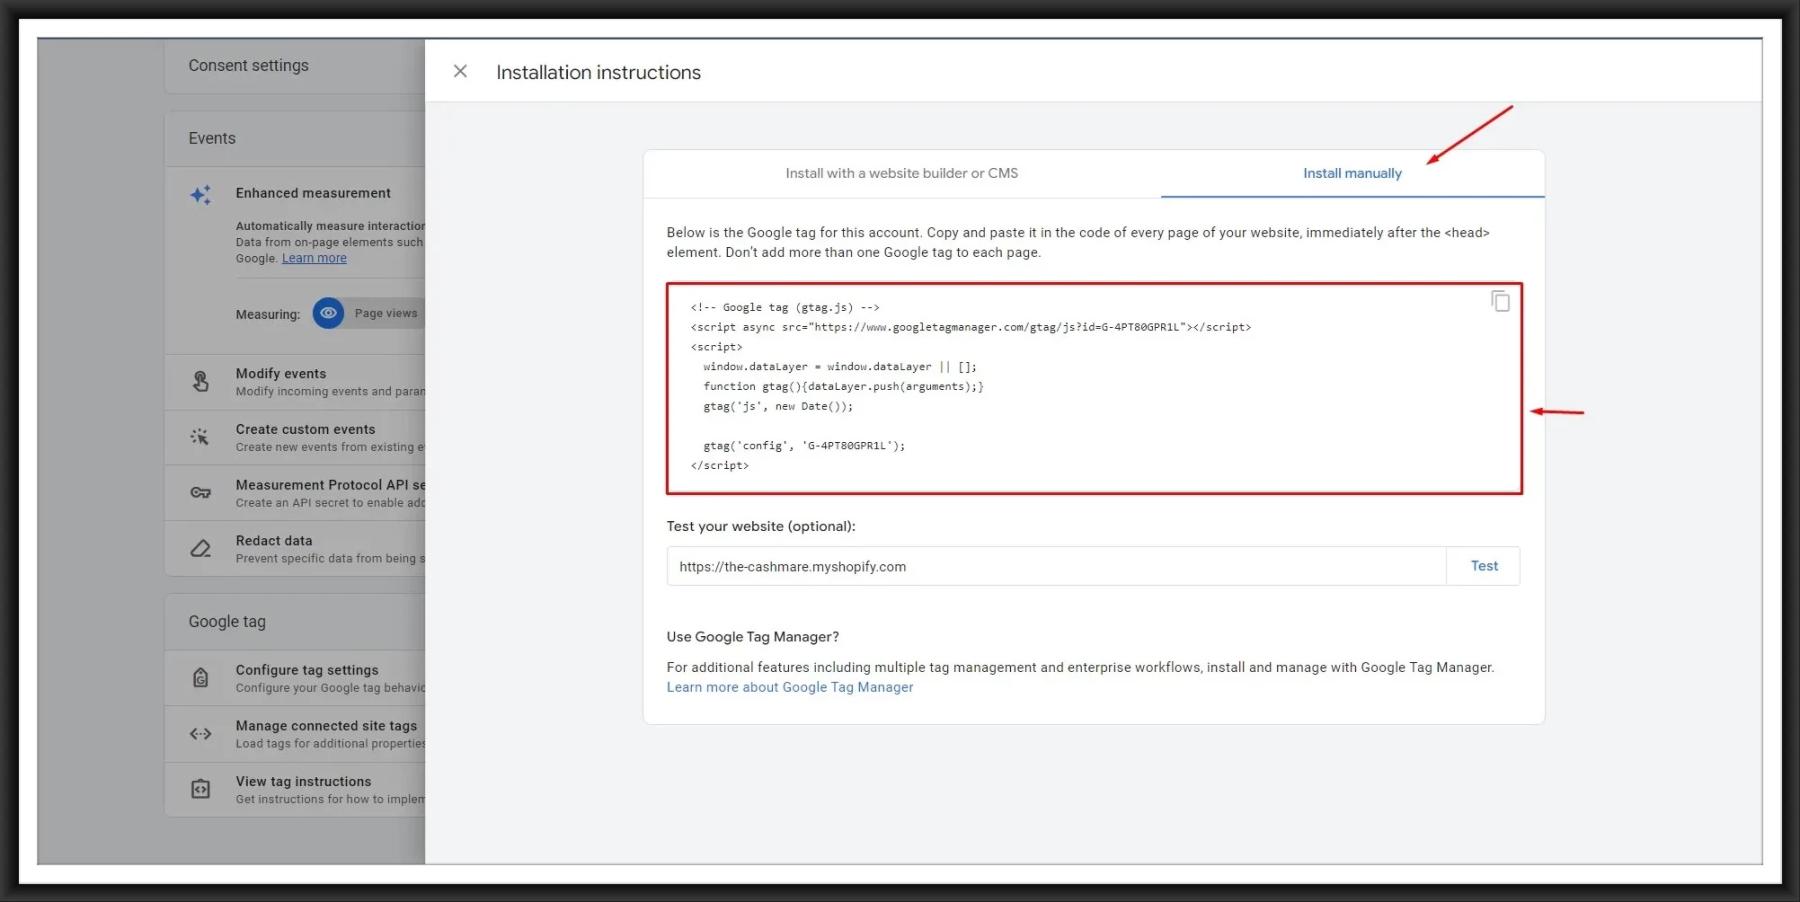
Choose your store’s current theme by going to Online Store > Themes in the Shopify admin.
Go to your development store and click on the online store under the sales channels selection.
Click on three dots in your current theme and select Edit Code.
In the “Layout” folder, find the `theme.liquid` file and make sure there are no Google tracking tags already added to the code.
If you don’t find any existing tracking code or file, paste the Google Analytics 4 tracking code either immediately after the <head> tag or just before the closing </head> tag. Click “Save”.
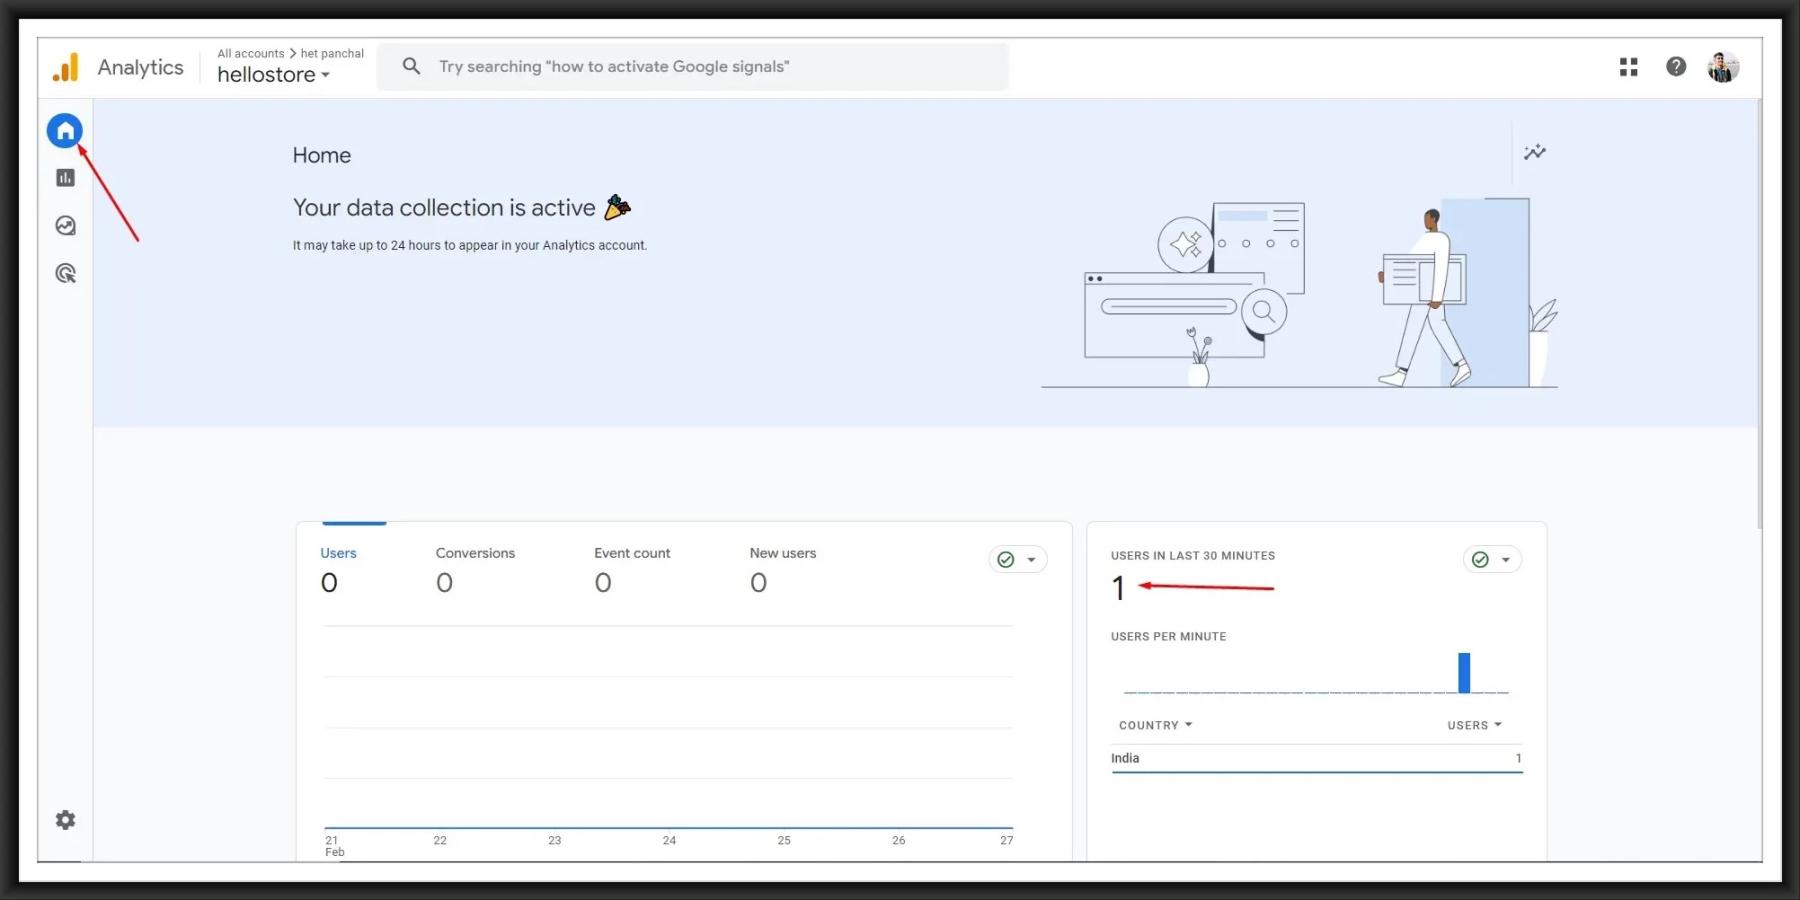
Navigate to the Google Analytics “Home” tab. As seen in the image above, you will get the success message “Your website’s data collection is active.” This indicates that Google Analytics has been successfully enabled in your online store.
Create a Property in Google Analytics
Use steps 2 through 7 above.
Next step:
Click here to check out Google Analytics 4 with Shopify: A Quick Guide Part 2.