
| Note: Click here, if you want to create a new Shopify app using the Remix template. |
What will you learn in this blog?
1. How to create routes in the Shopify remix app?
2. How to create Shopify app extensions in the Shopify remix app?
3. How to deploy changes to users as a new version of your app?
How to create routes in the Shopify remix app?
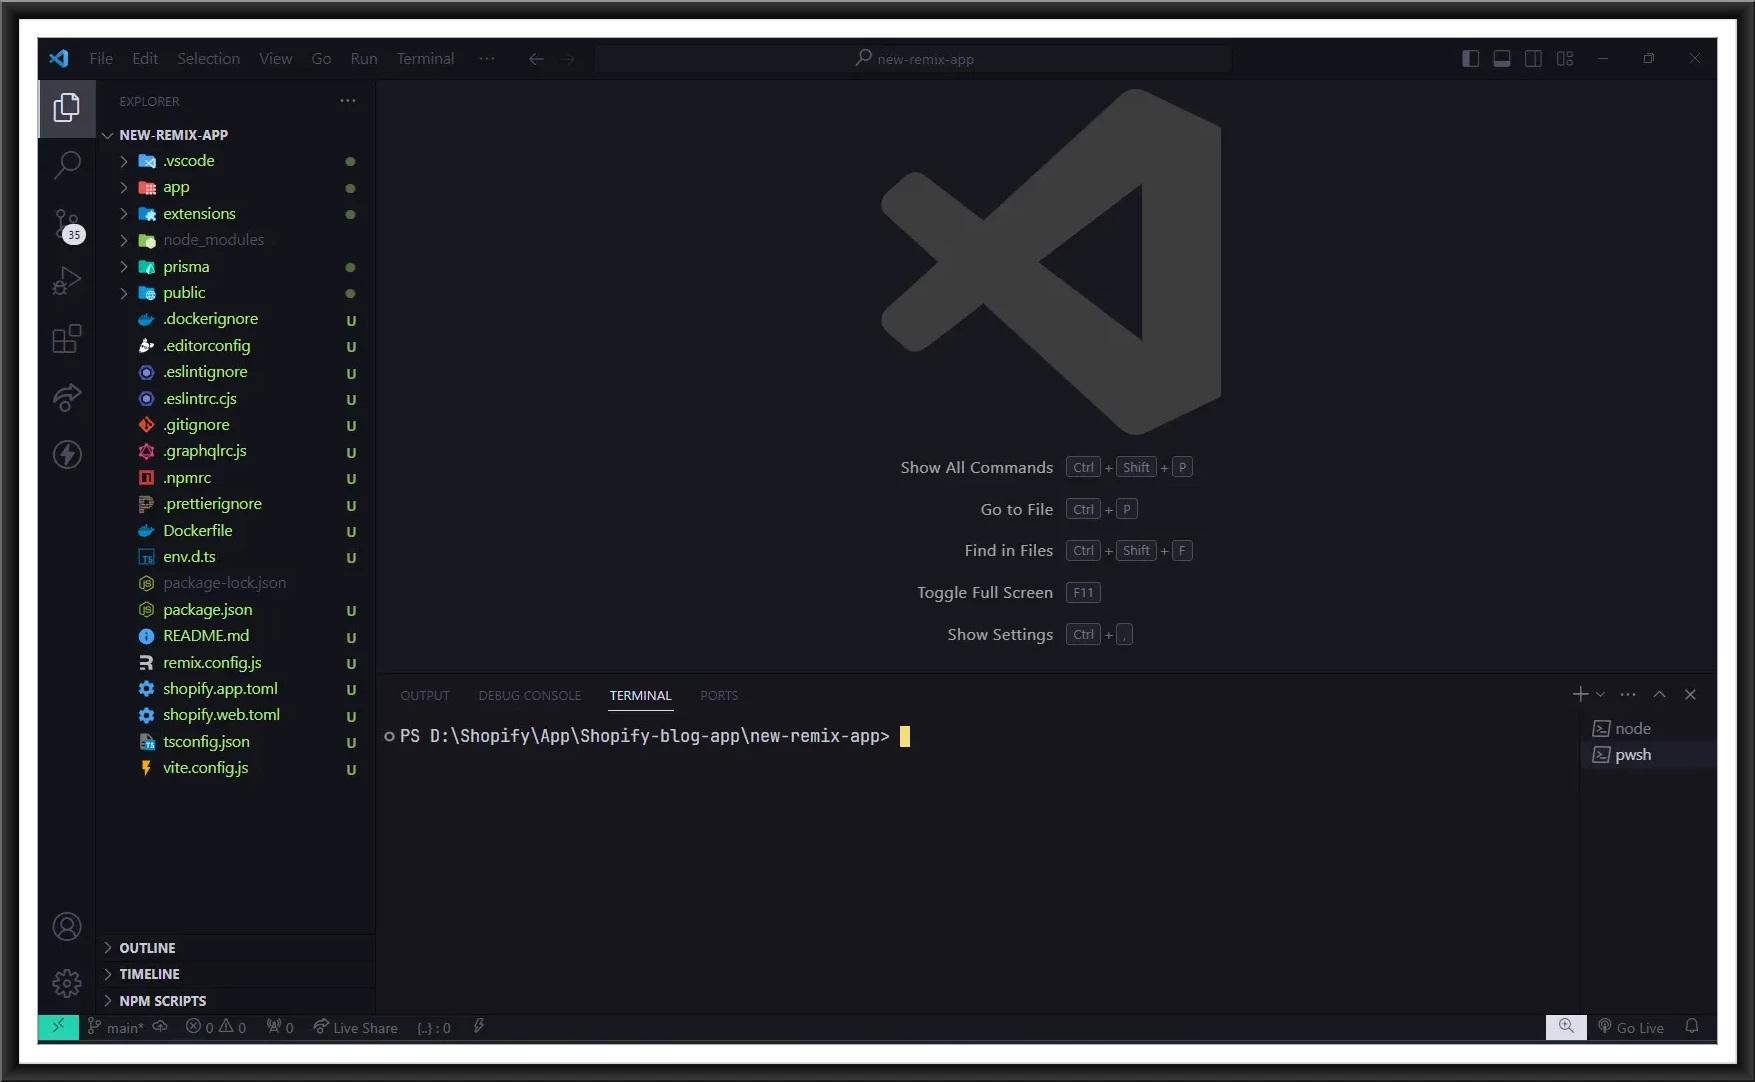
After creating a Shopify app using a remix template, Open your app in any code editor. We are using VSCode here.
Open a new terminal in VSCode and start a local server using the command:
| npm run dev — –reset |
To create a new page, go to app > routes.
As you see, some default files are already created like app.jsx, app._index.jsx, app.additional.jsx etc.
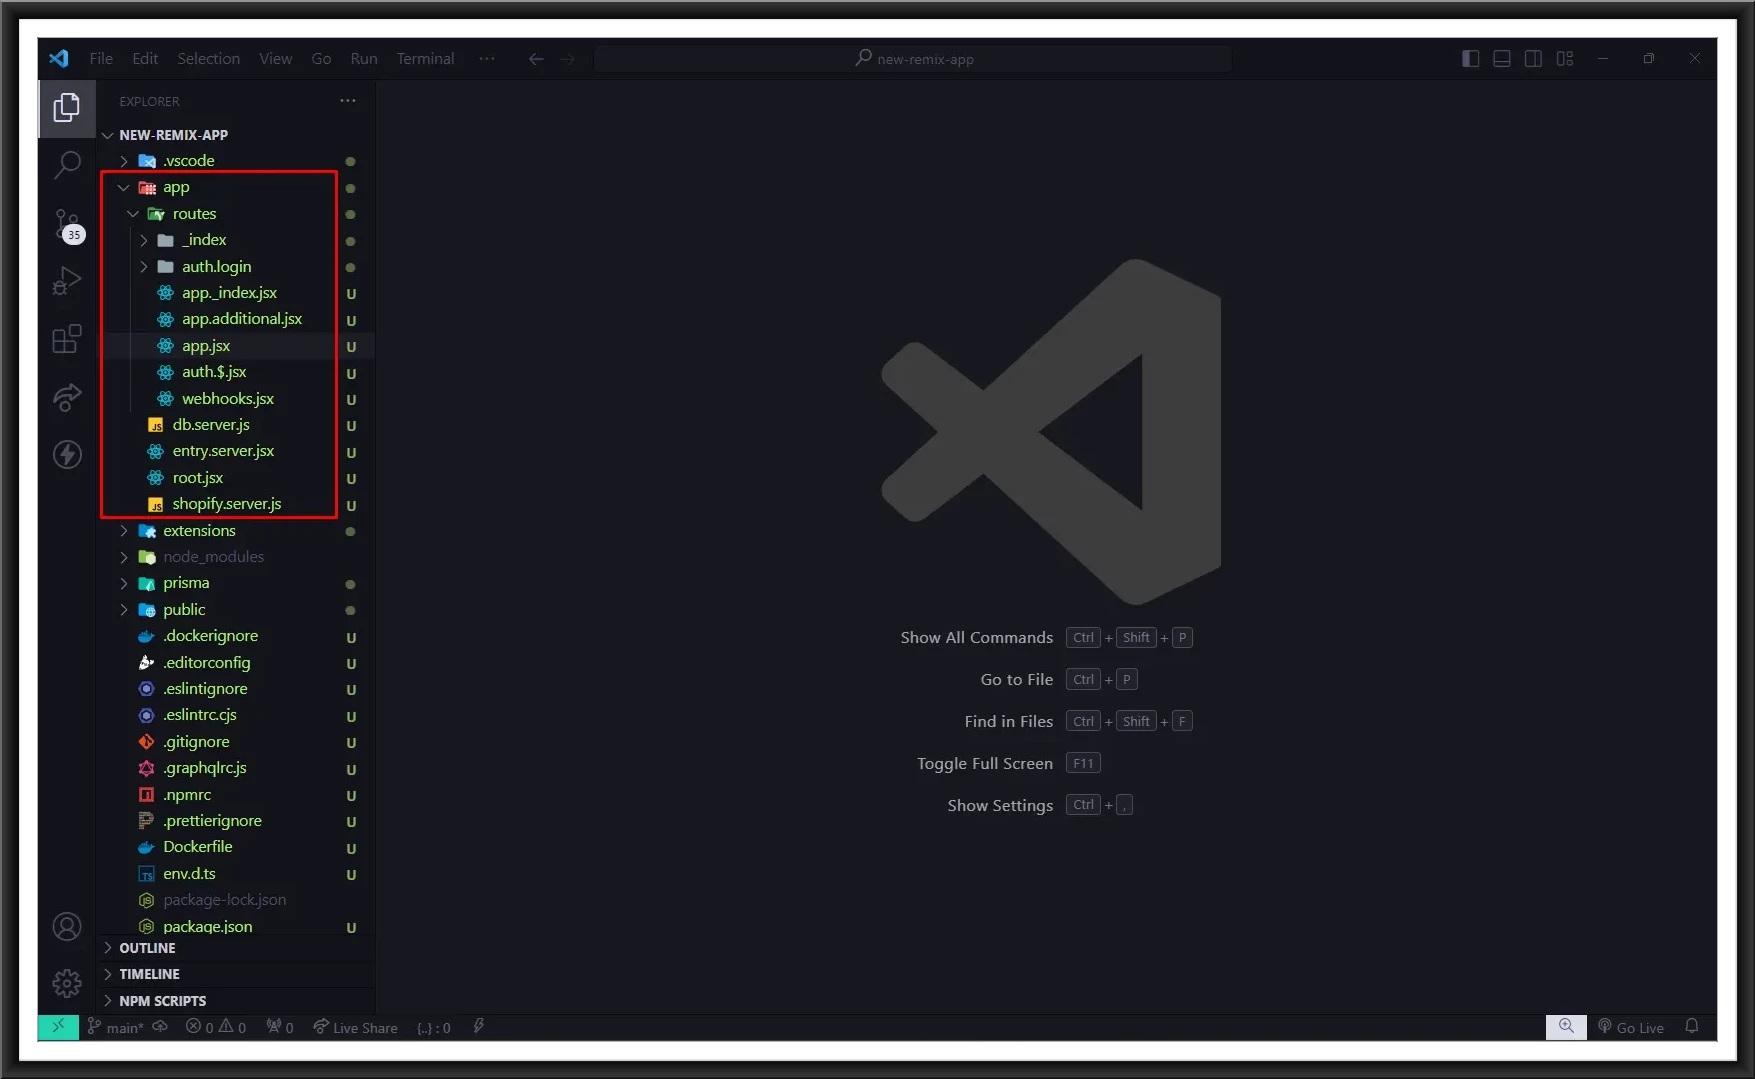
Create a new file in the routes folder with the proper name syntax app.{File Name}.jsx
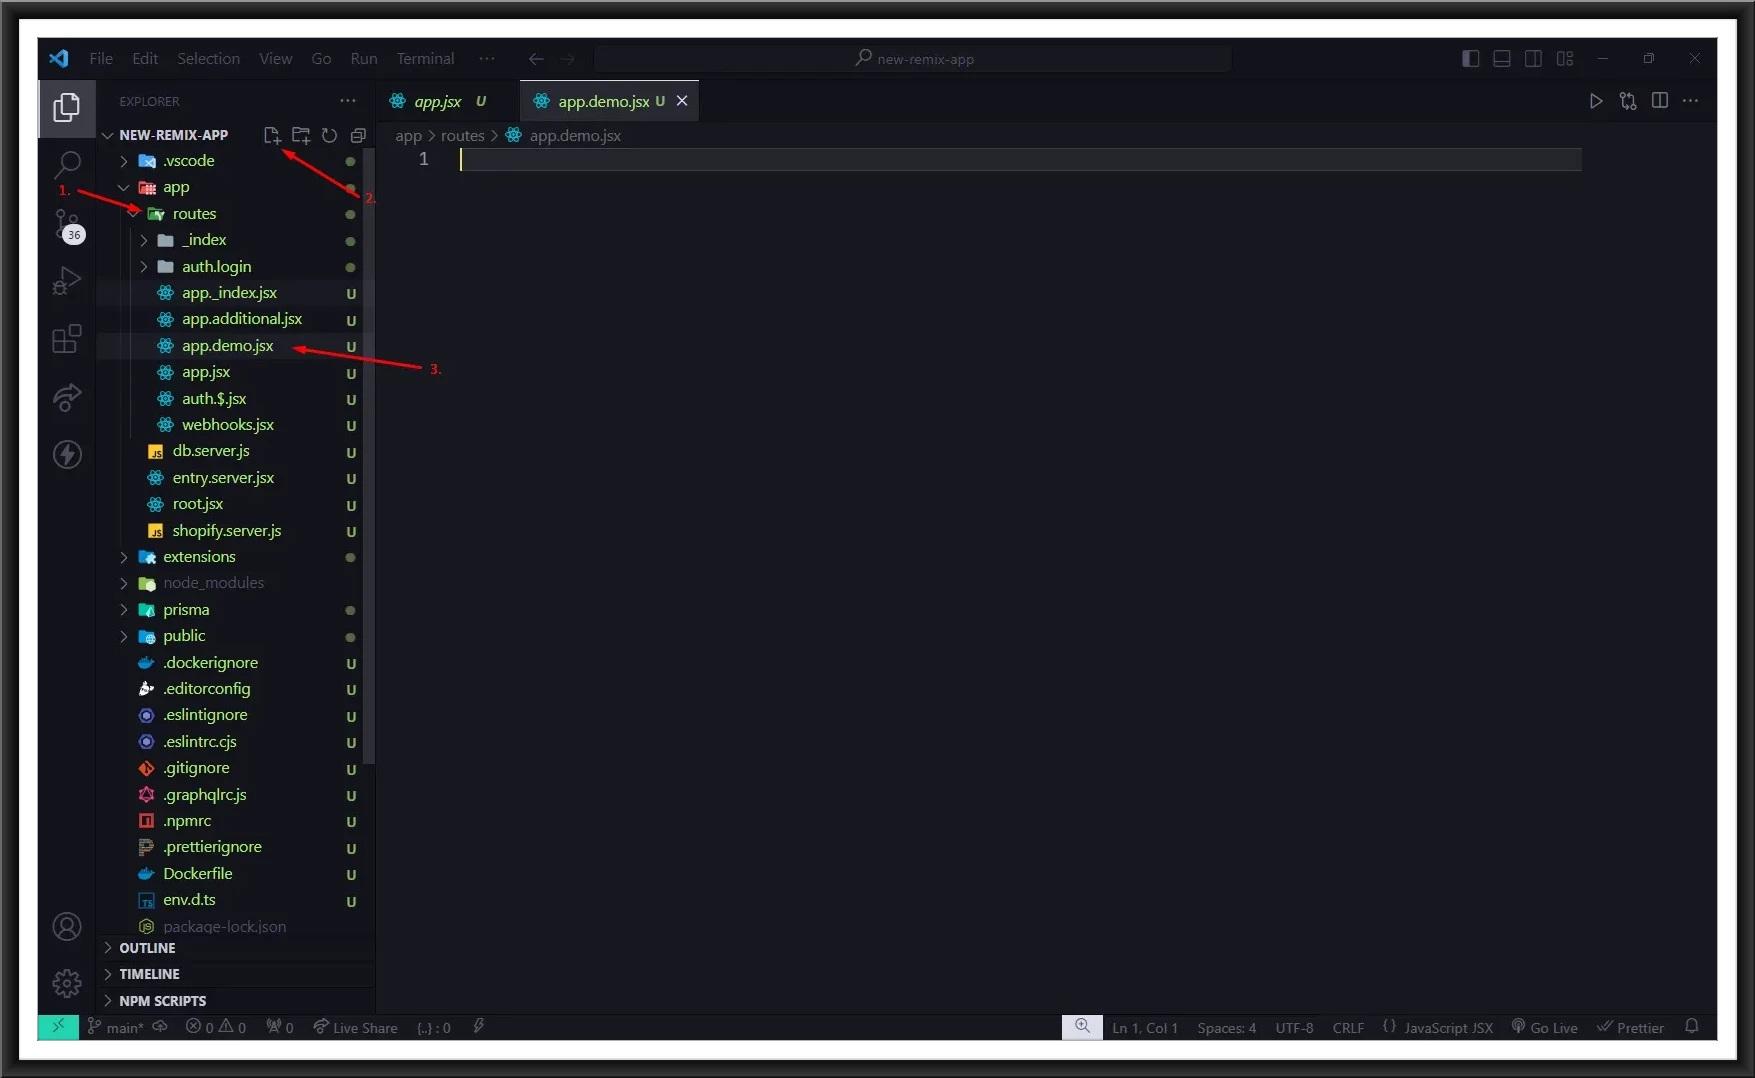
Now, let’s create a route for the newly created page to navigate in the app.
For that, Open the app.jsx file. Create a route as per the below image, save changes and open the app in your development store to see the changes.

You will see the new navigation option that you have just created at the left sidebar of the admin panel under the app section.
| Note: We recommend you use Polaris components to design your Shopify app. |

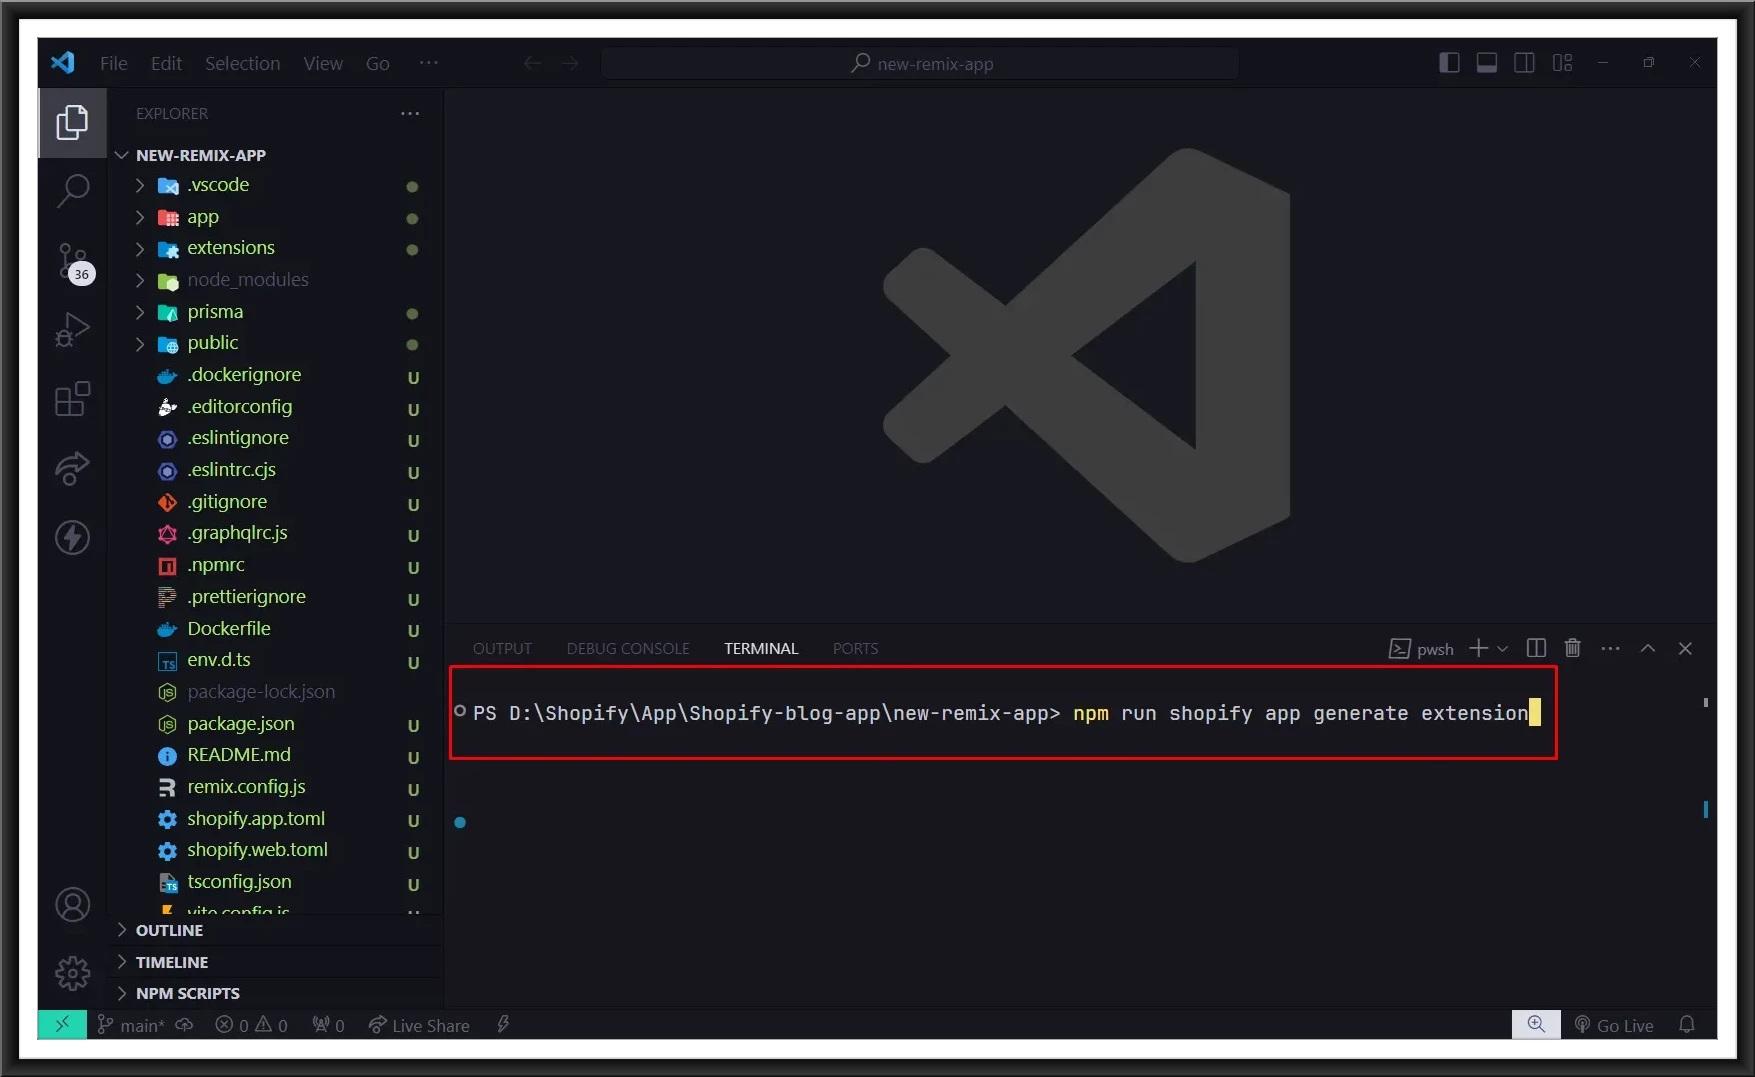
How to create Shopify app extensions in the Shopify remix app?
To create a New App Extension in Shopify, open the terminal, go to your app directory and run the command:
| npm run shopify app generate extension |
| Note: Before you start this process make sure you have fulfilled the below requirements.
• You’ve created a Partner account. • You’ve created a development store that uses generated test data. • You’ve created an app that uses Shopify CLI 3.0 or higher. • You’ve installed an Online Store 2.0 theme, such as Dawn, that uses JSON templates and supports app blocks. • You’ve installed the additional project dependencies (Ruby and Bundler). • You understand the theme app extensions framework. |
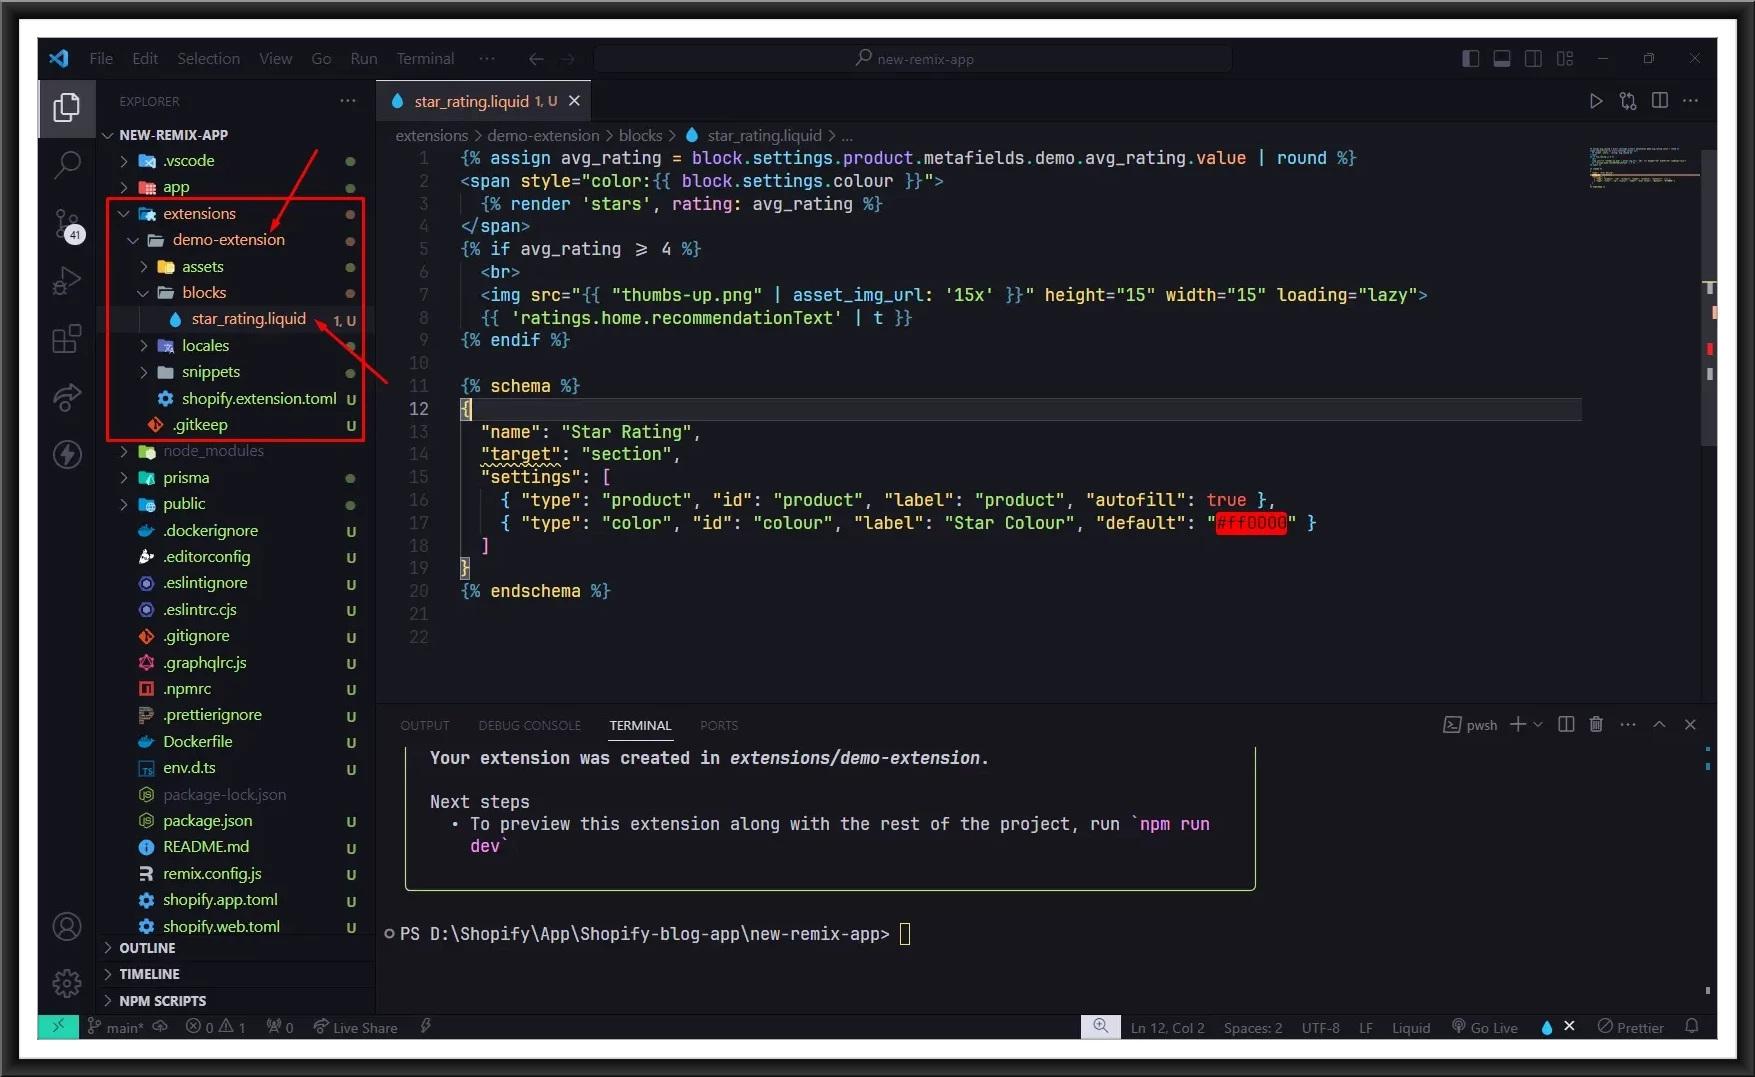
Select the type of extension you want to create and give a name for your extension. We are going to create a new `Theme app extension´ for our online store here.

Your app extension was created successfully. Open the extensions folder and you can see your extension here. Now you can add assets, blocks and snippets from here. As you can see, one example has already been created.
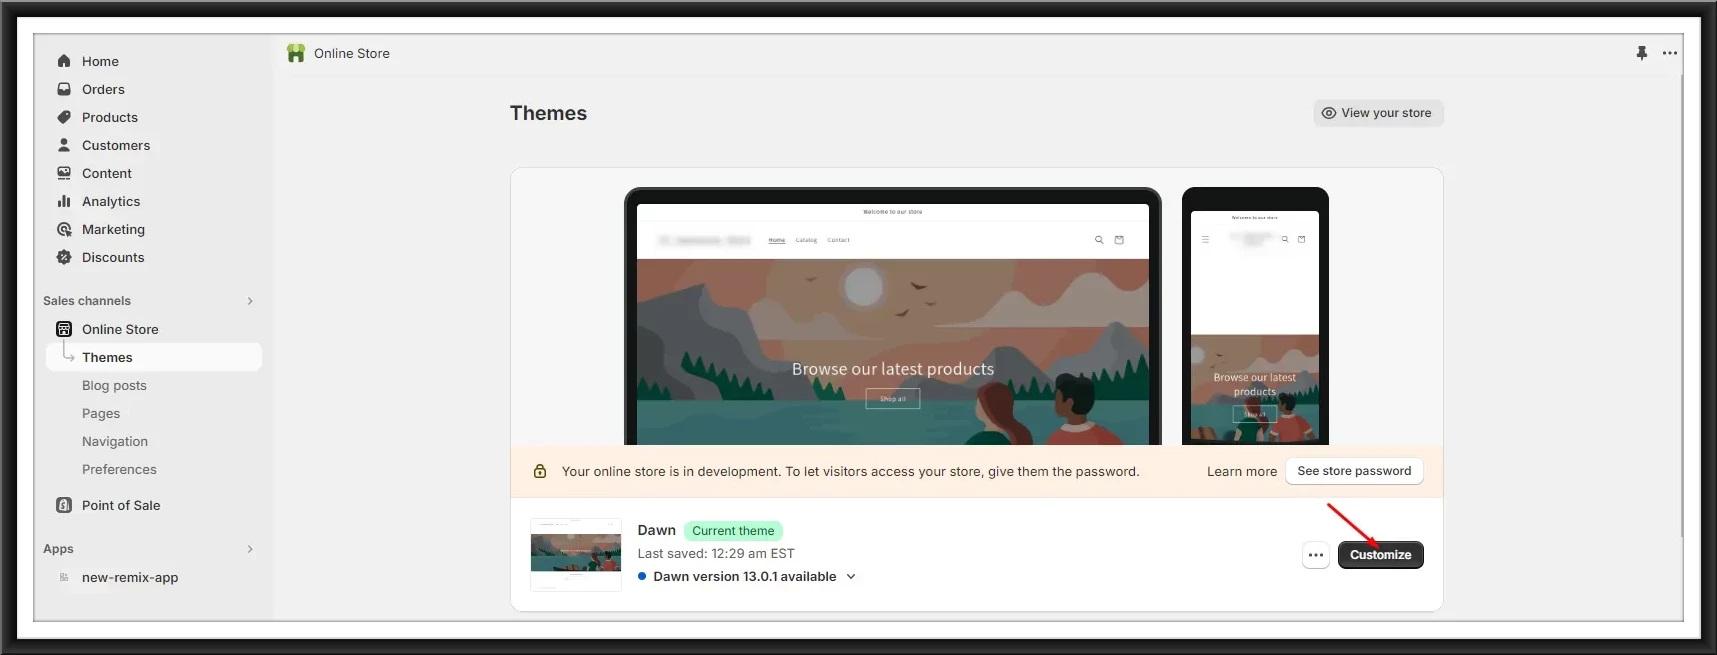
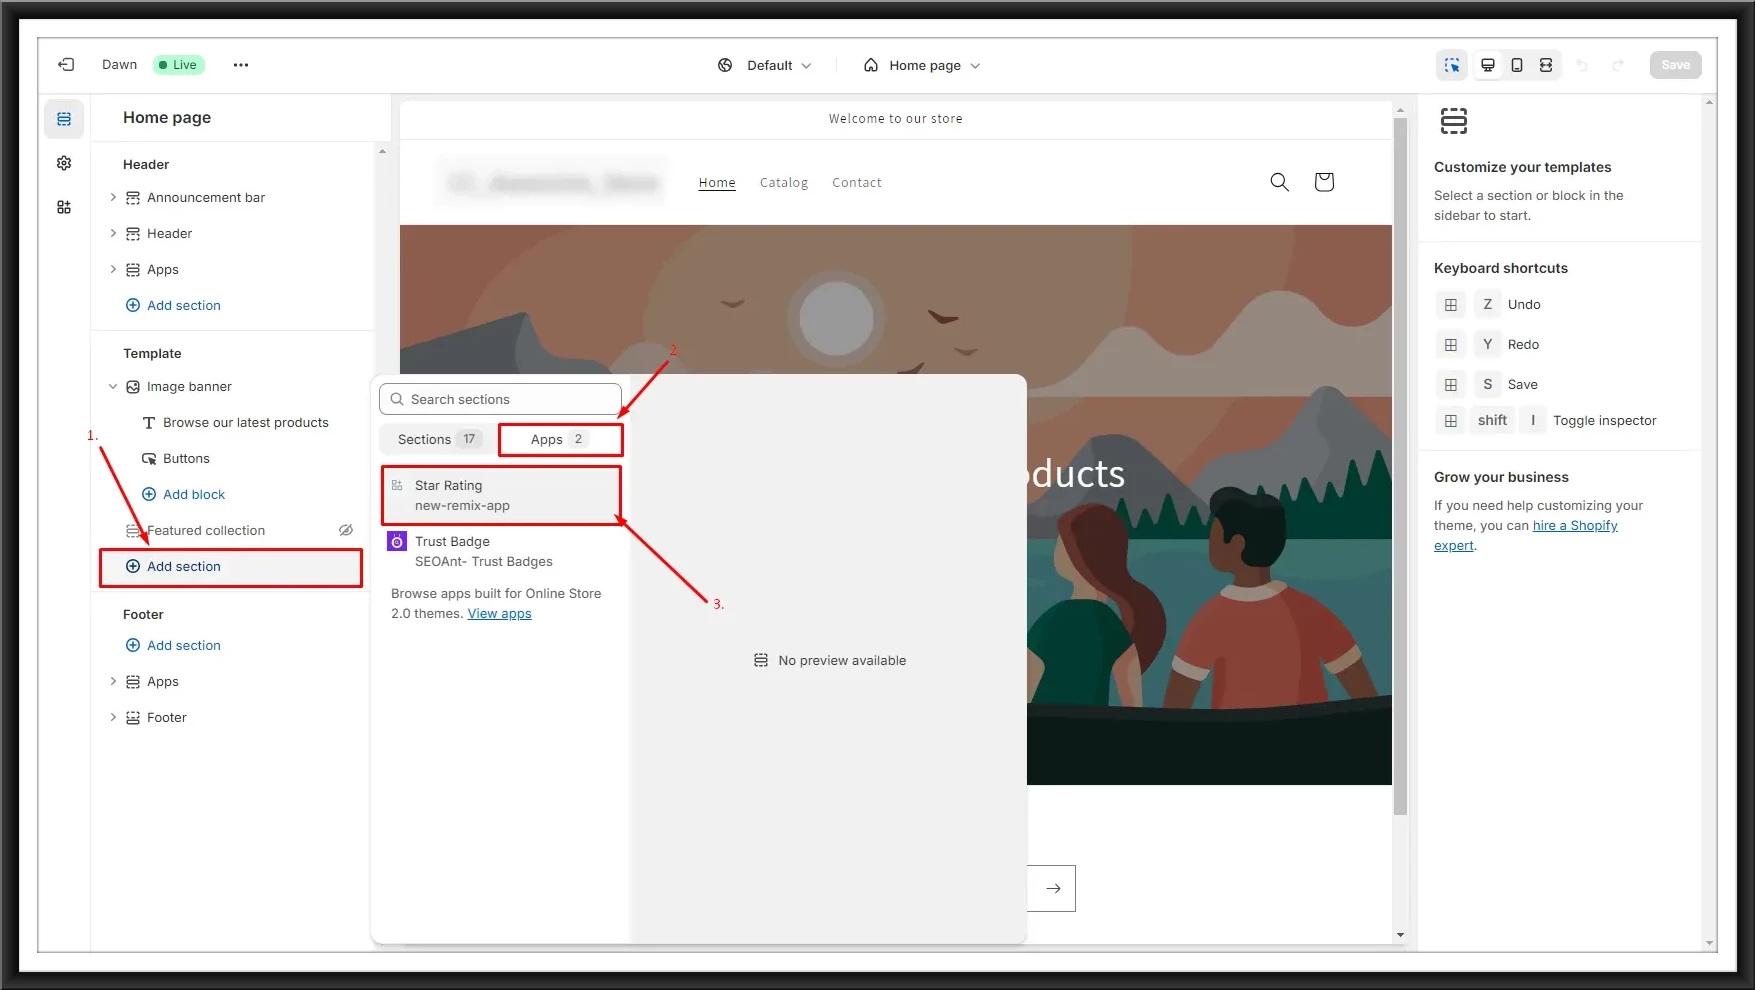
To preview this extension on your theme, run the command npm run dev. Then go to your development store, open your Theme editor > Add section > Apps > Select your extension.
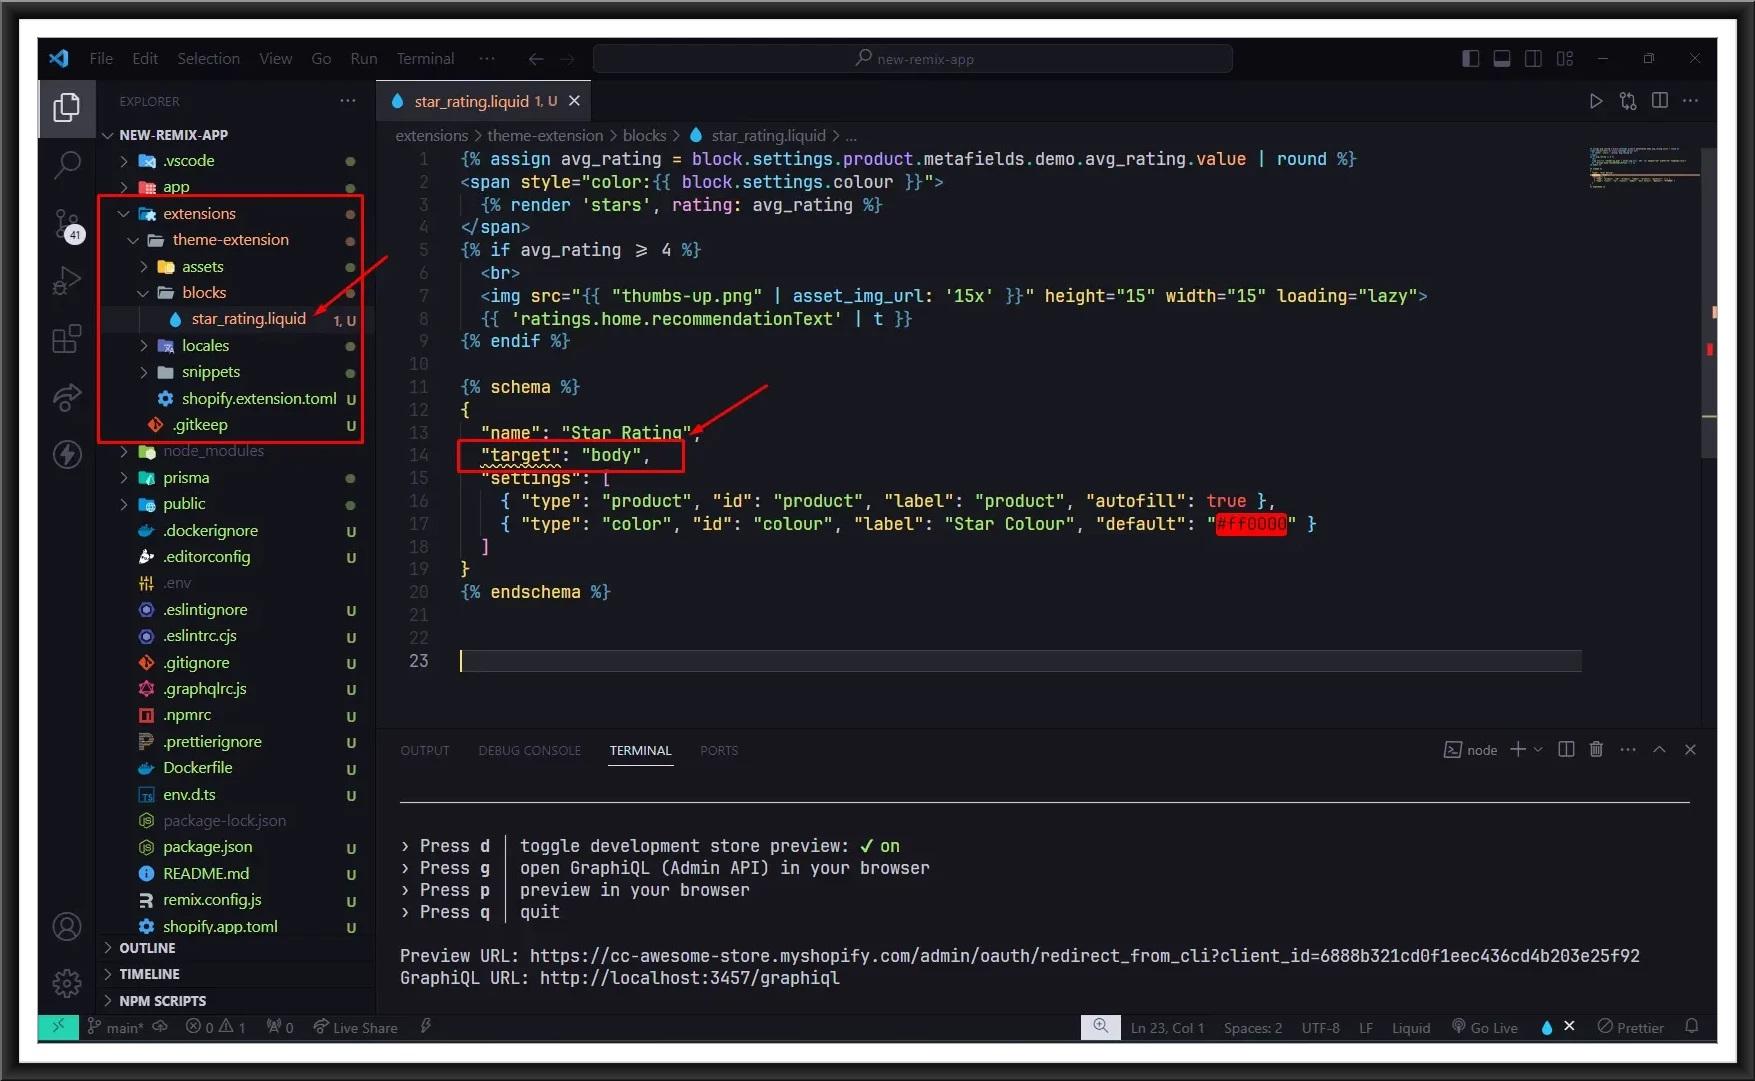
We have created an app block extension here. To create an app embed block extensions, go to your code, Extension folder > Your created extension > blocks > liquid file and change the target from `section to body´ in the schema.
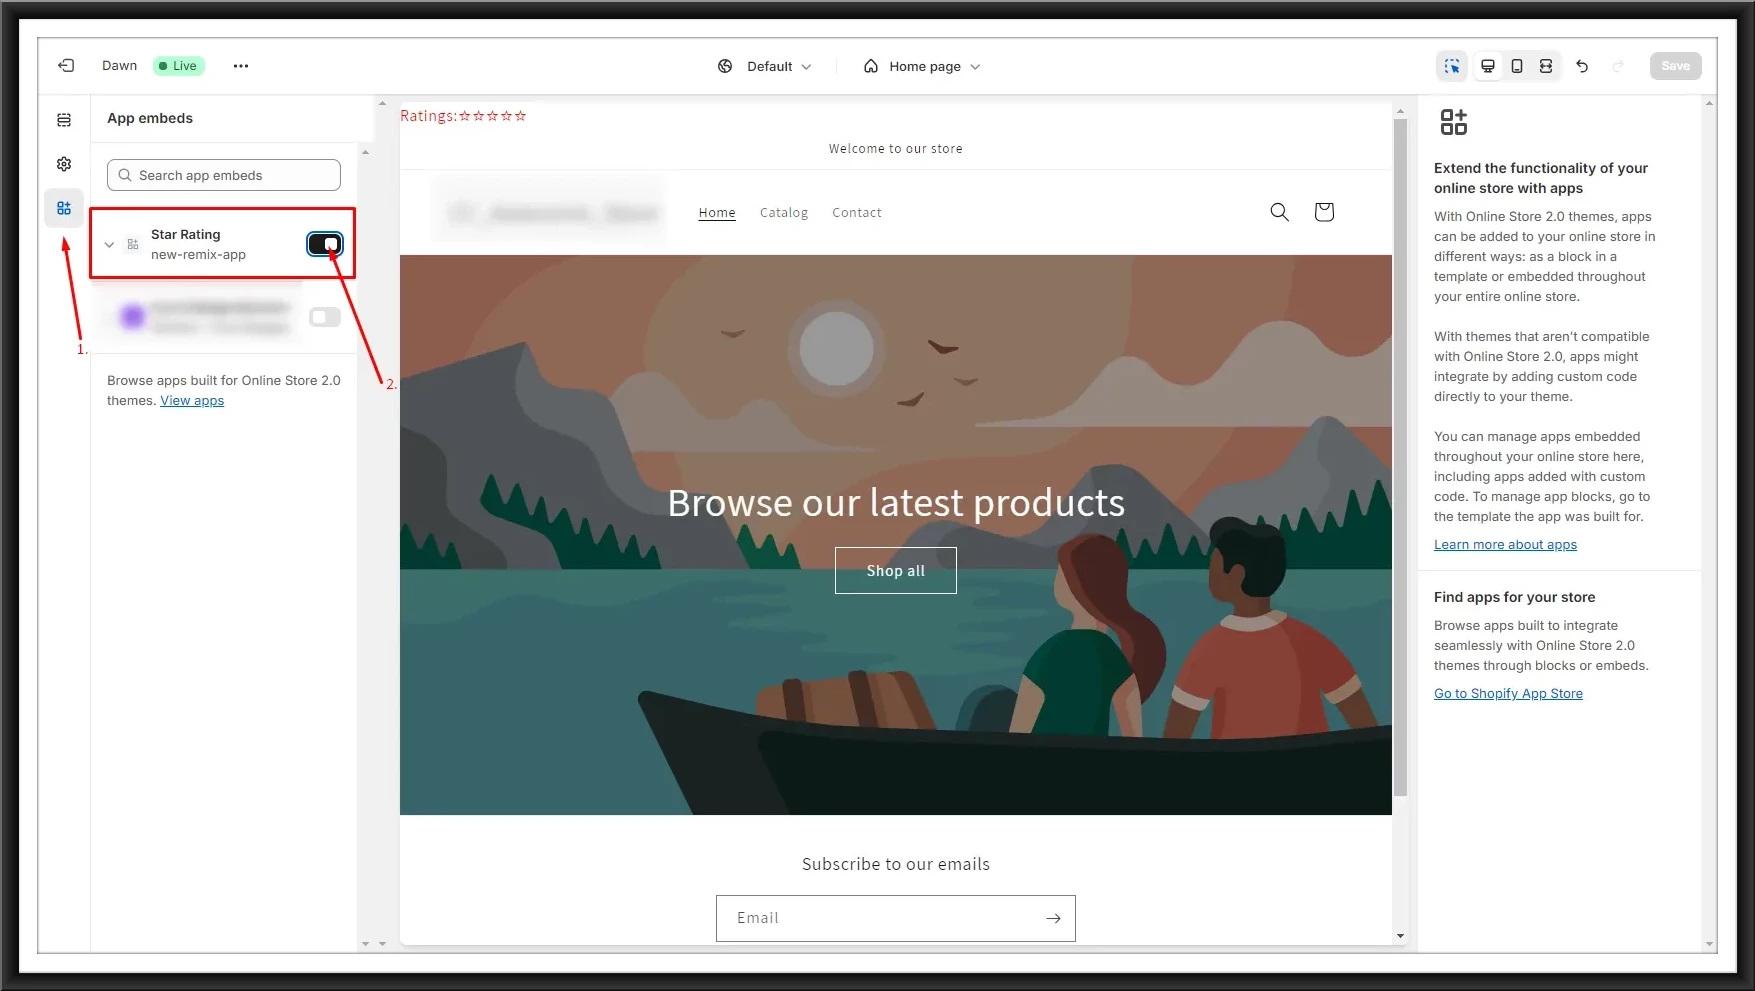
Now run the local server again using npm run dev and go to your development store, open theme editor. Now open the app embeds tab from the left side of the theme editor. Select your extension and enable it to be used.
How to deploy changes to users as a new version of your app?
After creating and proper testing of your extensions you need to deploy changes to the users as a new version of your app. For that, open the terminal, navigate to your app directory and run the below command:
| npm run deploy |
|
Note: If you just want to create a new version of your app but do not want to release it to users then run this command:
|
Now, your users can see the changes by updating your app.
Next step:
When you are ready with your app, you need to host your app before deploying it for review.
Click here to check our blog on How to host the Shopify app on the fly.io server for deployment.