Welcome to CodeCrew Infotech


How To Create And Modify Locations on Shopify
When running an internet business on Shopify, it's far considered important to have places that are accessible for the clients to each your products simpler. Herewith our function, you may effortlessly create your new, custom-designed, specific region for your online Shopify store and you could also modify it based on what you like your store's locations to turn out.
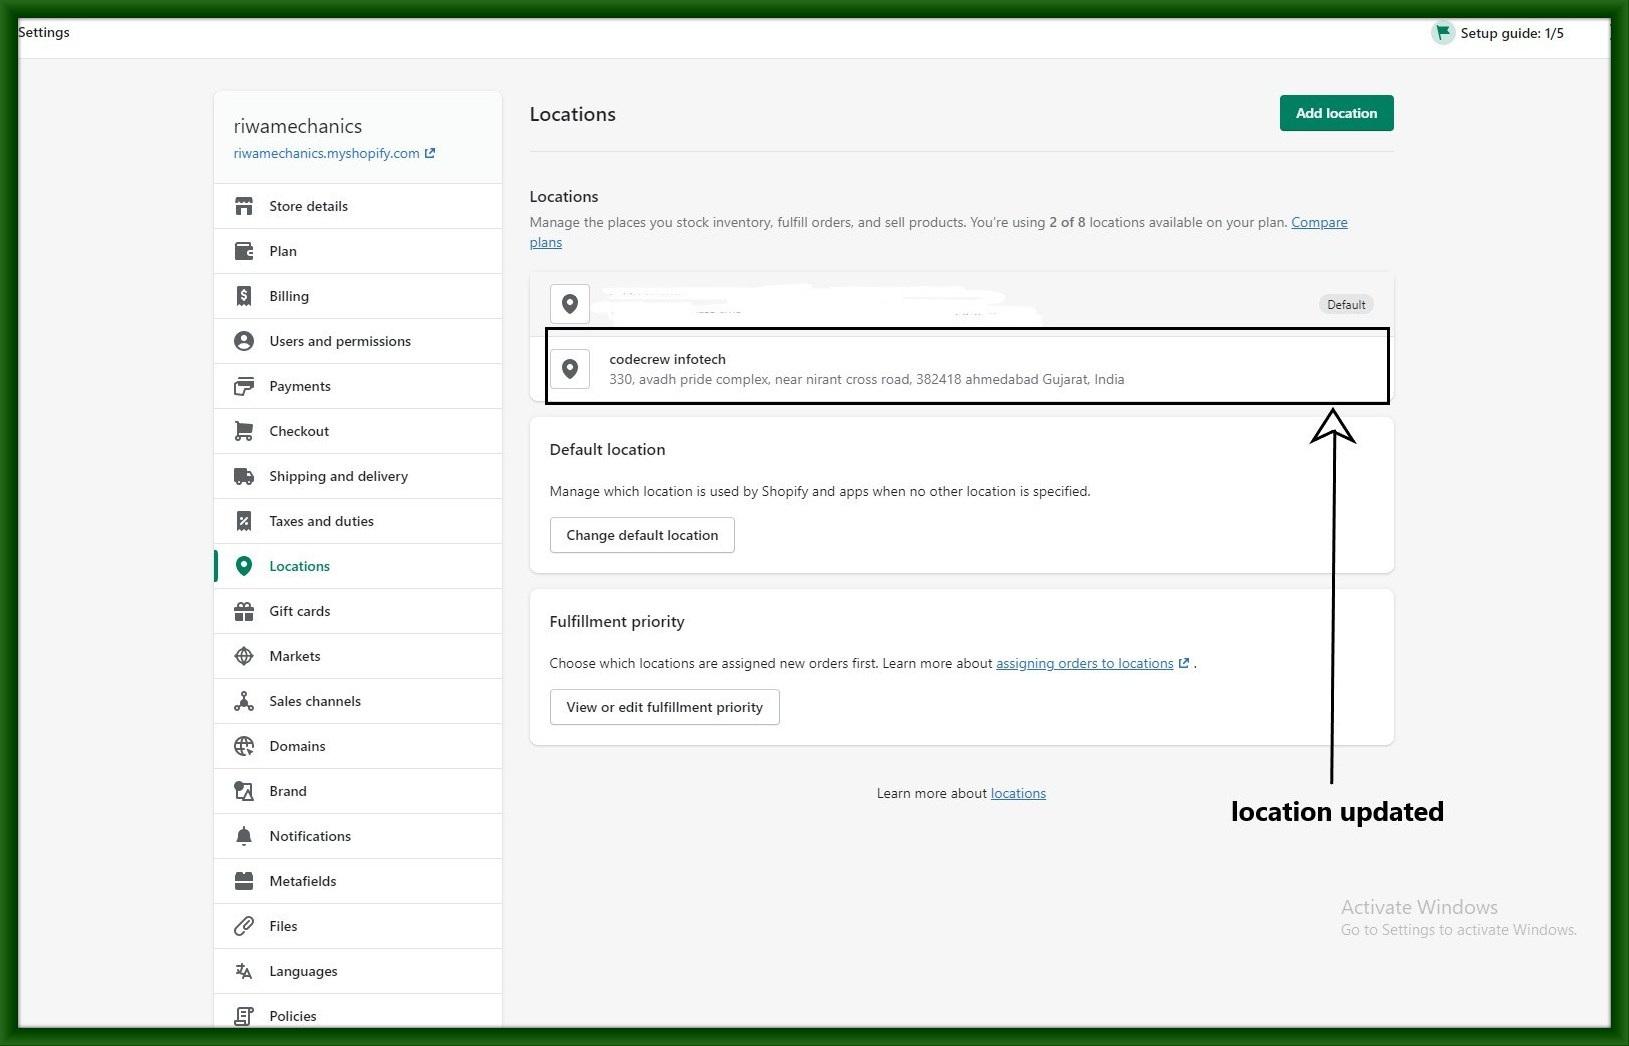
Step 1: Click on Locations.
After logging into your Shopify admin account, from your homepage, click on the Settings button on the bottom left of your page. Then click on the Locations option.

Step 2: Add location.
Upon entering the Locations page, you will see a blue Add location button on the right side of your page. If you want to add a new location for your Shopify online store, click on the button.

Step 3: Enter details.
In the new location's details adding a page, enter the required information in each field such as the location's name and address. Make the name unique so that it will be more appealing to the customers' eyes.

Step 4: Fulfill online orders.
Under the Location name field is a checkbox called Fulfill online orders from this location. If you check the box, you confirm that you want the products from this location to be available for online customers.

Step 5: Save changes.
Click on the Save button from both your page's top left or your page's bottom left to finish adding the new location for your Shopify online store.
You may also like