
Introduction:
Welcome to the world of React.js! In this tutorial, we’ll guide you through the basics of React and help you build your first React web-application. Whether you’re a beginner or looking to refresh your skills, this step-by-step guide will get you started on your React journey.
Table of Contents:
1. What is React?
2. Understanding the Benefits of React.js Over Vanilla JavaScript?
3. Comparing React.js to Angular and Vue.js: Reasons for Choosing React
4. How to install React?
5. What is JSX? and how it works?
6. What is Component?
7. What is the lifecycle of a component?
8. What is Props?
9. How to styling the component?
10. What is event handling in React?
11. What is conditional rendering in React, and how is it achieved? Provide examples of conditional rendering techniques in React.
12. How can you render lists in React using the map method, and what is the importance of keys in React?
Let’s Get Started
1. What is React.js?
React.js is a JavaScript library used to build user interfaces for web applications, making it easier to create interactive and dynamic elements on websites.
Let’s break it down into simple terms:
React.js is like a toolbox for web developers. It’s a special set of tools (a library) in JavaScript that helps them create cool, interactive parts of websites. With React, developers can easily build things like buttons, forms, and other dynamic elements that make websites fun to use.
React is a popular technology that improves the experience and functionality of websites. Many well-known websites use React, such as Facebook, Instagram, and Netflix.
2. Why do people choose to use React instead of Vanilla JavaScript?
People choose to use React because it helps them build websites more efficiently. While JavaScript is the language used to create interactivity on websites, React provides helpful tools and patterns that make it easier to organize and manage code. With React, developers can create reusable components, handle complex UI interactions, and efficiently update the user interface when data changes. This makes it faster and more convenient to build modern, interactive web applications.
3. Why do people choose React over Angular or Vue.js?
People often choose React over Angular or Vue.js for several reasons. React offers a more flexible and lightweight approach to building user interfaces, allowing developers greater control over the structure and behavior of their applications. Additionally, React’s component-based architecture makes it easier to create reusable and modular code, which can lead to improved maintainability and scalability of projects. Furthermore, React’s large and active community, along with its extensive ecosystem of libraries and tools, provides developers with ample resources and support to build complex and high-performance web applications. Overall, while Angular and Vue.js have their own strengths, React’s simplicity, flexibility, and robust ecosystem make it a preferred choice for many developers.
4. How to Install React?
To install React, you will need Node.js and npm (Node Package Manager), which come together when you install Node.js. Here’s a step-by-step guide:
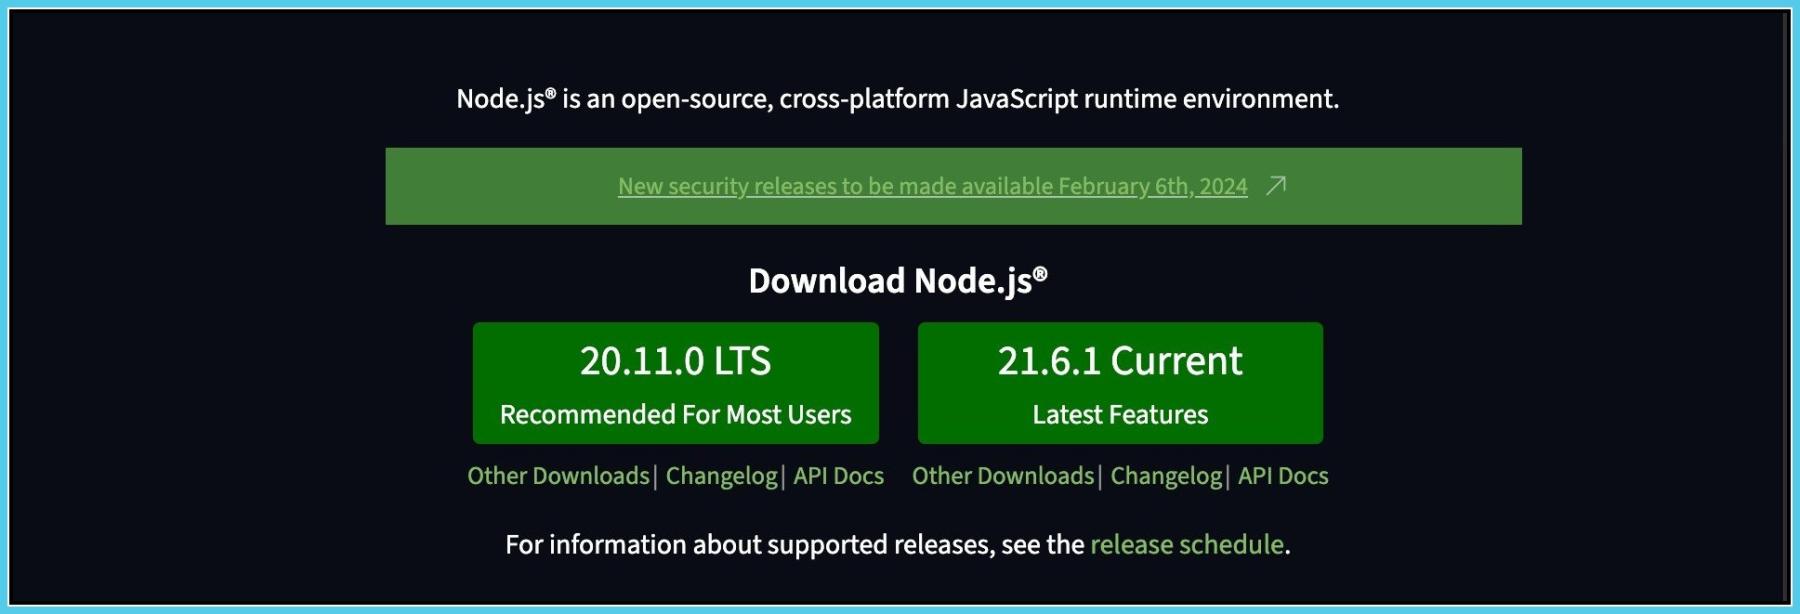
Step 1: Install Node.js:
Visit the official Node.js website: https://nodejs.org/
When you click the link, the following page will be displayed and need to download the LTS version (Long-Term Support), which is recommended for most users.
Step 2 : After Installation:
Open a terminal or command prompt.
Run the following commands to verify that Node.js and npm are installed:
node – v
npm – v
If installed correctly, you’ll see version numbers for both Node.js and npm.

Step 3 : Now, Let’s Create our First React App:
Once Node.js and npm are installed, you can use the following command to create a new React app. Open the terminal or command prompt and run:
npx create-react-app my-demo
Replace “my-demo” with the desired name for your React app.
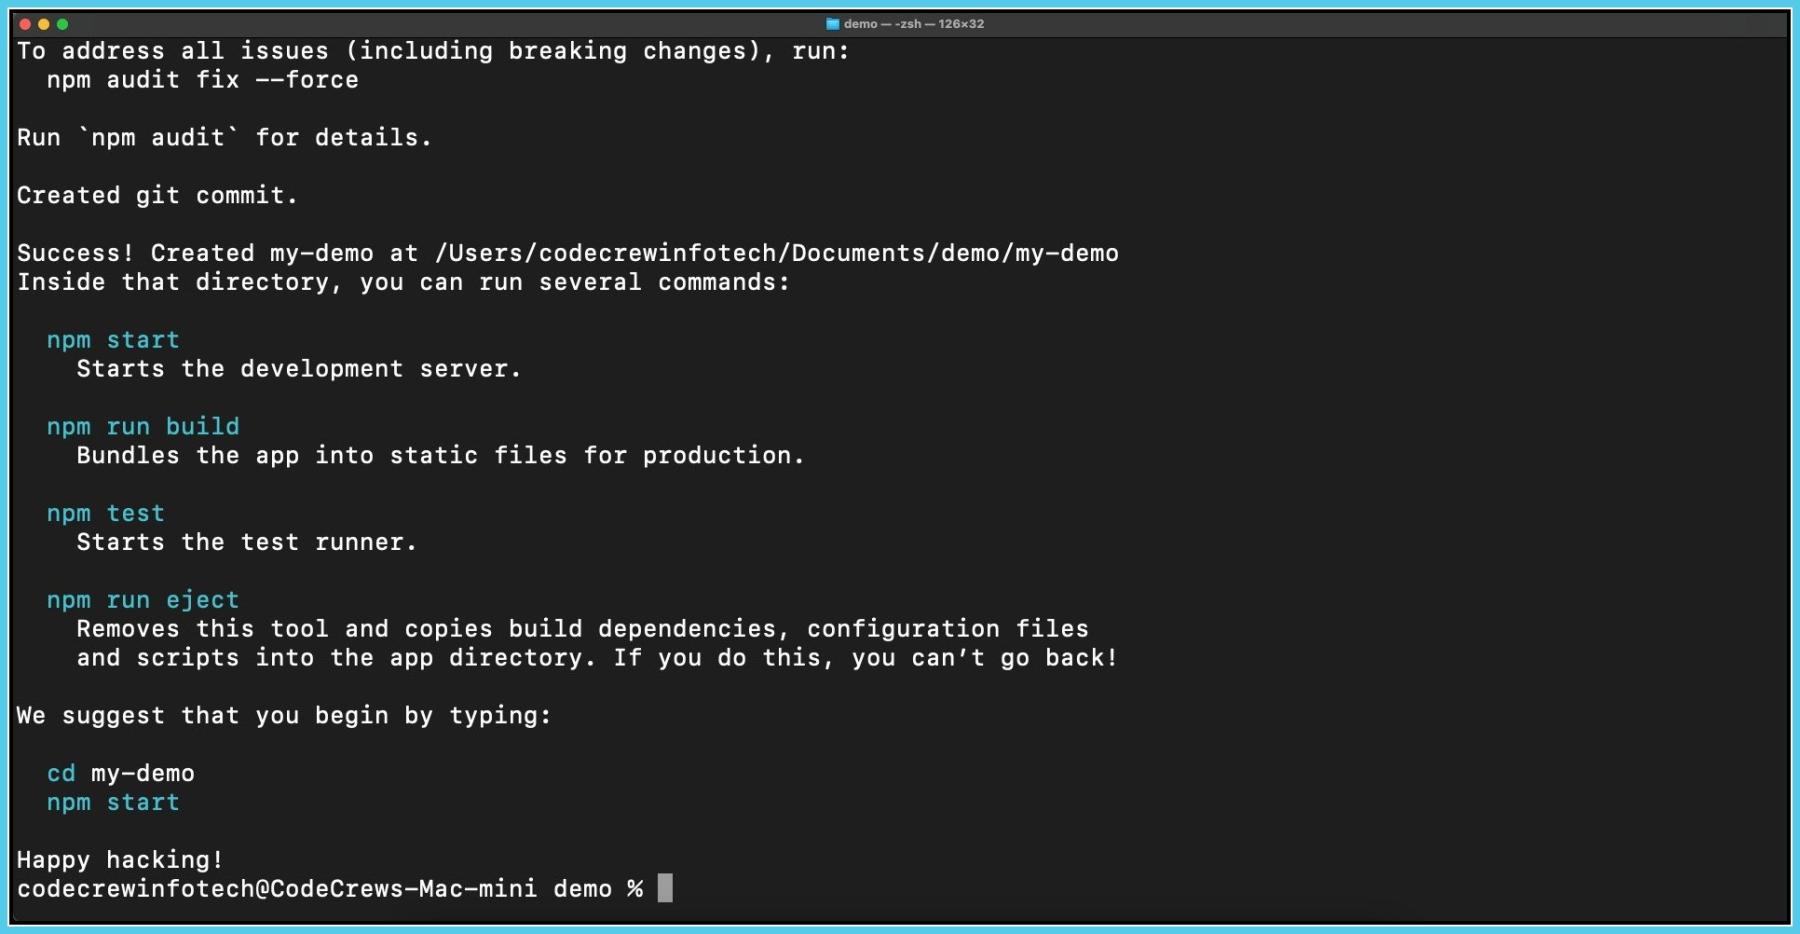
If you follow all the steps correctly, then you can also see the same
Step 4: Last Step after Installation
Type: cd my-demo
NOTE:- “my-demo” is the name of the react app that we created, you need to write your app name if you have used other name.
Start the Development Server:
Run the following command to start the development server and open your new React app in a browser:
npm start
This will open a new tab in your default web browser with your React app running at http://localhost:3000/:
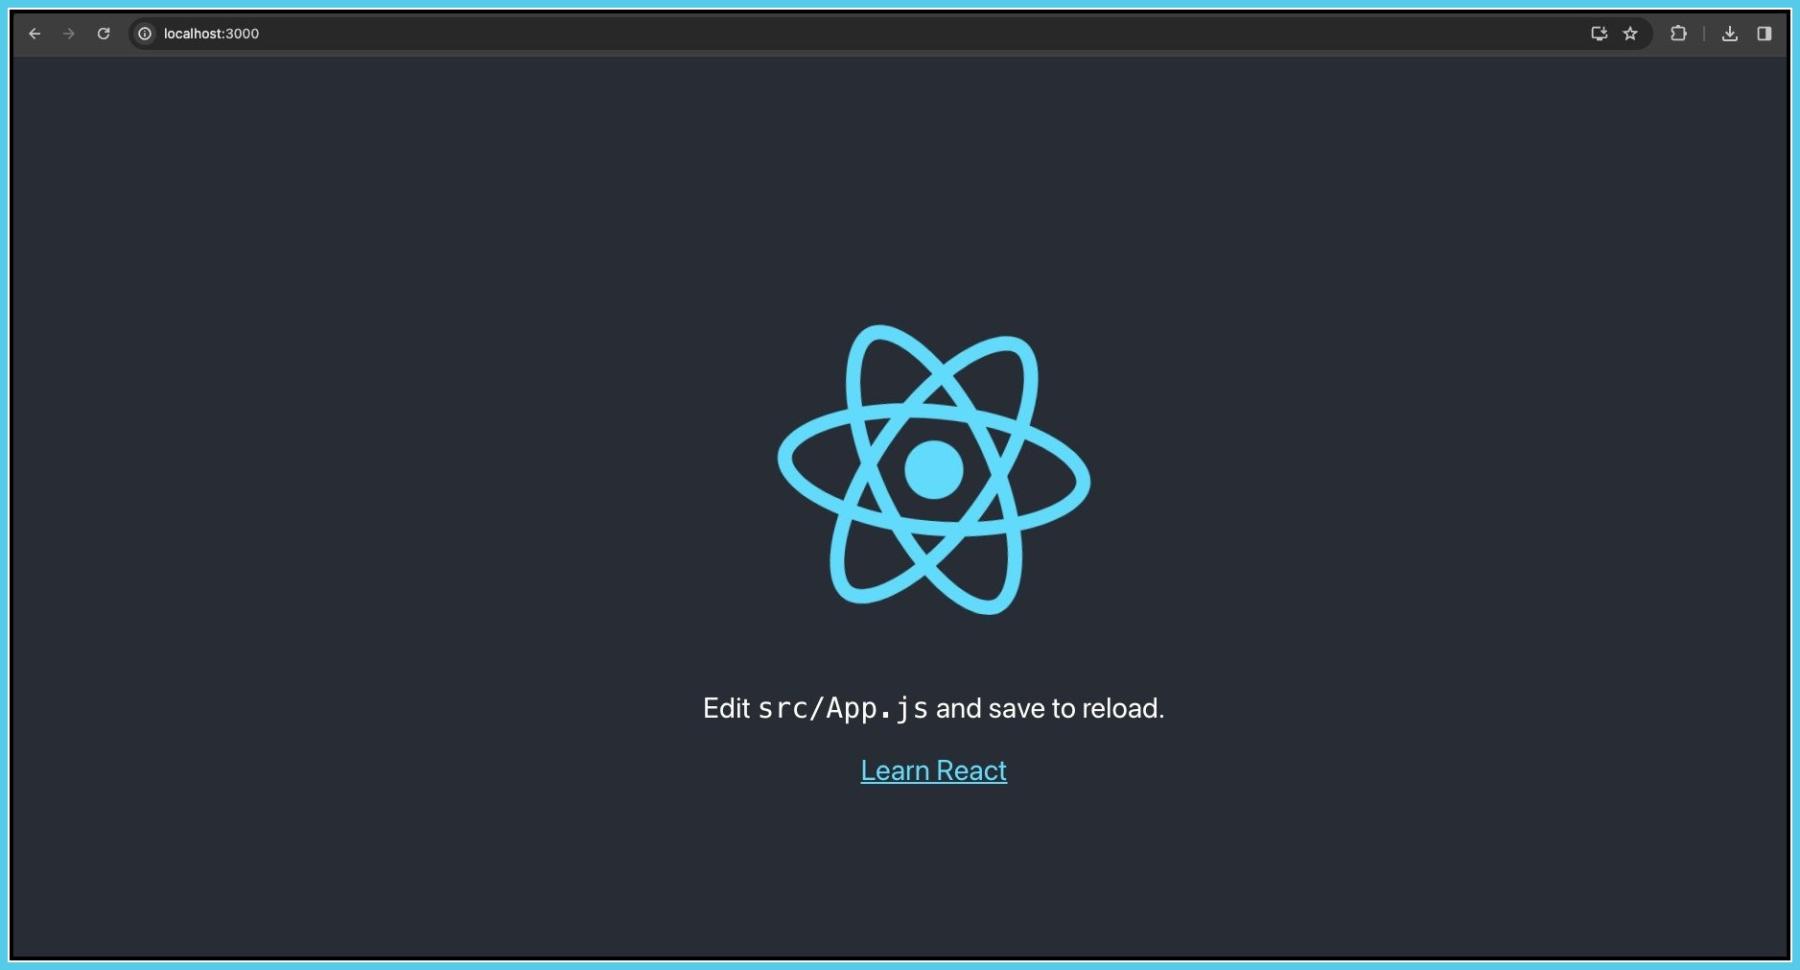
Congrats! You’ve successfully created a new React app. You can now start building your website and explore the world of React development.
I know that you guys are eager to start a project in react but Before Heading up directly on project. Let’s talk about JSX as well as some more basic things which you must know.
5. What is JSX?
JSX stands for JavaScript XML. It’s a syntax extension for JavaScript recommended by React for describing what the UI should look like.
In Short: JSX is a special syntax used in React that lets you write HTML-like code directly within your JavaScript files. It’s a convenient way to describe how your user interface should look, making it easy to build dynamic and interactive components. With JSX, you can seamlessly mix HTML and JavaScript together, making your code more readable and easier to maintain.
Certainly! Here’s an example of a simple React component written without JSX, along with the equivalent code using JSX:
Without JSX:
|
import React from ‘react’;
// Without JSX const AppWithoutJSX = () => { return React.createElement(‘div’, null, React.createElement(‘h1’, null, ‘Hello, React!’), React.createElement(‘p’, null, ‘This is a simple React application.’) ); } export default AppWithoutJSX; |
With JSX:
|
import React from ‘react’;
// With JSX const AppWithJSX = () => { return ( <div> <h1>Hello, React!</h1> <p>This is a simple React application.</p> </div> ); } export default AppWithJSX; |
6. What is Components?
A component is an independent, reusable bit of code which divides the UI into smaller pieces. For example, if we were building the UI of React website using Reactjs we can break its UI into smaller parts as shown in the figure.
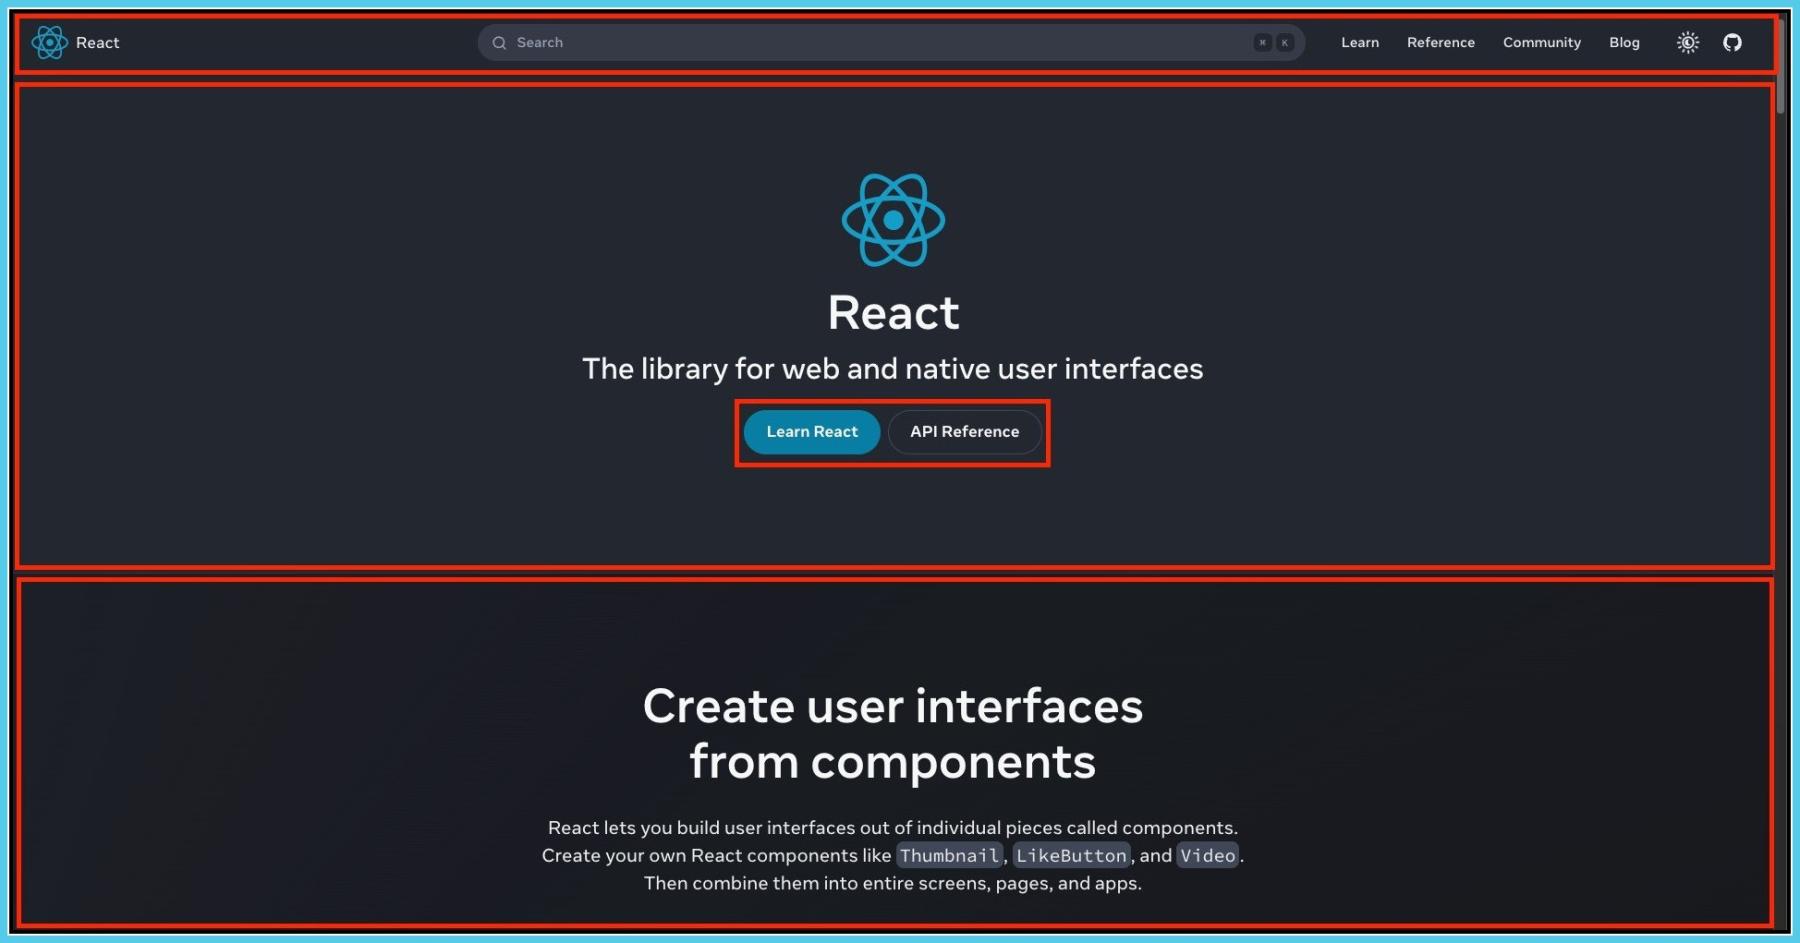
Instead of building the whole UI under one single file like HTML, we can divide all the sections (marked with red) into smaller independent pieces. In other words, these are components. Each component will go into its own JavaScript file.
In React we have two types of components:
1. Functional Component
2. Class Component
Certainly! Here’s a closer look at each type of component in React:
1. Functional Component:
Functional components are JavaScript functions that accept props (short for properties) as input and return React elements to describe what should appear on the screen. They are also sometimes referred to as stateless components because they do not have their own internal state.
Example of a functional component:
|
import React from ‘react’;
const Greeting = (props) => { return <h1>Hello, {props.name}!</h1>; }; export default Greeting; |
Functional components are preferred for simpler components that only need to render UI based on props, as they are lightweight and easy to understand.
2. Class Component:
Class components are ES6 classes that extend from React.Component and have a render() method. They can also have their own state, and they are used when the component needs to manage its internal state, handle lifecycle methods, or have more complex logic.
Example of a class component:
|
class MyClassComponent extends React.Component{ constructor(props){ super(props); this.state = {message: “Hello, I am a class component”}; } render(){ return <div>{this.state.messagte}</div>; } } |
You Guys may understand now that how components work and how their types are different from each other if you still don’t get these, Don’t worry Let me quickly explain this in a simple way.
Components in React are like building blocks for your website. Each component is like a small part that you can use to create your webpage.
Functional Components: These are like basic building blocks. You give them some information, and they give you back a part of your webpage. They’re great for simple things like showing text or images
Class Components: These are like more advanced building blocks. They not only show something on the page but can also remember things and do stuff. They’re useful for more complex features, like forms or games.
So, whether you need a simple part of your webpage or something more interactive, React has the right kind of component for you!
NOTE: Most Developers prefer Function Based Component as it provides simplicity, along with improved readability and reusability, which leads to the popularity of function components in the React ecosystem. And we prefer the function component as well.
7. What is the lifecycle of a component?
React component goes through three main phases:
1. Mounting: Setting up the component.
2. Updating: Handling changes in state or props.
3. Unmounting: Cleaning up before removal.
Let’s dive down with some more explanation and example on each topic.
1. Mounting:
Mounting is the phase where a React component is initialized and added to the DOM. This phase has several lifecycle methods that are called in a specific order:
constructor: This is the first method called when a component is created. It’s used for initializing state and binding event handlers.
render: This method is required and returns the JSX that describes the UI of the component.
componentDidMount: This method is called after the component has been rendered to the DOM. It’s commonly used to perform tasks like fetching data from an API or setting up event listeners.
Example:
|
class MyComponent extends React.Component { constructor(props) { super(props); this.state = { count: 0 }; } componentDidMount() { console.log(‘Component mounted!’); } render() { return <h1>Hello, React!</h1>; } } |
2. Updating:
The updating phase occurs when a component’s state or props change. This phase also has lifecycle methods that are called in a specific order:
componentDidUpdate: This method is called after the component has been updated and re-rendered. It’s commonly used to perform tasks like updating the DOM or fetching new data based on the updated props or state.
|
class MyComponent extends React.Component { componentDidUpdate(prevProps, prevState) { console.log(‘Component updated!’); } render() { return <h1>Hello, React!</h1>; } } |
3. Unmounting:
The unmounting phase occurs when a component is removed from the DOM. This phase has one lifecycle method:
componentWillUnmount: This method is called just before the component is removed from the DOM. It’s commonly used to perform cleanup tasks like removing event listeners or canceling network requests.
Example:
|
class MyComponent extends React.Component { componentWillUnmount() { console.log(‘Component will unmount!’); } render() { return <h1>Hello, React!</h1>; } } |
8. What is props?
Props, short for properties, are a mechanism in React for passing data from a parent component to a child component. They are immutable and are used to customize the behavior or appearance of a component.
Props are passed as attributes to a component when it is declared in JSX, and they are accessible within the component as properties of the props object.
Here’s a simple example of how props are used:
|
// ParentComponent.js import React from ‘react’; import ChildComponent from ‘./ChildComponent’; const ParentComponent = () => { return <ChildComponent name=”John” age={30} />; }; export default ParentComponent;
// ChildComponent.js import React from ‘react’; const ChildComponent = (props) => { return ( <div> <p>Name: {props.name}</p> <p>Age: {props.age}</p> </div> ); }; export default ChildComponent; |
In this example, the ParentComponent passes the name and age props to the ChildComponent. Inside the ChildComponent, these props are accessed using props.name and props.age, allowing the child component to display the data passed from the parent component.
“Get Ready for More – Part 2 is Up Next!”